Explanation
If you need to update many records in Salesforce, you can use Salesforce reports to simplify the process. A common use case is updating the value of a field across all records created by a Play. However, these steps are generally applicable to any set of Salesforce records.Steps
Export the records
- Navigate to the Reports page.
In the top-right corner of the screen, if you click the menu icon and search for “reports”, you should see a link to get there.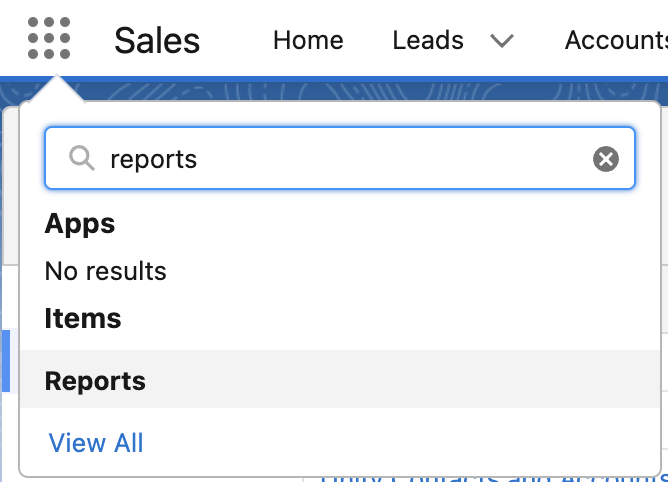
- In the top-right corner of the screen, select New Report
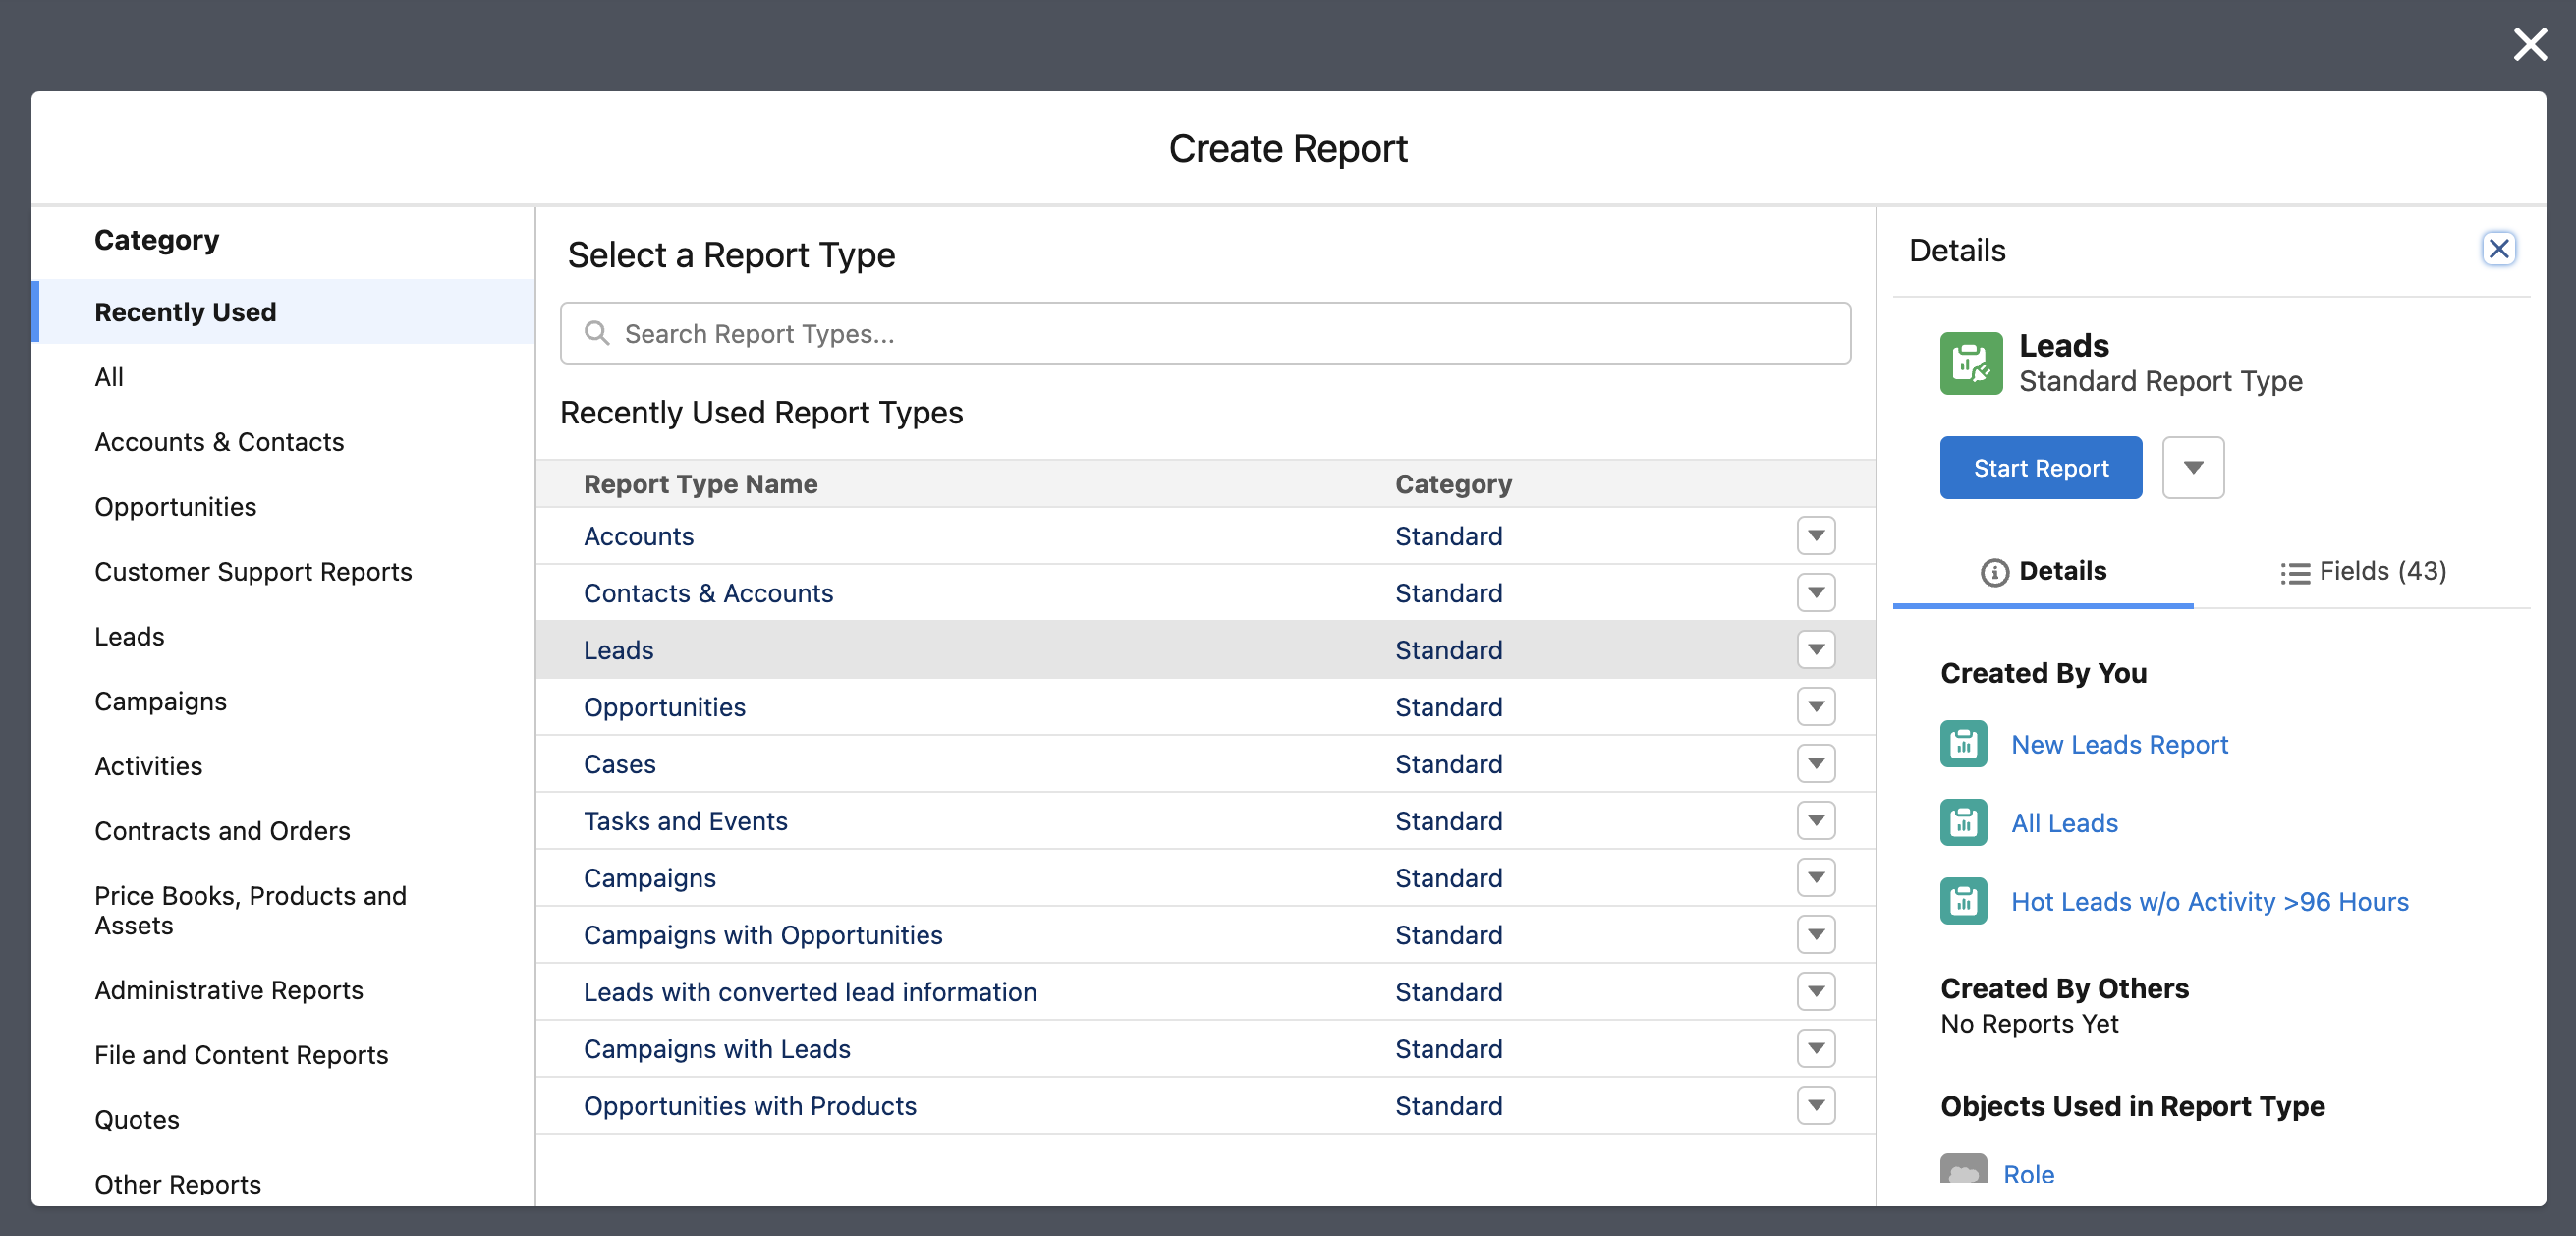
- Choose a report type based on which type of records you need to update, and then click Start Report on the right
- Be sure to add the
Idcolumn to your report in the sidebar, which is typically named after the record type you are selecting (e.g.,Account ID,Contact ID, etc.)
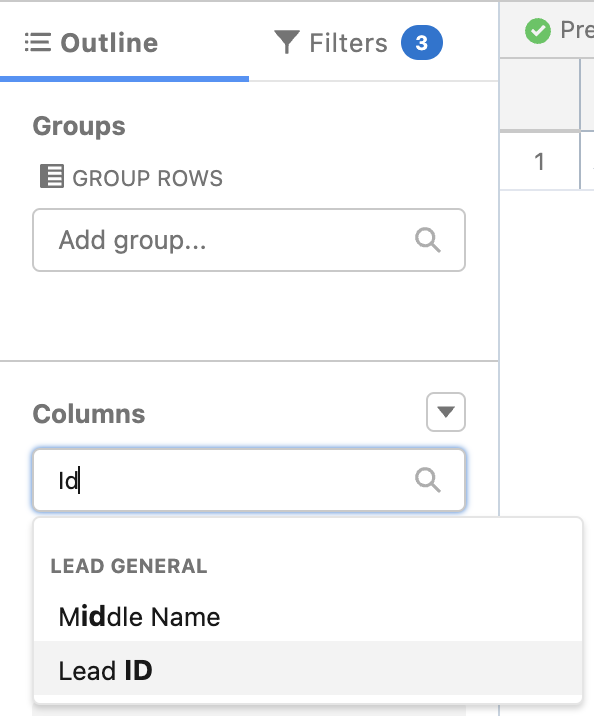
- Also add any additional columns that you wish to edit on the records
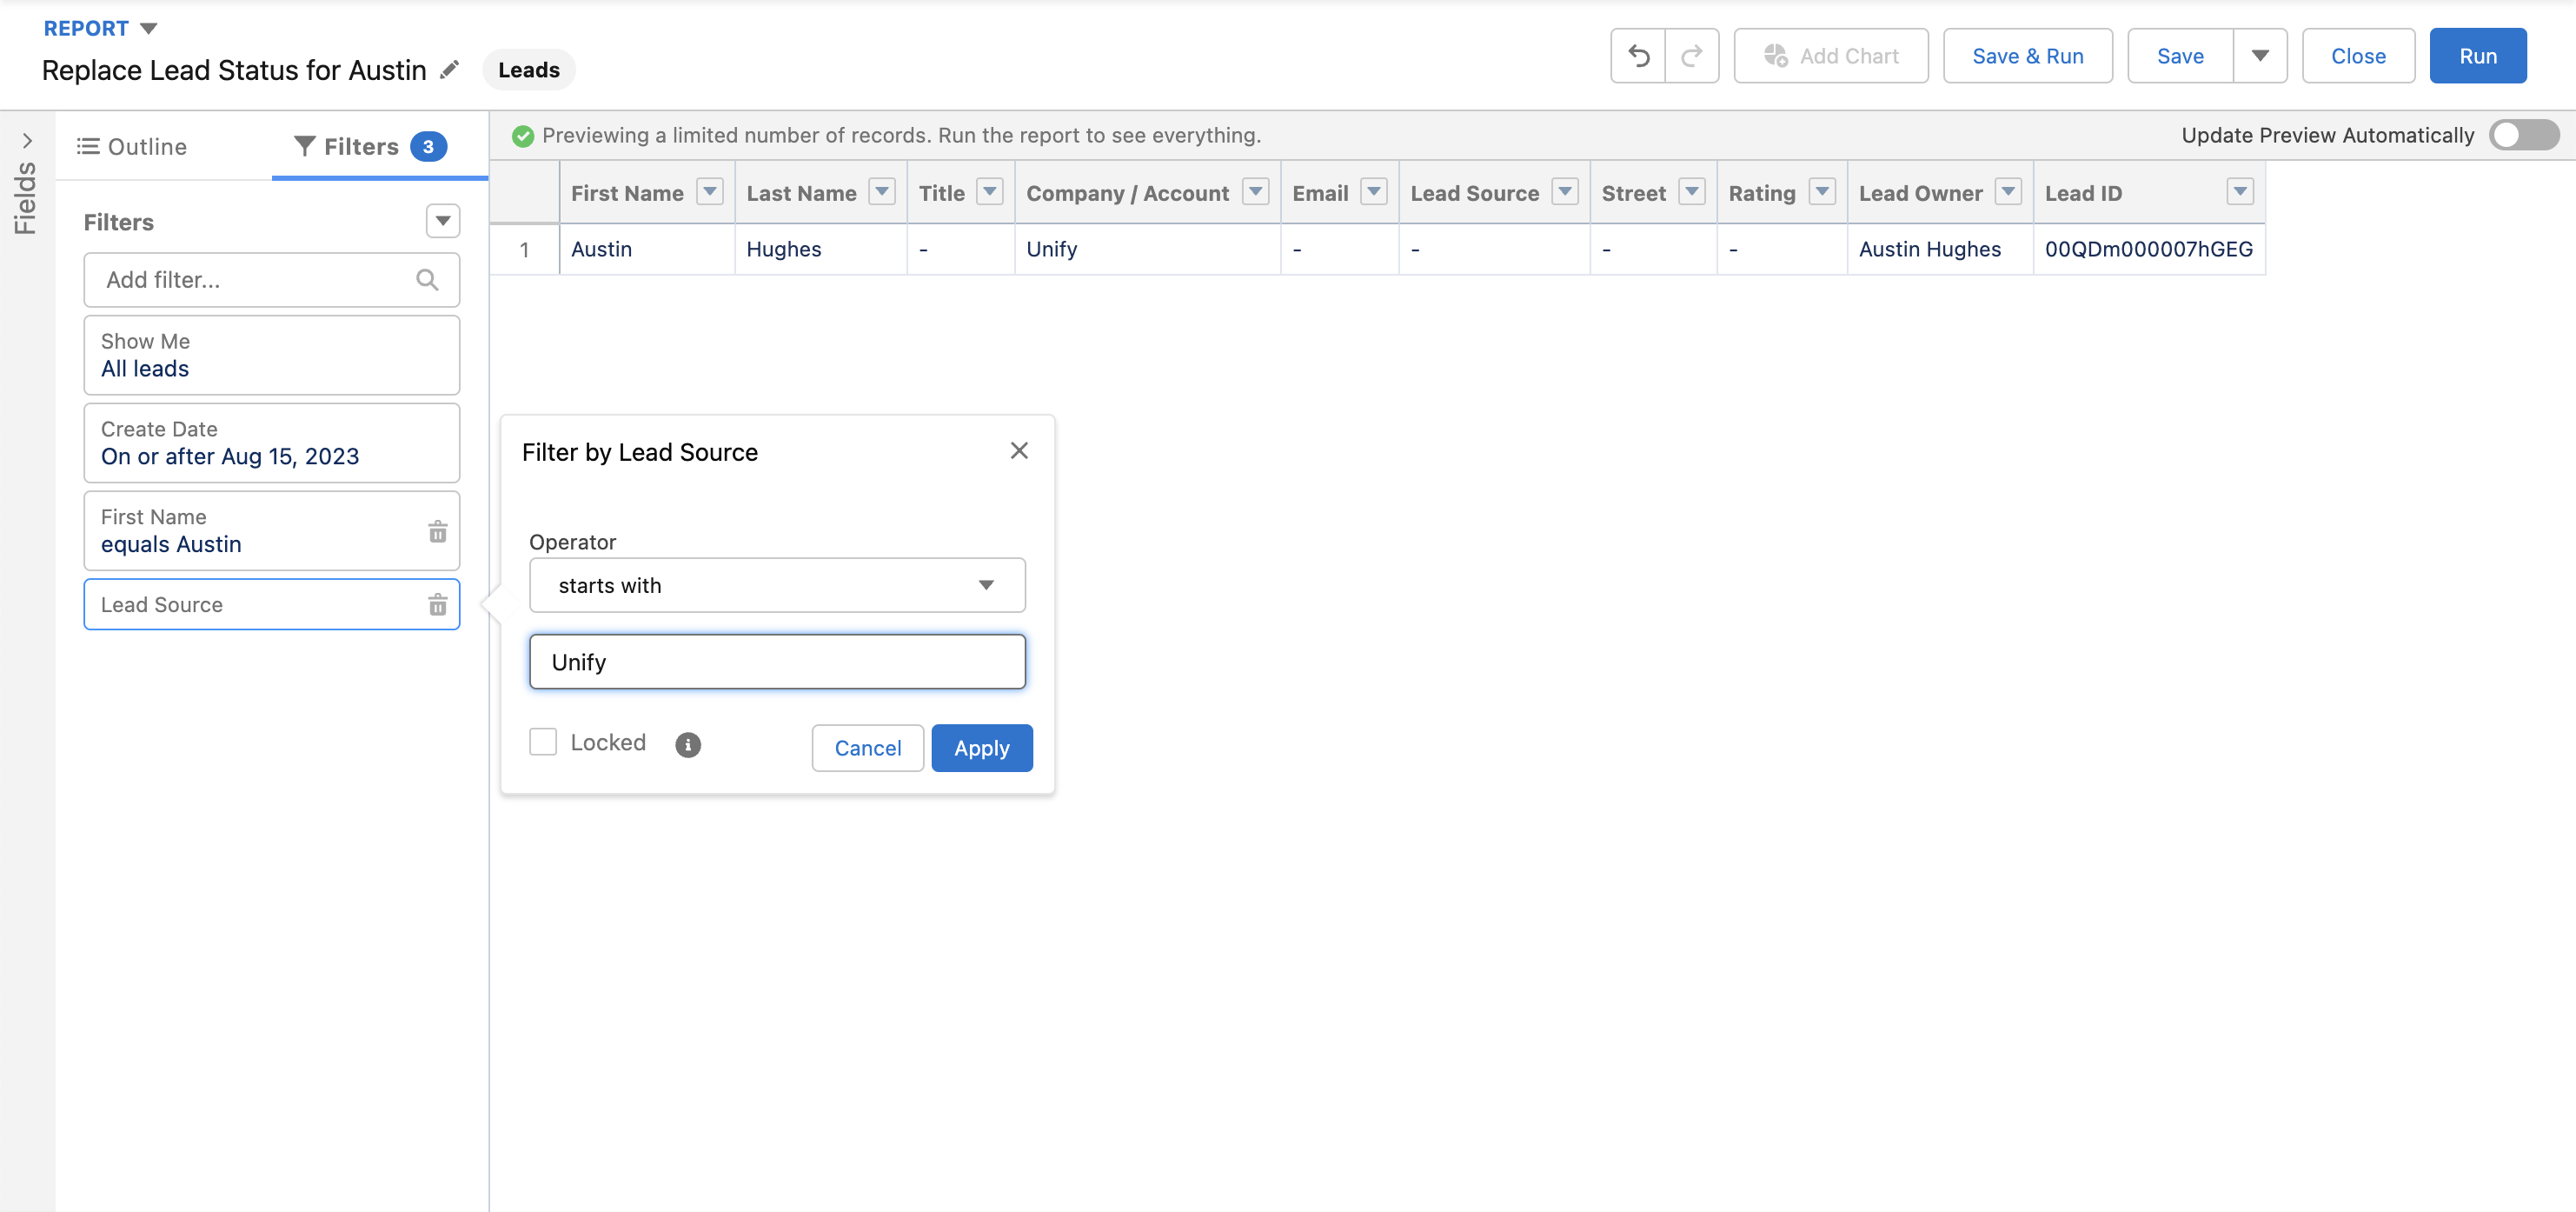
- Add any filters or sorting options needed to narrow down the records you want to update
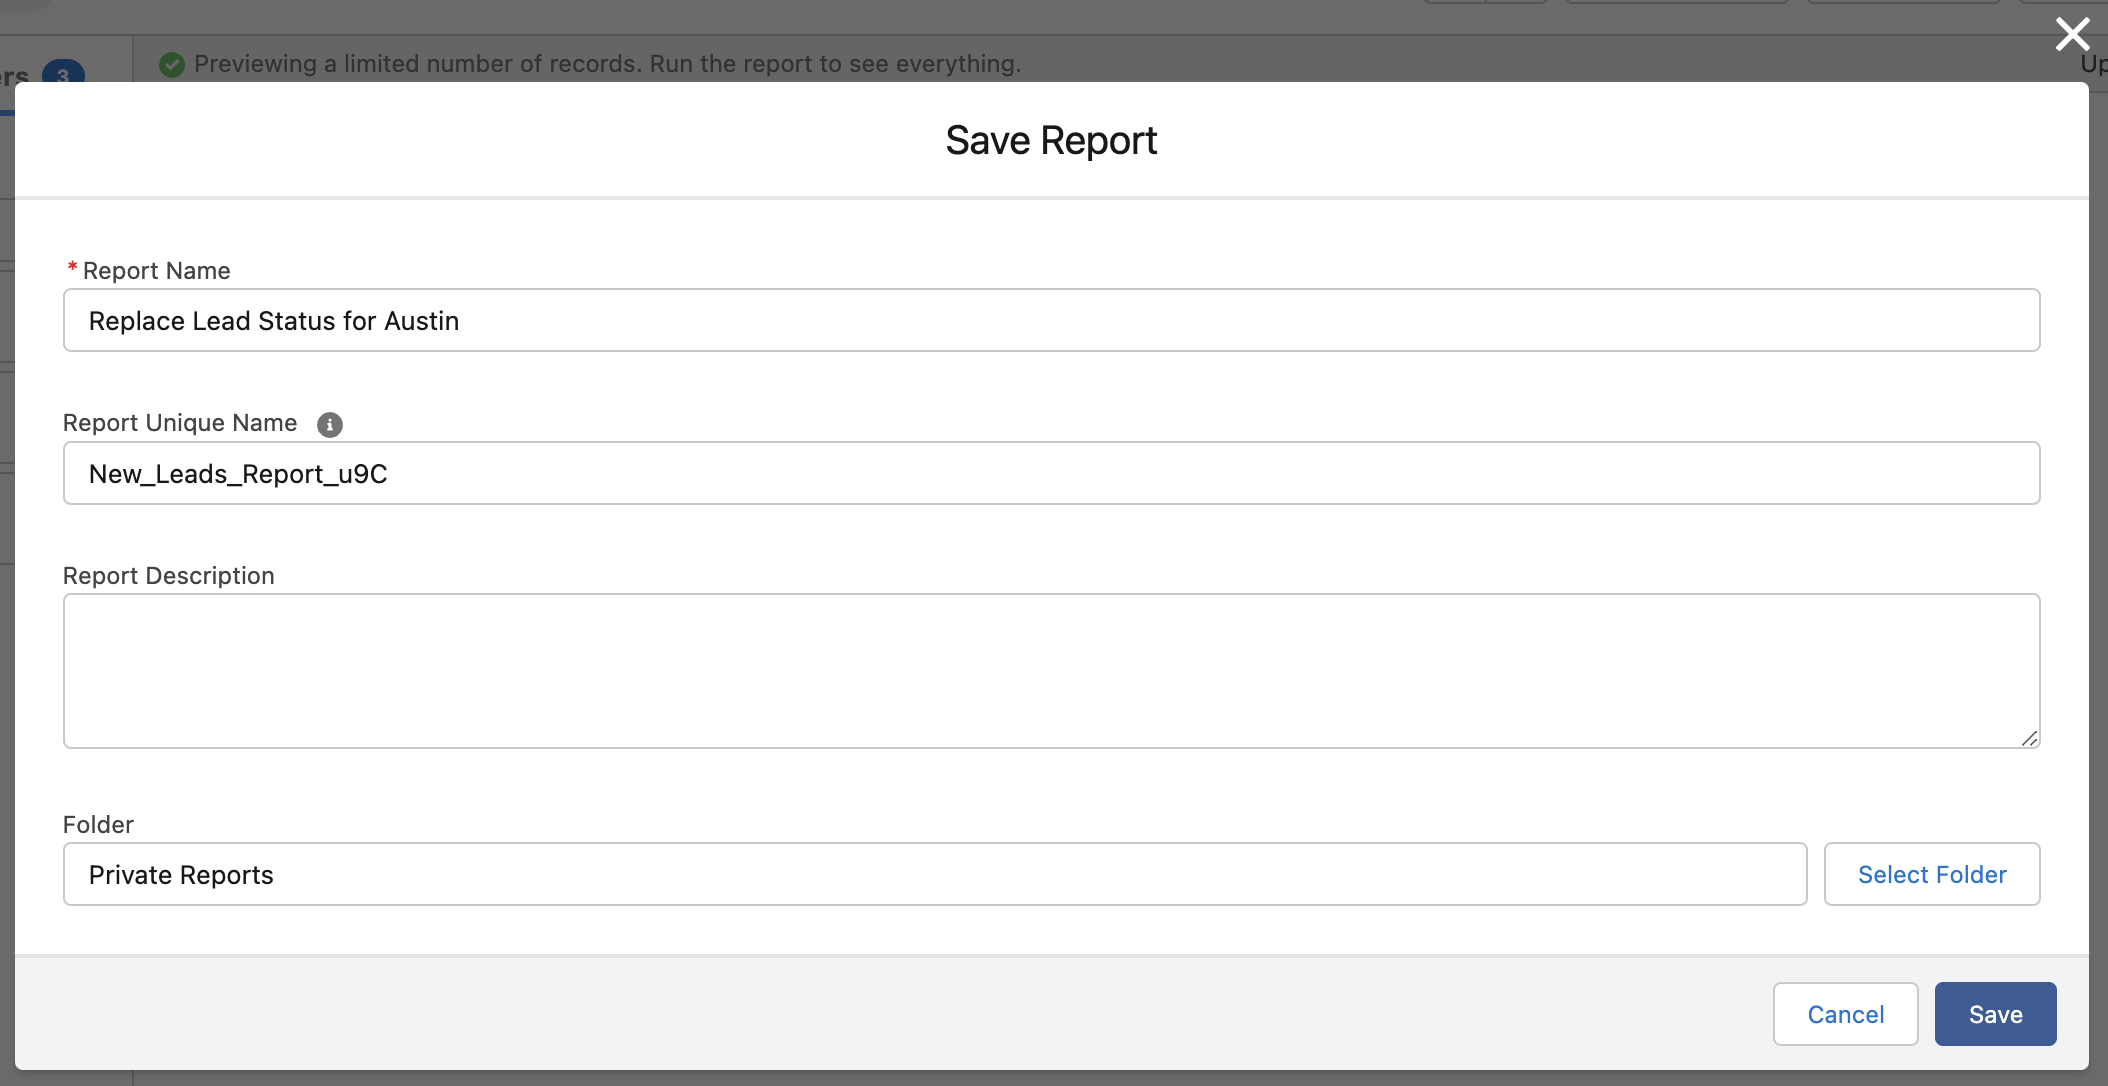
- When ready, click Save in the top-right corner, enter a name, and then click Save again
- Click Run in the top-right corner and verify these are the records you want to update
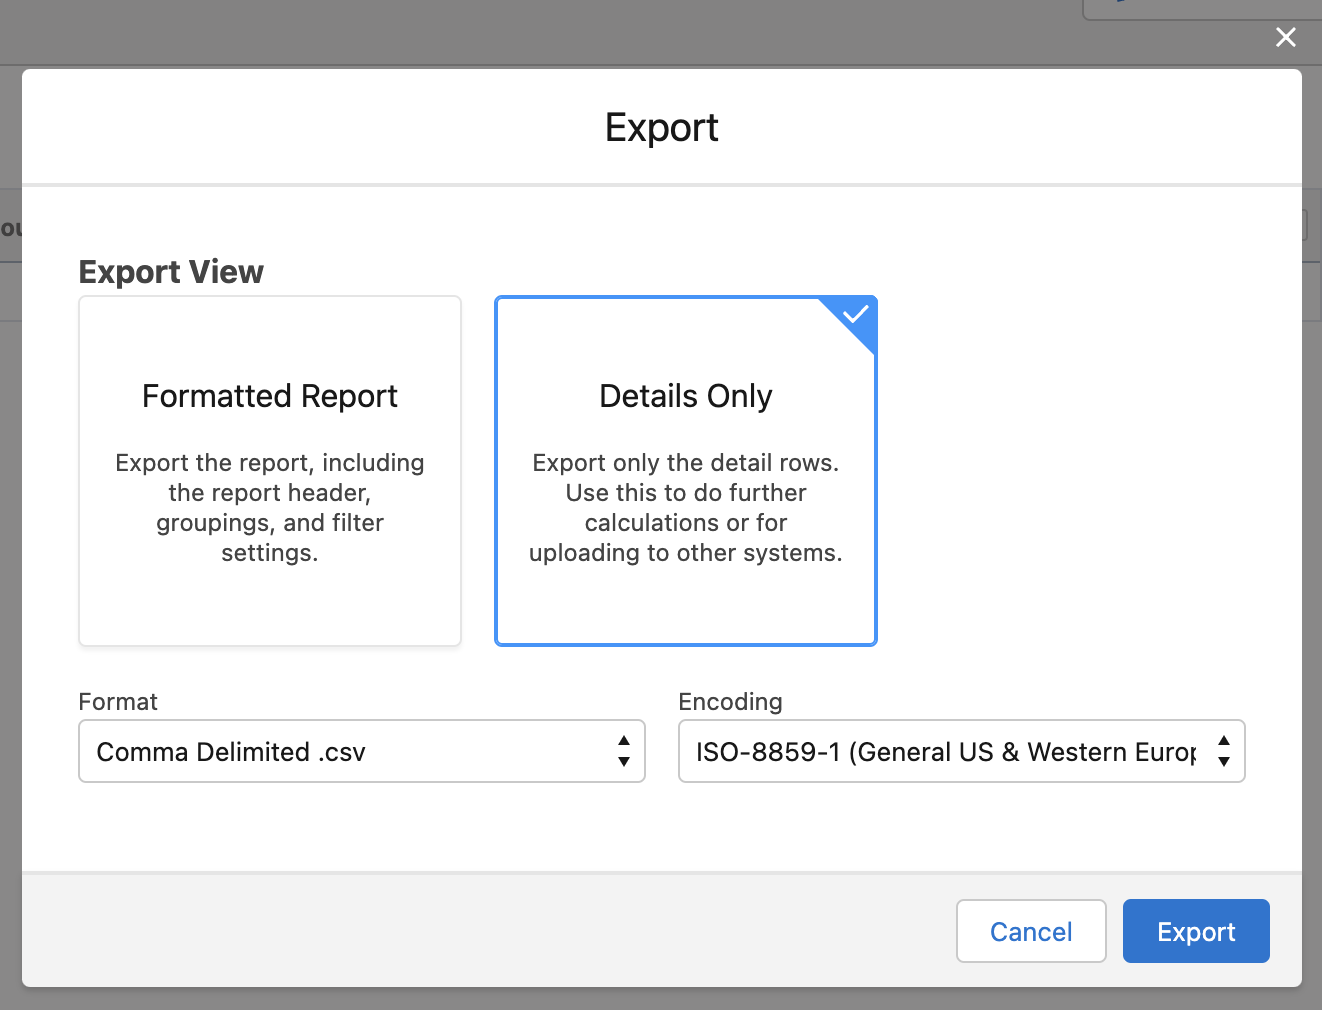
- Click the dropdown arrow next to Edit in the top-right corner and select Export
- Choose Details Only and Comma Delimited .csv as the format and then click Export
Make changes
- Open the downloaded file and make any desired updates to the values
- Save the changes as a new file so that the original is available as a backup
Upload the changed records
- Navigate to the Setup page in Salesforce
- In the sidebar on the left, search for “data import wizard” and select the Data Import Wizard integration
-
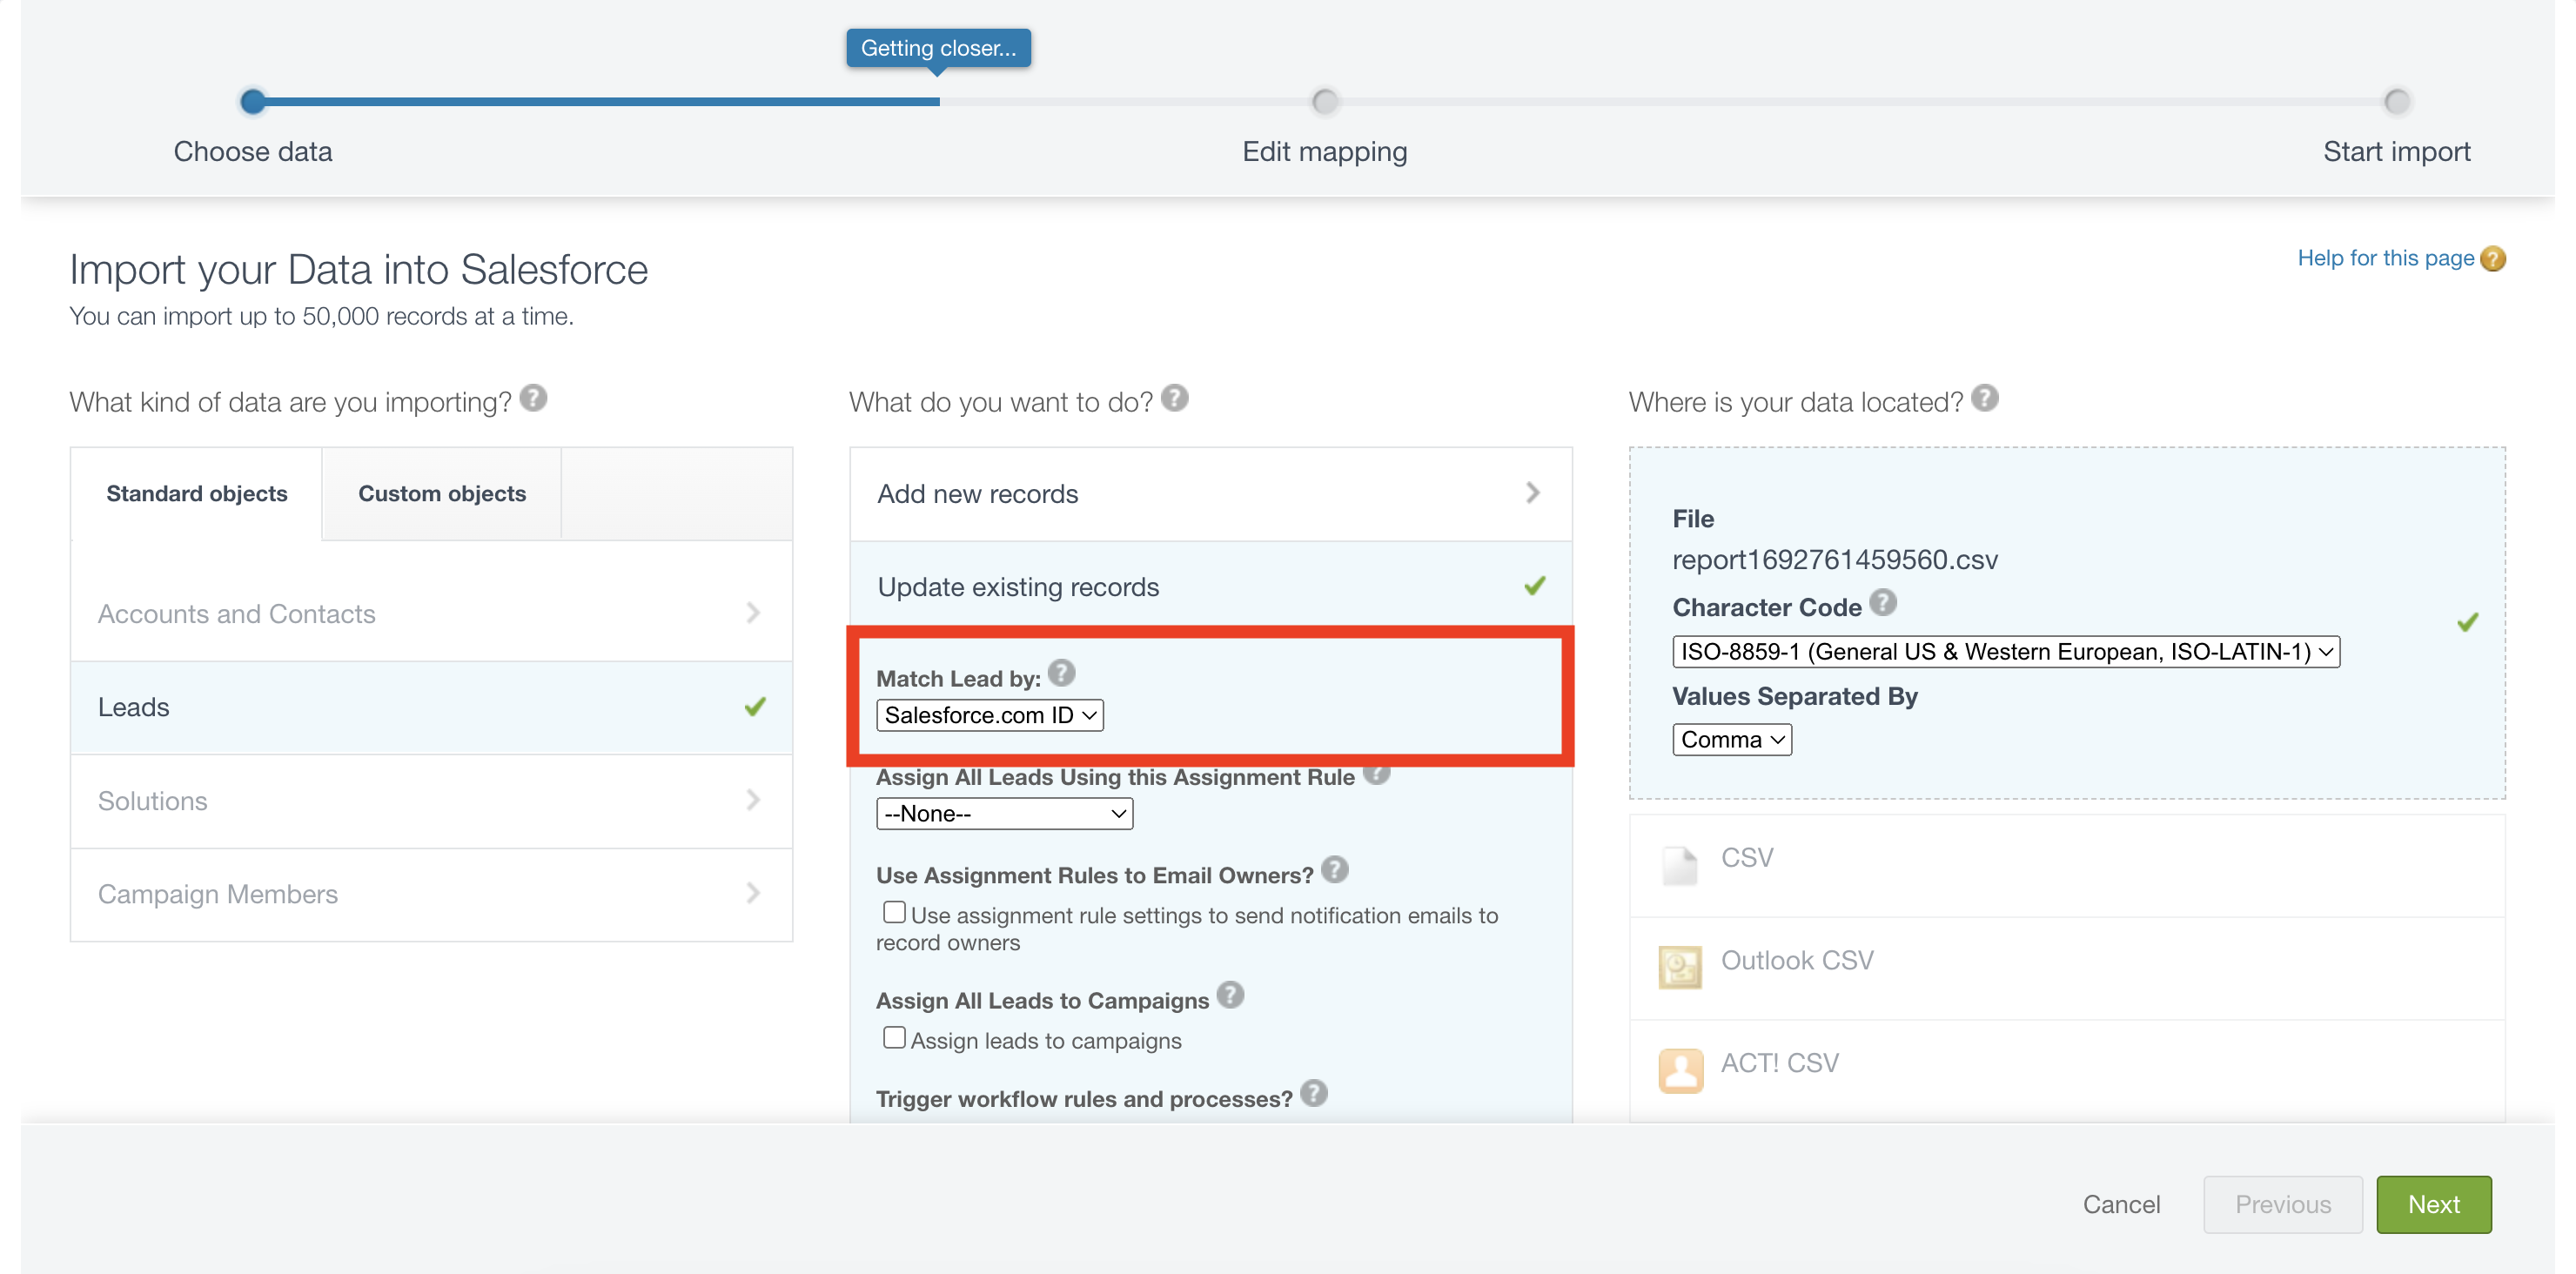
Follow the on-screen instructions to update existing records and be sure to choose the option to match records by
Salesforce.com ID
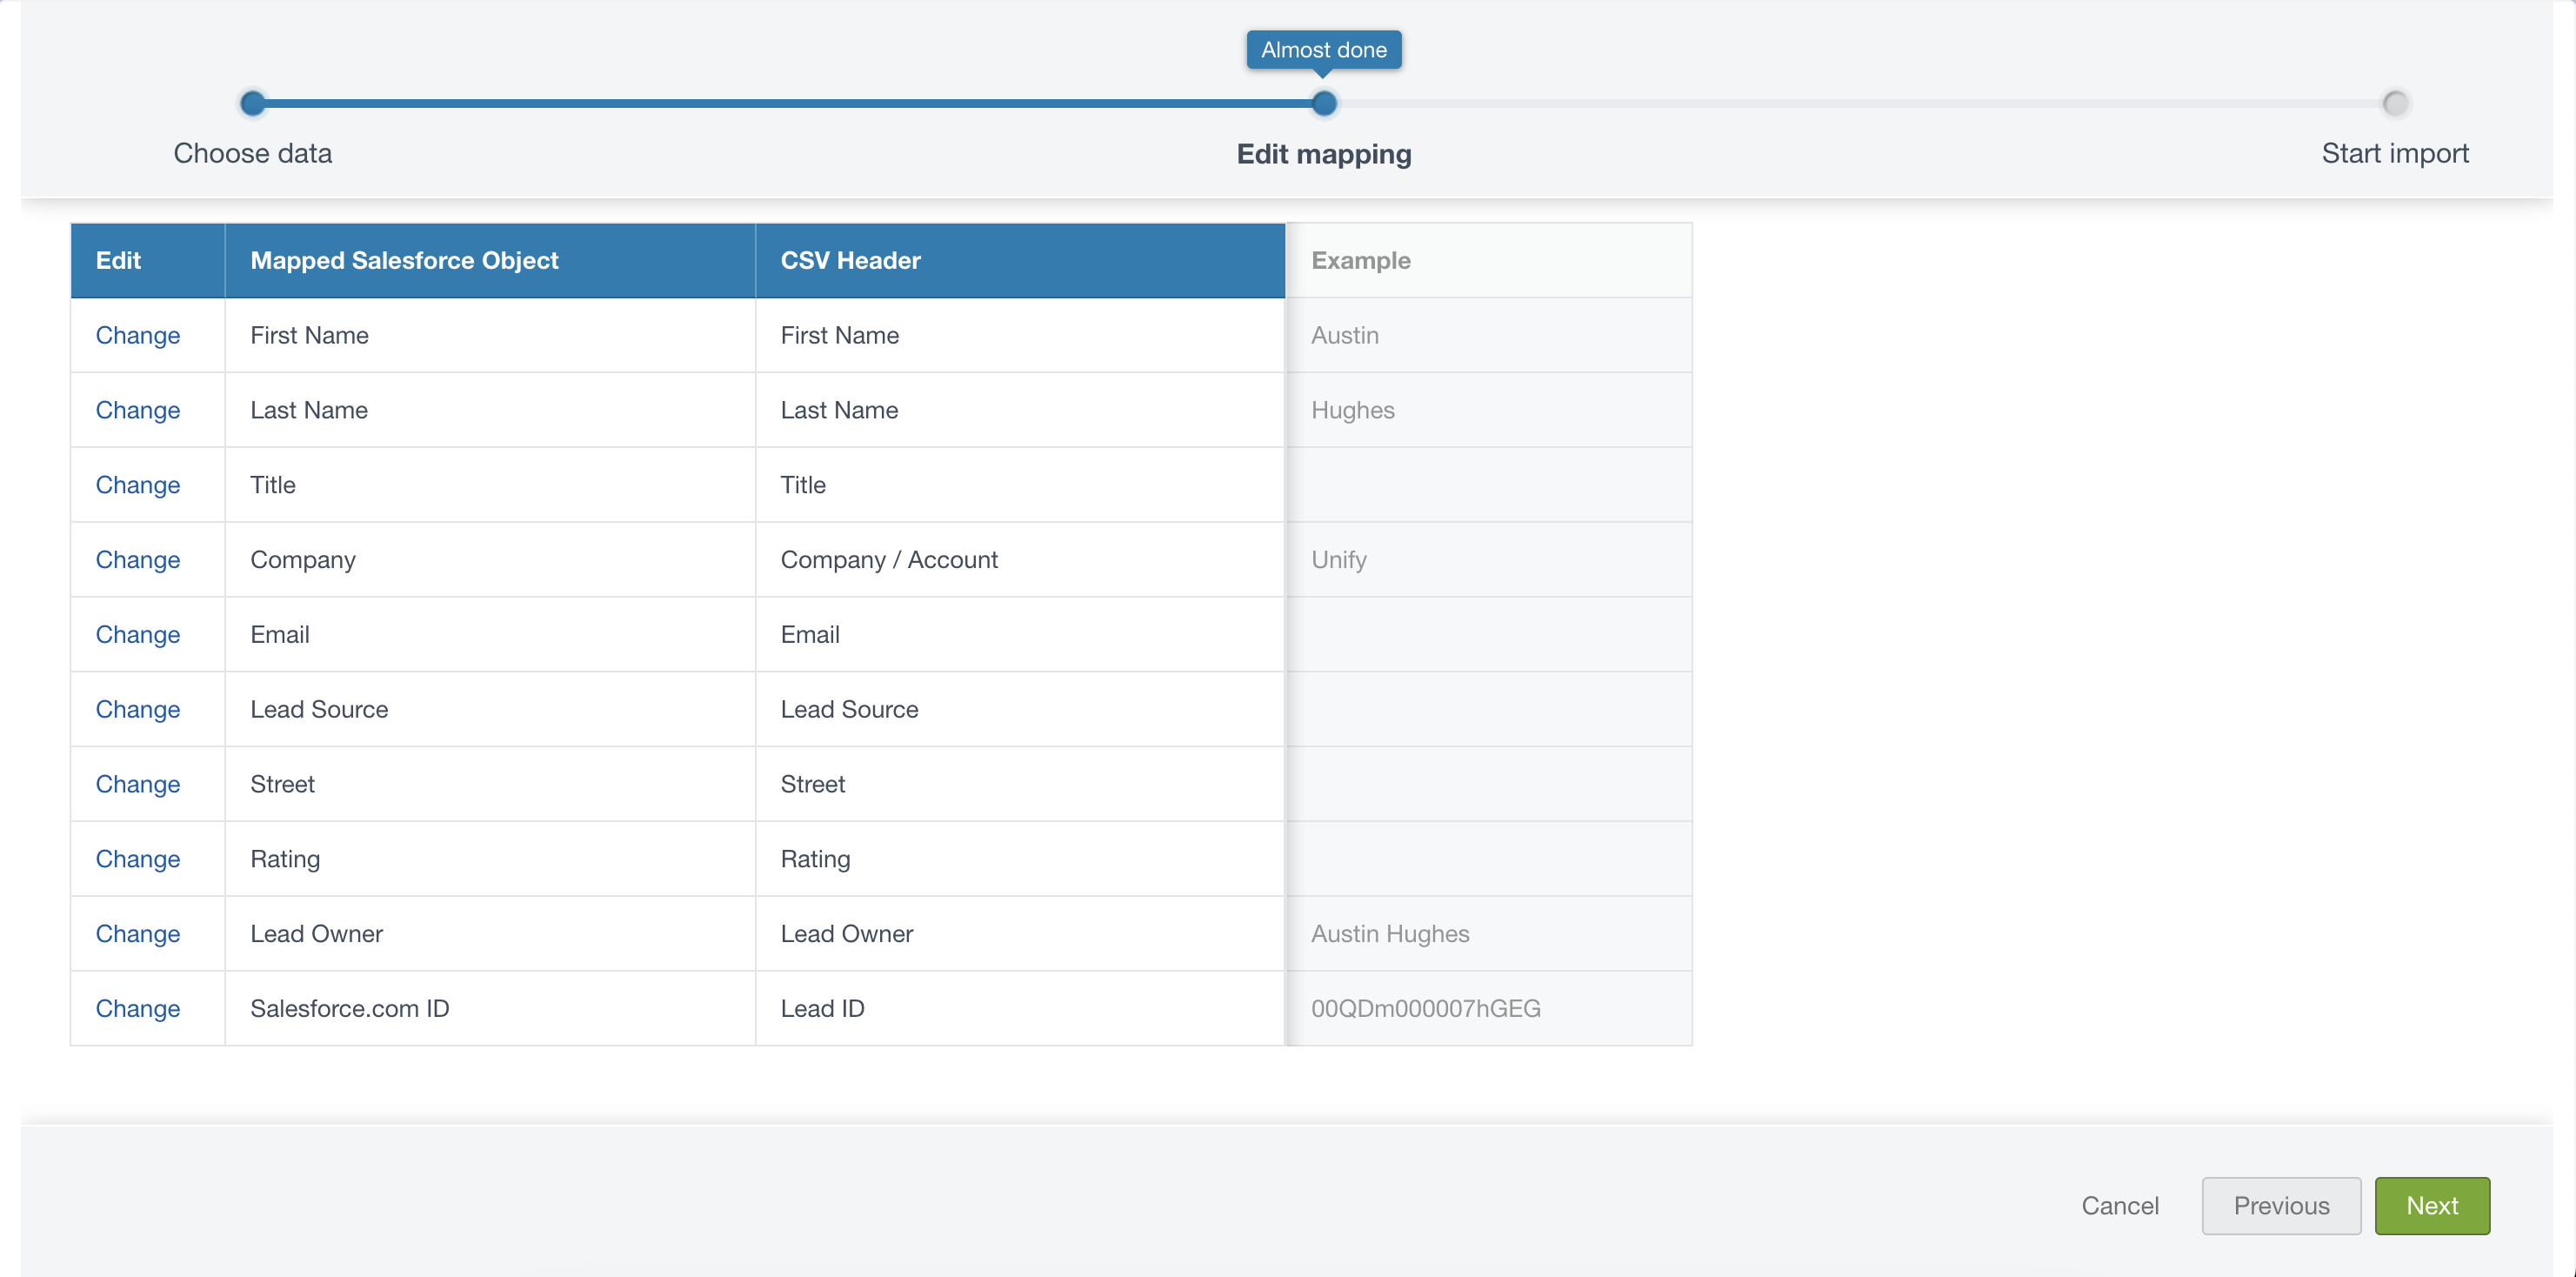
- Ensure the mapping looks correct and that the ID column is mapped to
Salesforce.com ID
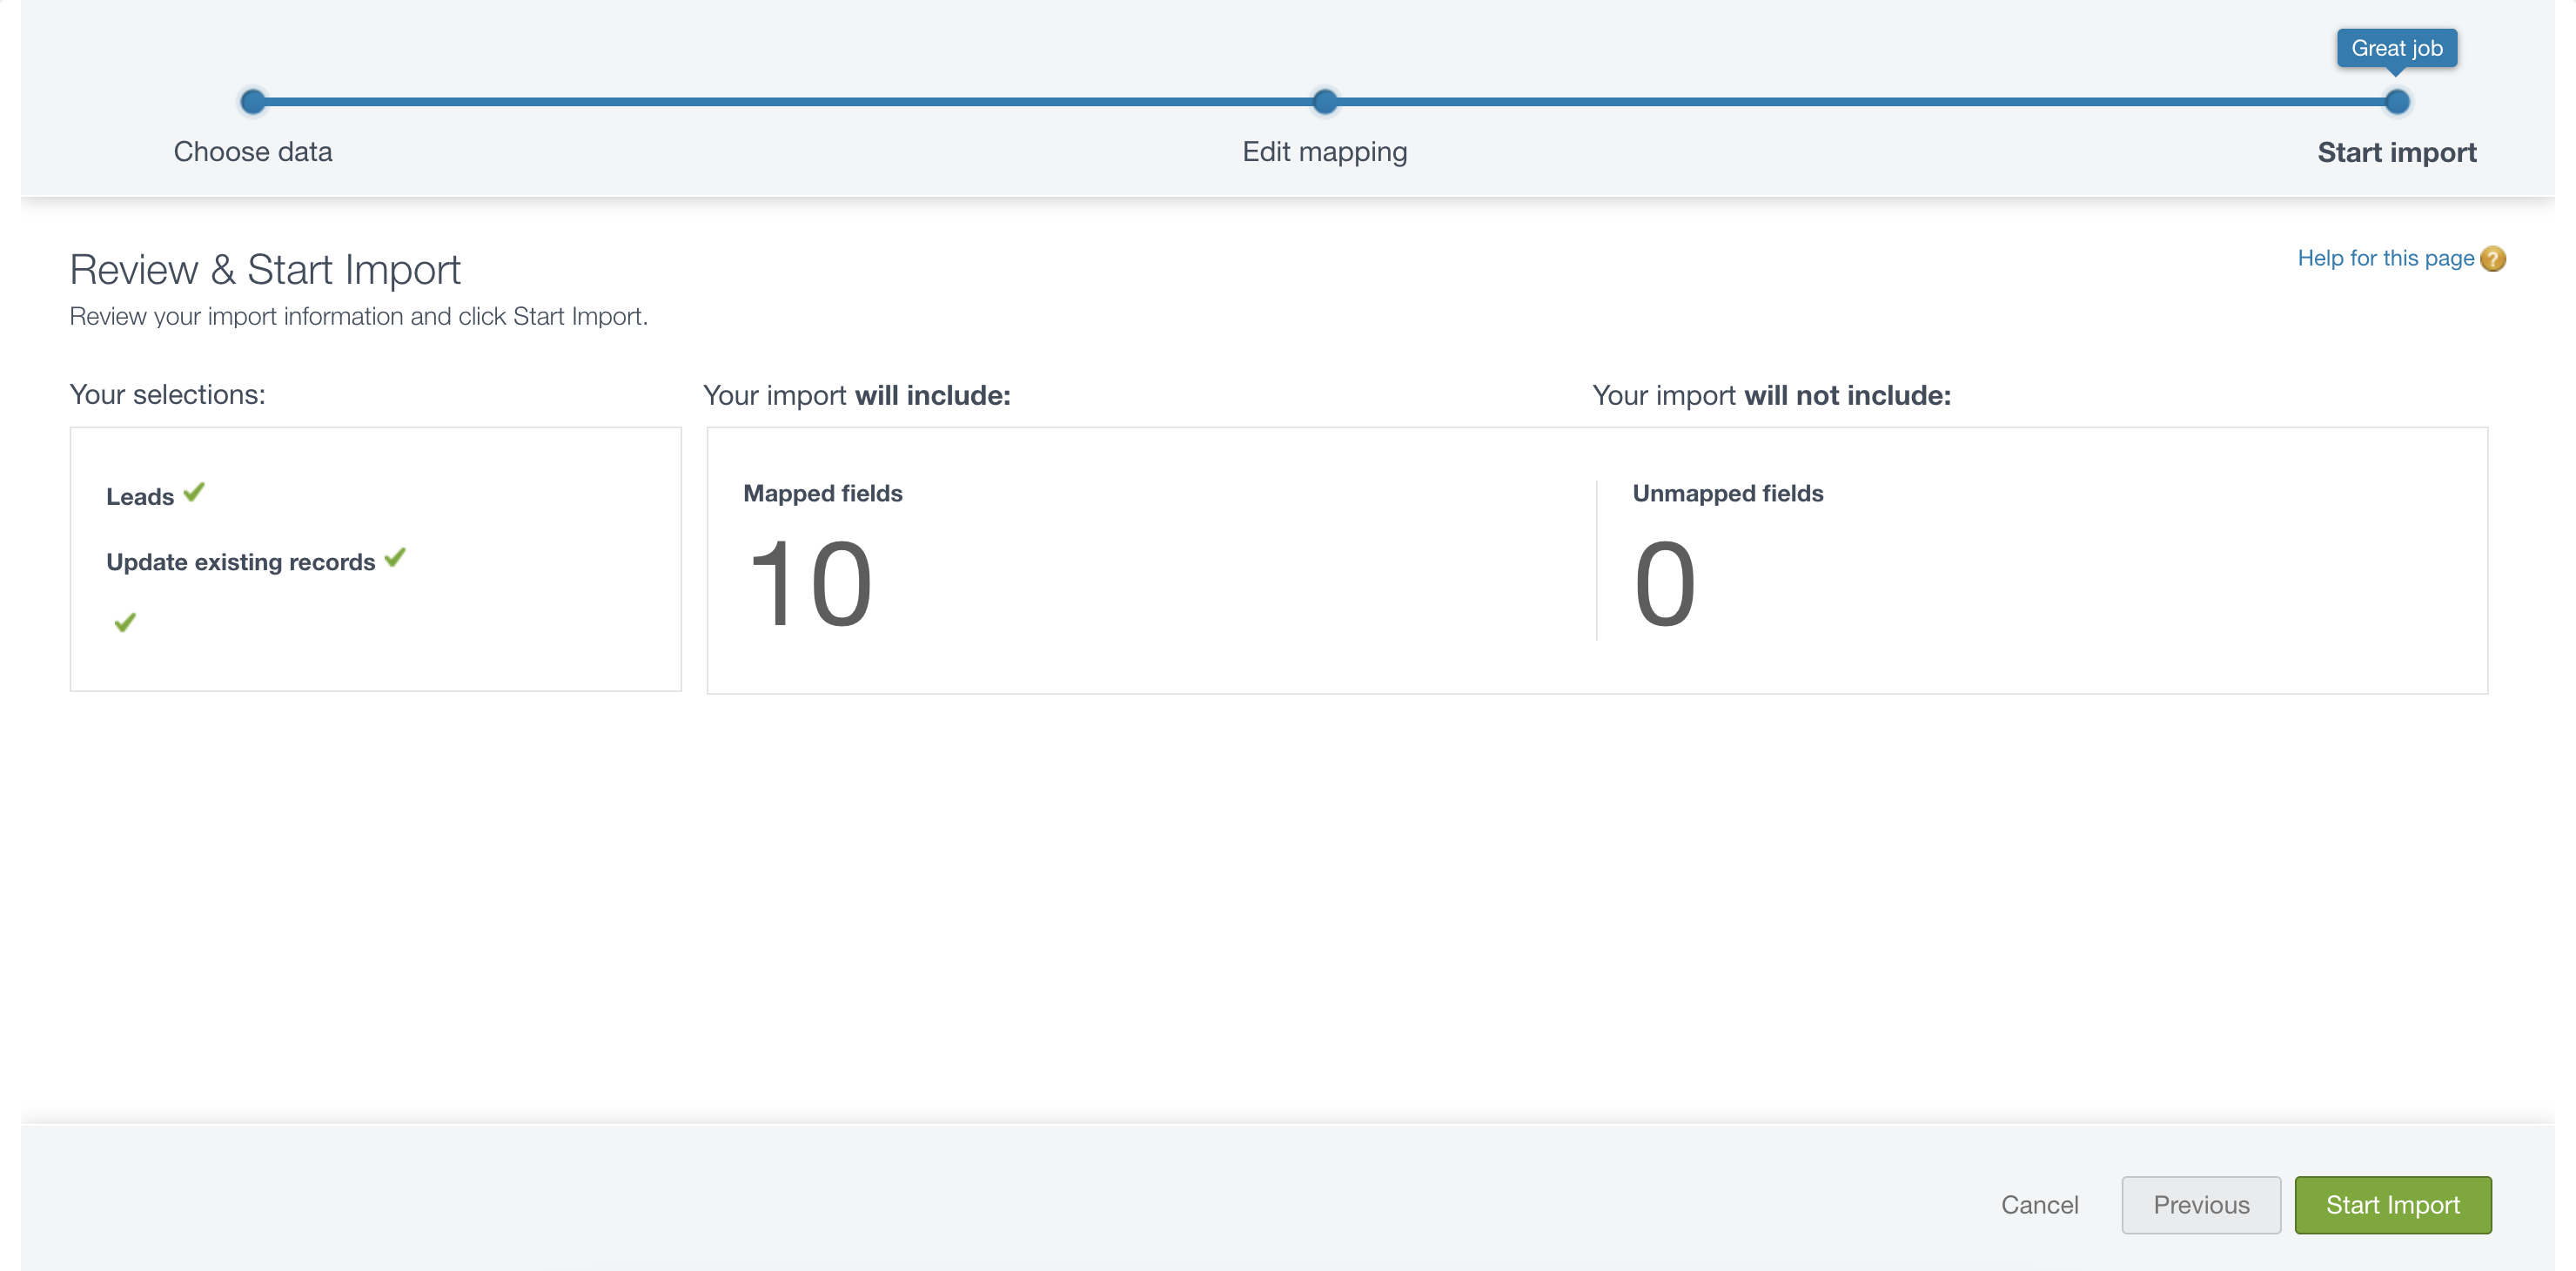
- Verify the details on the last page and then click Start Import
- Once this bulk import is complete you’re all finished!