In just a few steps, you can connect your Salesforce instance to Unify and start
syncing data bidirectionally. This unlocks a few key benefits when using Unify:
Salesforce records can be used to construct exclusions
that prevent Unify from engaging with specific people or companies. For
example, you can create an exclusion for all current customers or deals in
progress.
You can create Plays that are triggered by Salesforce records. This allows
you to run a Play based on a specific event or criteria captured within
Salesforce.
Unify can write data back to Salesforce so that you can maintain a source of
truth in your CRM and respect rules of engagement in other tools or business
processes.
Unify’s integration with Salesforce is designed from the ground up to prevent
many common pitfalls, including overwriting existing data or creating duplicate
records. For an in-depth description of how Unify does this, see How bidirectional syncs work.
Salesforce Subscription: Unify requires API access to your Salesforce
instance. This is typically included with most Salesforce plans, but some
plans may require an upgrade.
If you’re unsure, follow these instructions
to determine your plan and then check here
to see if API access is included.
Administrative Access: To assign the correct permissions to the
integration user, a Salesforce admin may be needed to complete these steps.
If you are using a Salesforce sandbox instance, let our support team know in
advance and we will create a dedicated testing login for you.
1
Choose an integration user strategy
Decide which integration user Unify should use to connect to Salesforce.
Unify supports multiple approaches:
Setup
Pros
Cons
Dedicated integration user
This is best practice and our recommended option. The user is granted specific limited permissions and all updates made within Salesforce are clearly attributable to Unify.
This requires the purchase or use of a dedicated Salesforce user license, which may require time to set up at your company.
Shared integration user with other connected apps
This might be a better choice, because you may already use an integration user with other connected apps. You don’t need to provision a new user.
Unify must share the permissions and limits of the shared integration user. If this user’s access is shut down, all connected apps will be impacted.
Existing individual user with system admin permissions
This is typically the fastest and most affordable option because you use an individual user that already exists in your Salesforce. There’s no need to create anything new.
Unify is given full system access and edits made within Salesforce are attributed to the individual user. If the user leaves the company, the connection will break.
If you choose to create a dedicated integration user, you can follow this guide
for step-by-step instructions.
2
Connect Salesforce instance
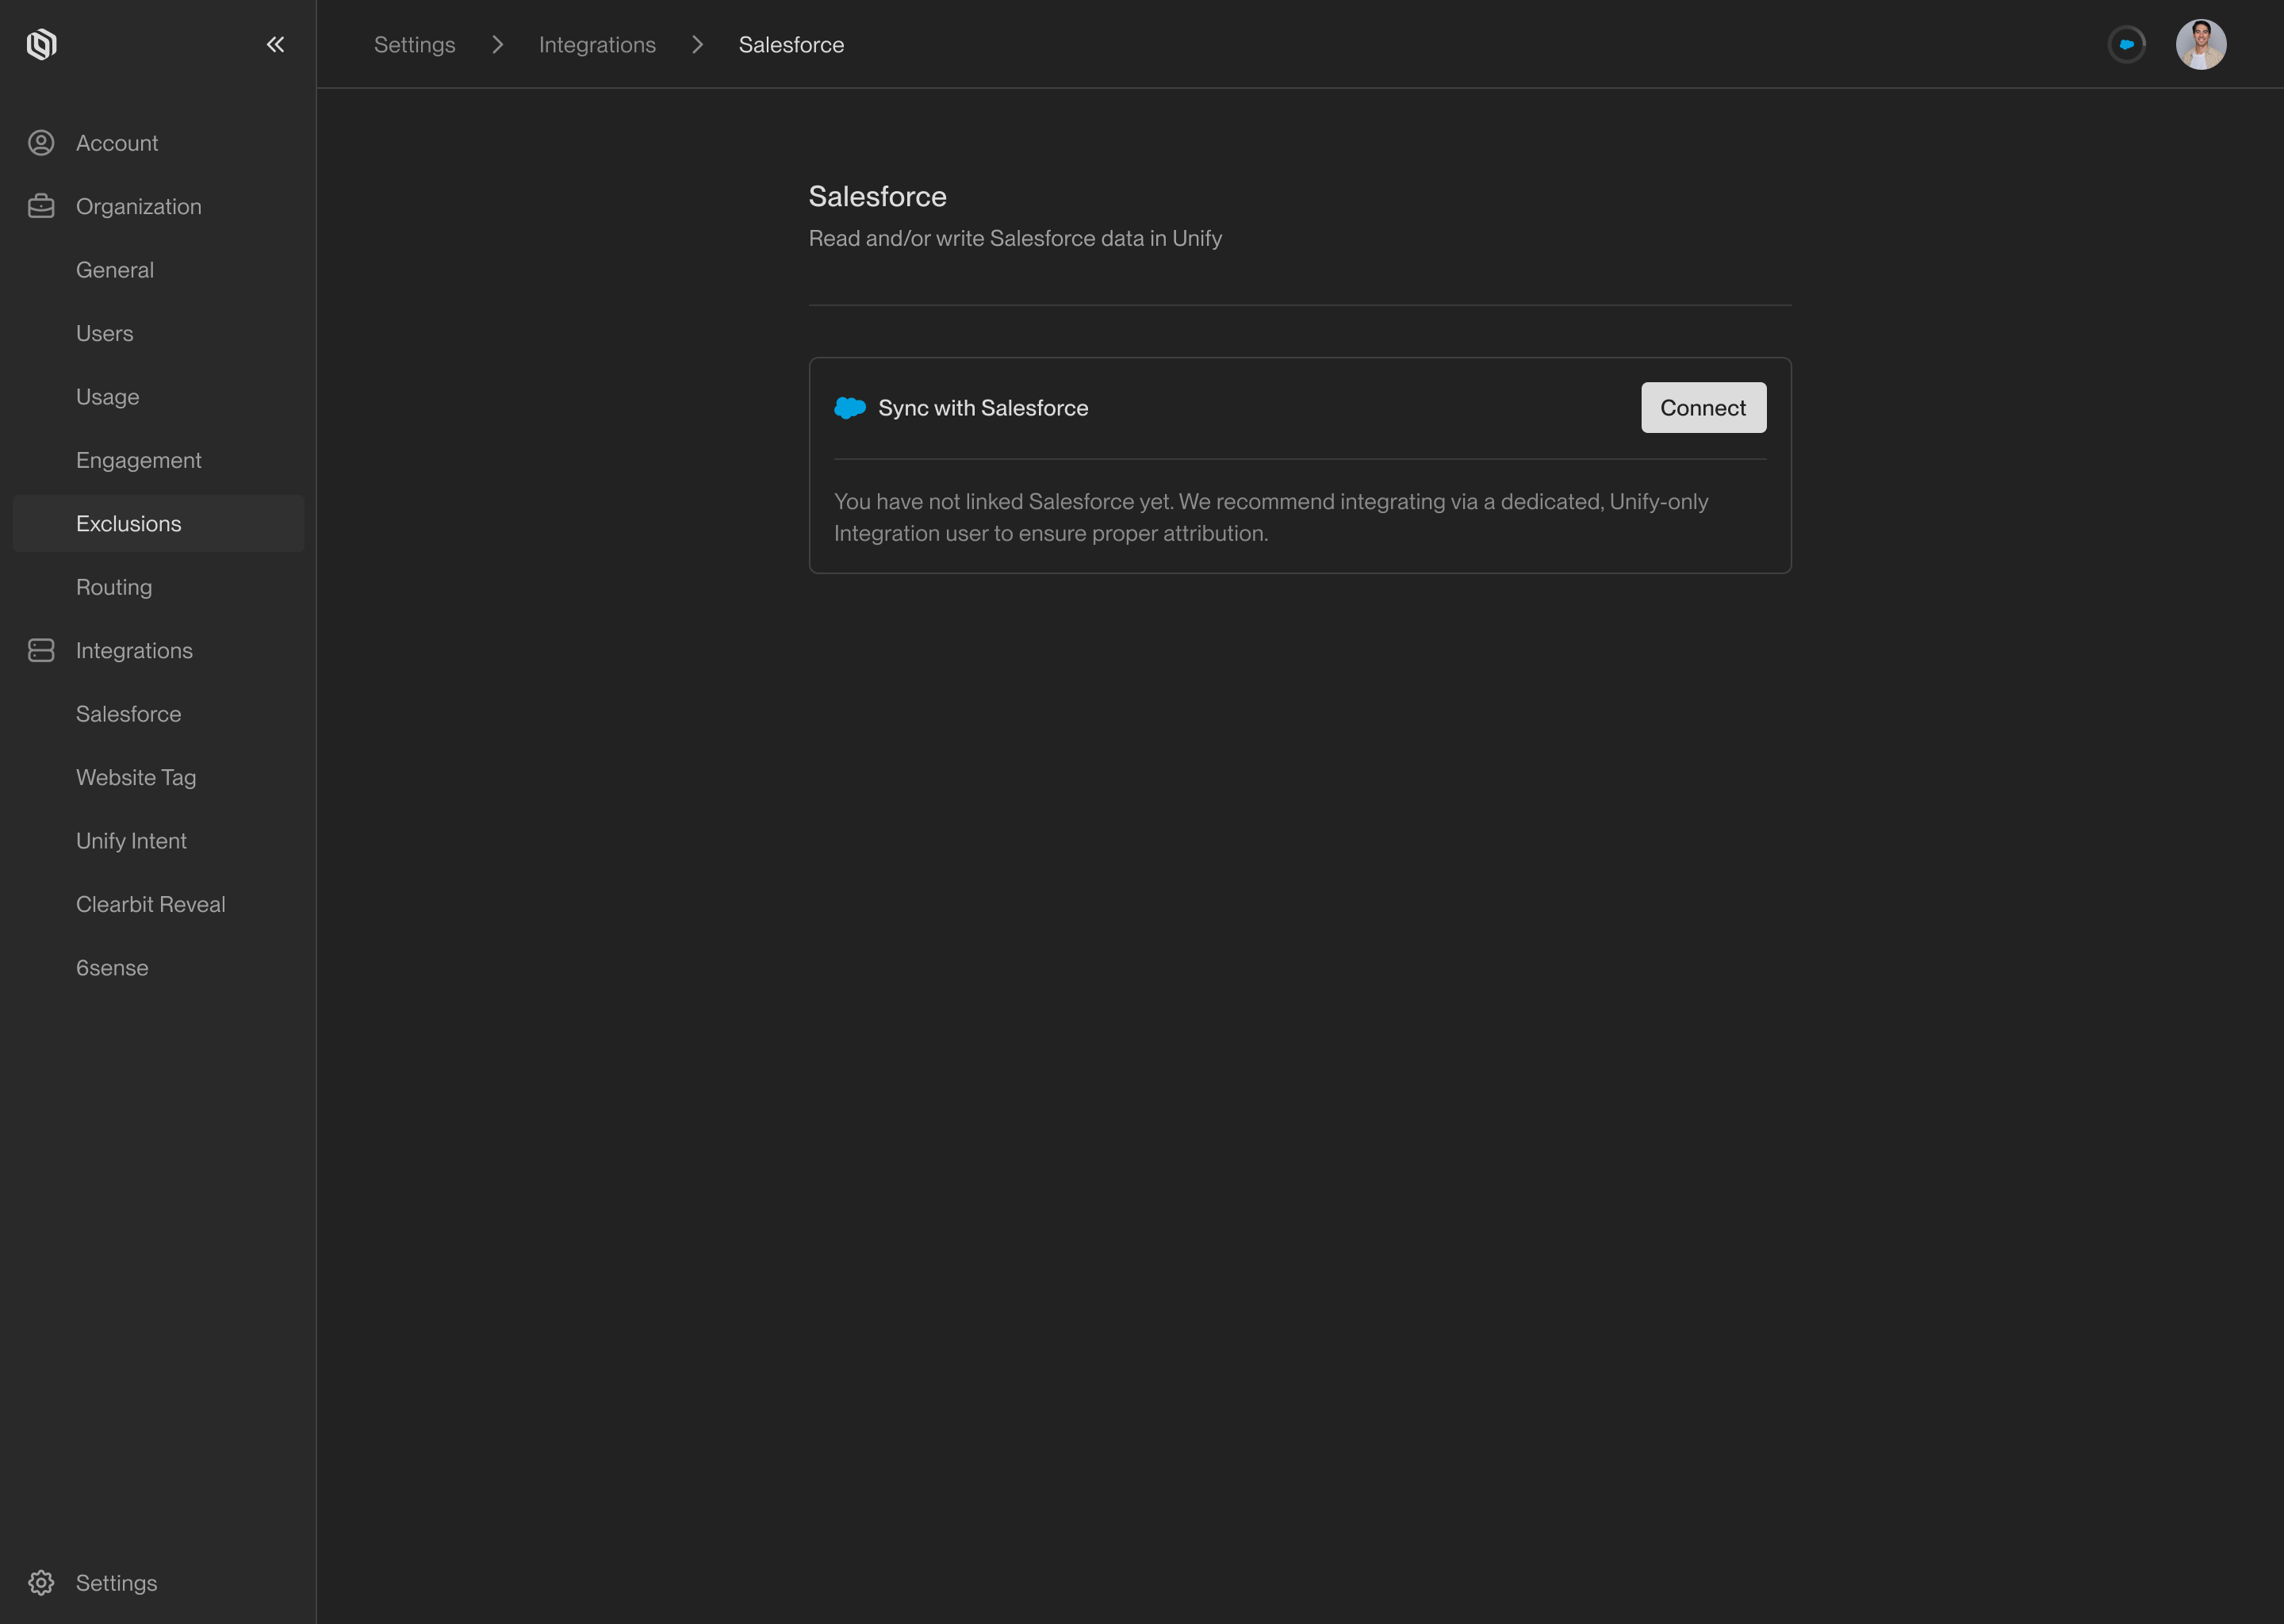
Navigate to Settings → Salesforce
and select Connect. You will be redirected to the Salesforce authentication
page where you can sign in using the desired Salesforce integration user that
Unify will use.
This screen will appear before you have connected a Salesforce organization.
Once a connected, you will see the settings available for your Salesforce connection.
If you are unable to connect your Salesforce instance, you may need to install and unblock the Unify
Connected App. Navigate to Setup → Connected Apps → Connected Apps OAuth Usage, look for “Unify”, and ensure it
is installed and unblocked.
3
Assign required permissions
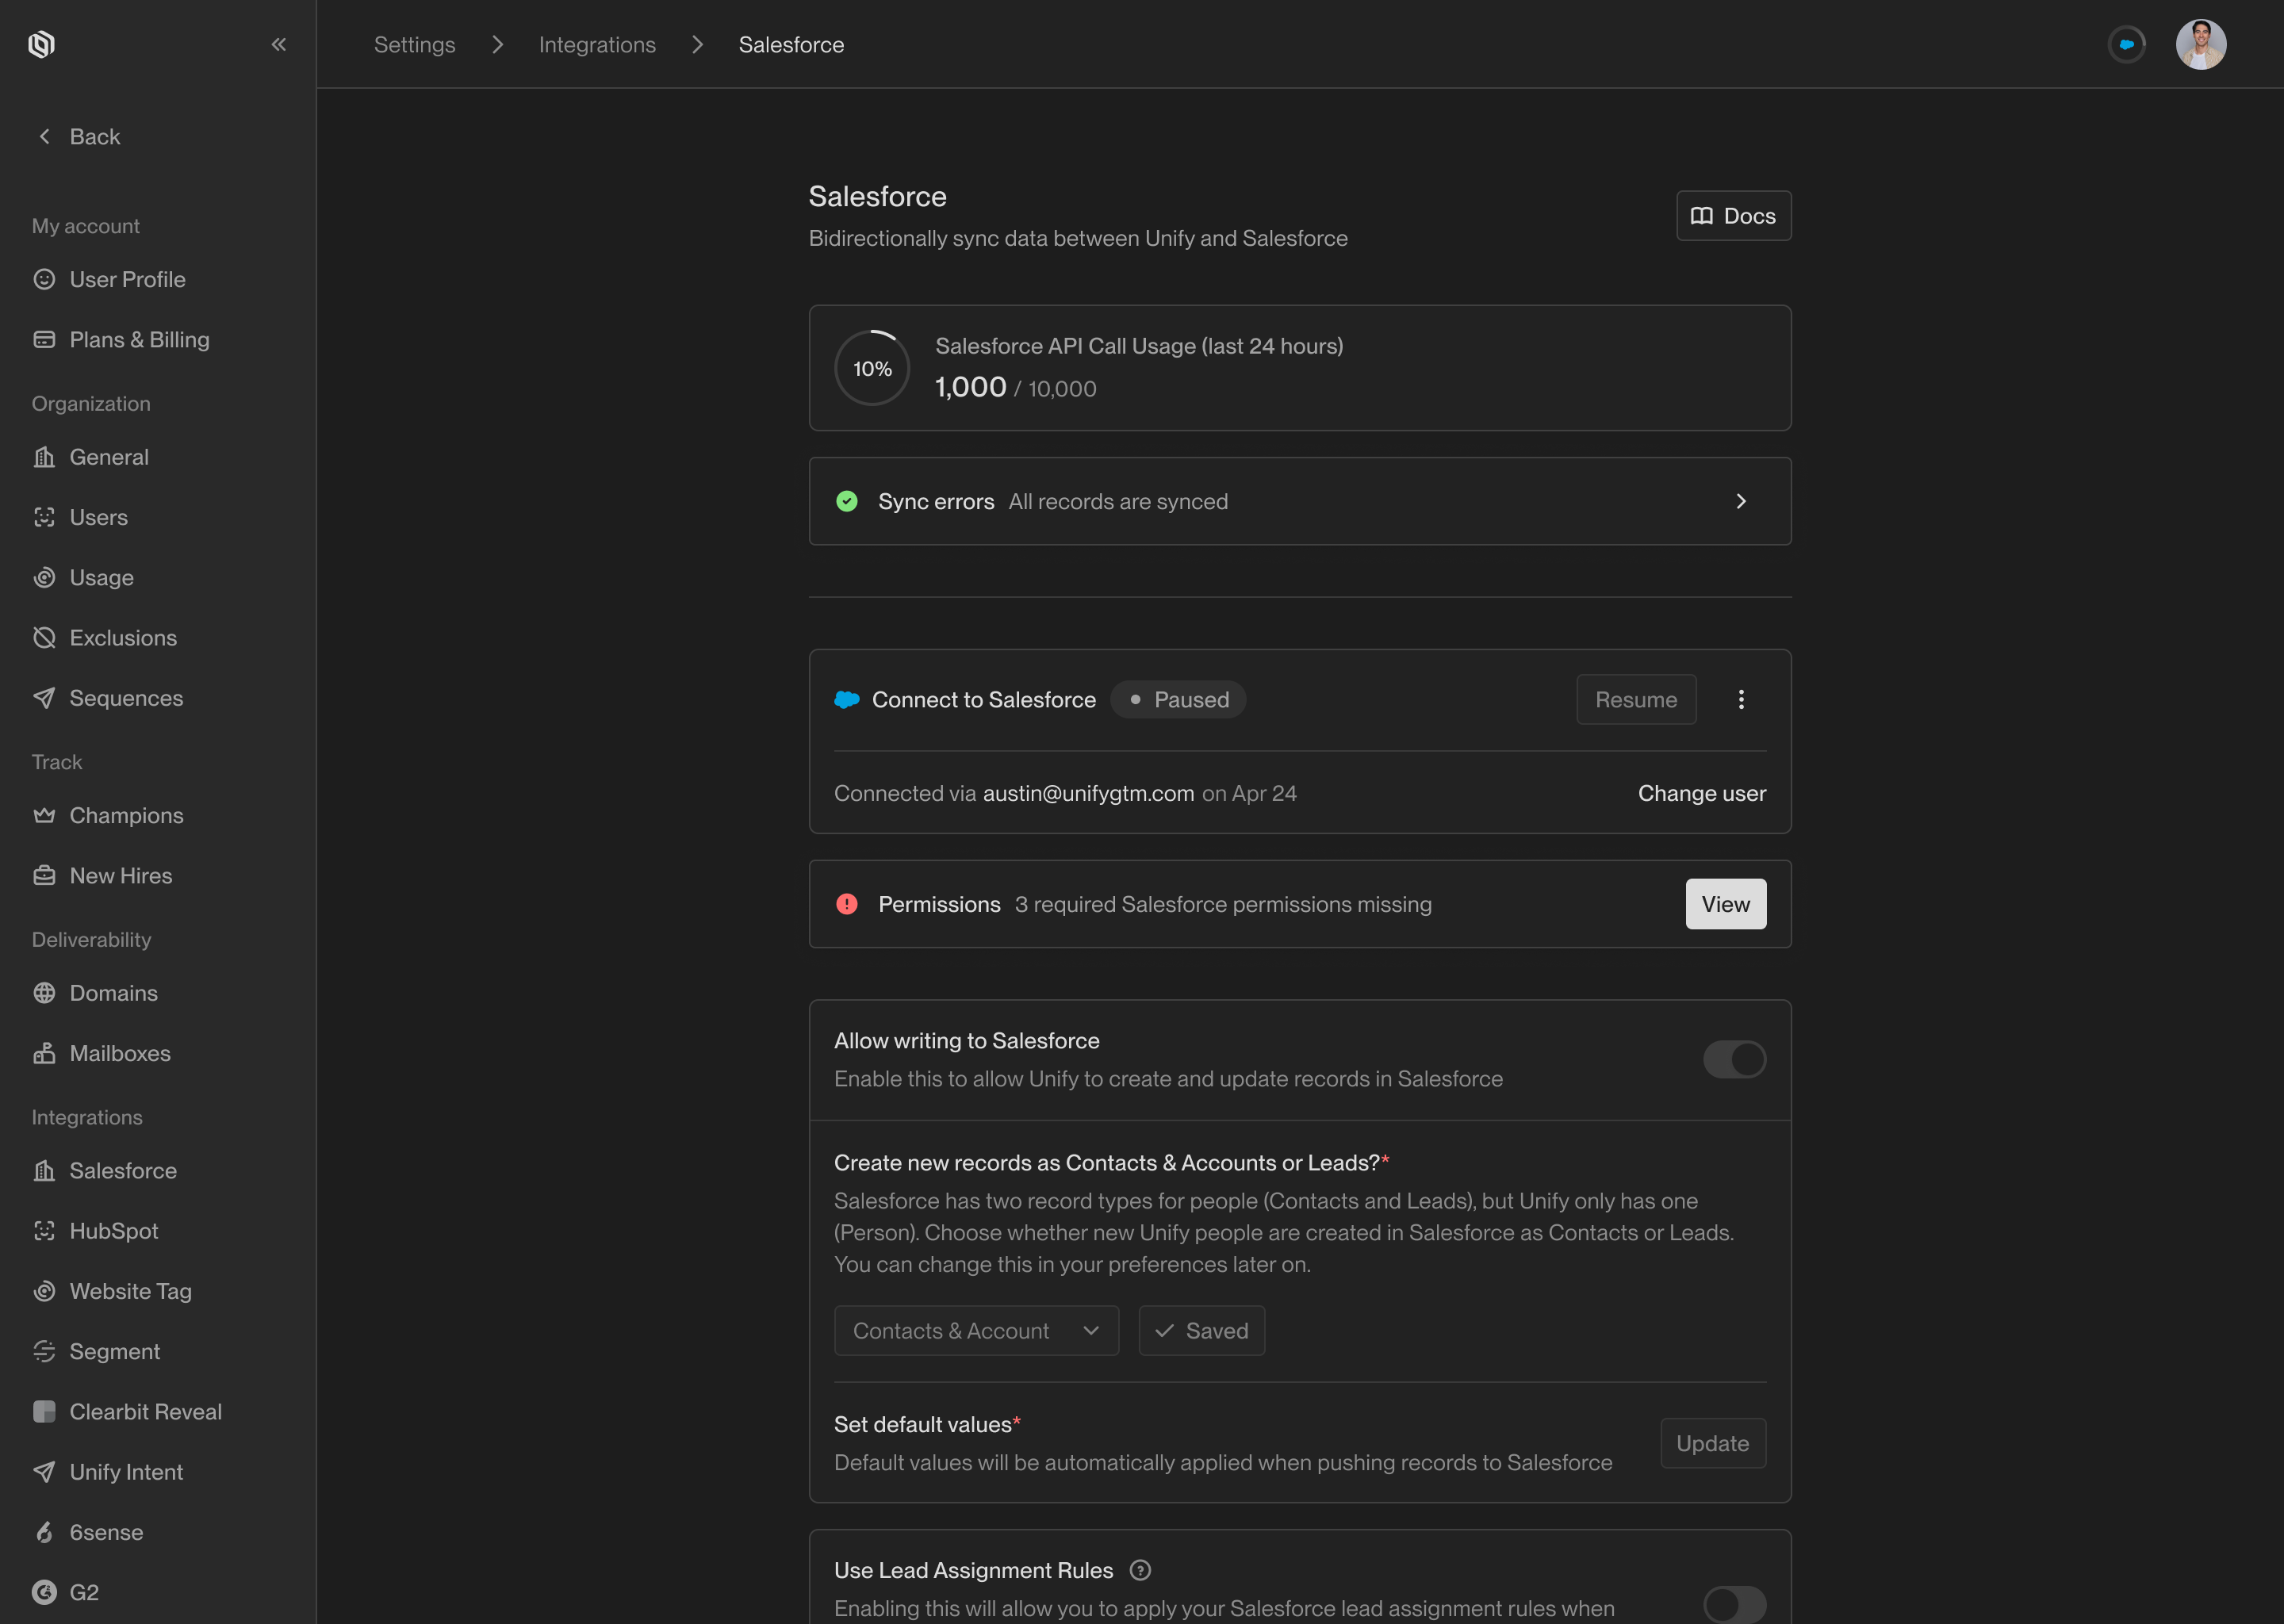
Unify requires specific permissions to access the Salesforce API and read
and write data. If any permissions are missing, they will be shown on the
settings page.
The permissions widget will indicate if permissions are missing.
Salesforce has two different ways of representing companies and people:
Contacts and Accounts: Every person has a Contact record, and Contacts are associated with Accounts.
Leads: Every person has a Lead record which contains information about both the person and their company.
Unify supports both options, and you can choose which approach you want to
use on the integration settings page. This can be changed at any time.
Pick the option that best aligns with how your team uses Salesforce today.
If you’re unsure, Unify recommends Contacts and Accounts as a best
practice.
5
Create field mappings
Unify provides granular control over which Salesforce fields map to which
Unify fields. For each object, select Create Mapping and update any
fields you wish to customize.In most cases, the default options will be a good starting point. You can
always return to change these mappings in the future.
The field mappings page lets you customize which fields Unify can read and write.
See Field mappings for details on
how field mappings work and the available options.
6
Enable syncs
Once you’re satisfied with your integration settings and field mappings, you
can begin syncing data into Unify by selecting Resume. If at any point
you want to pause syncs again, you can return to this page and select
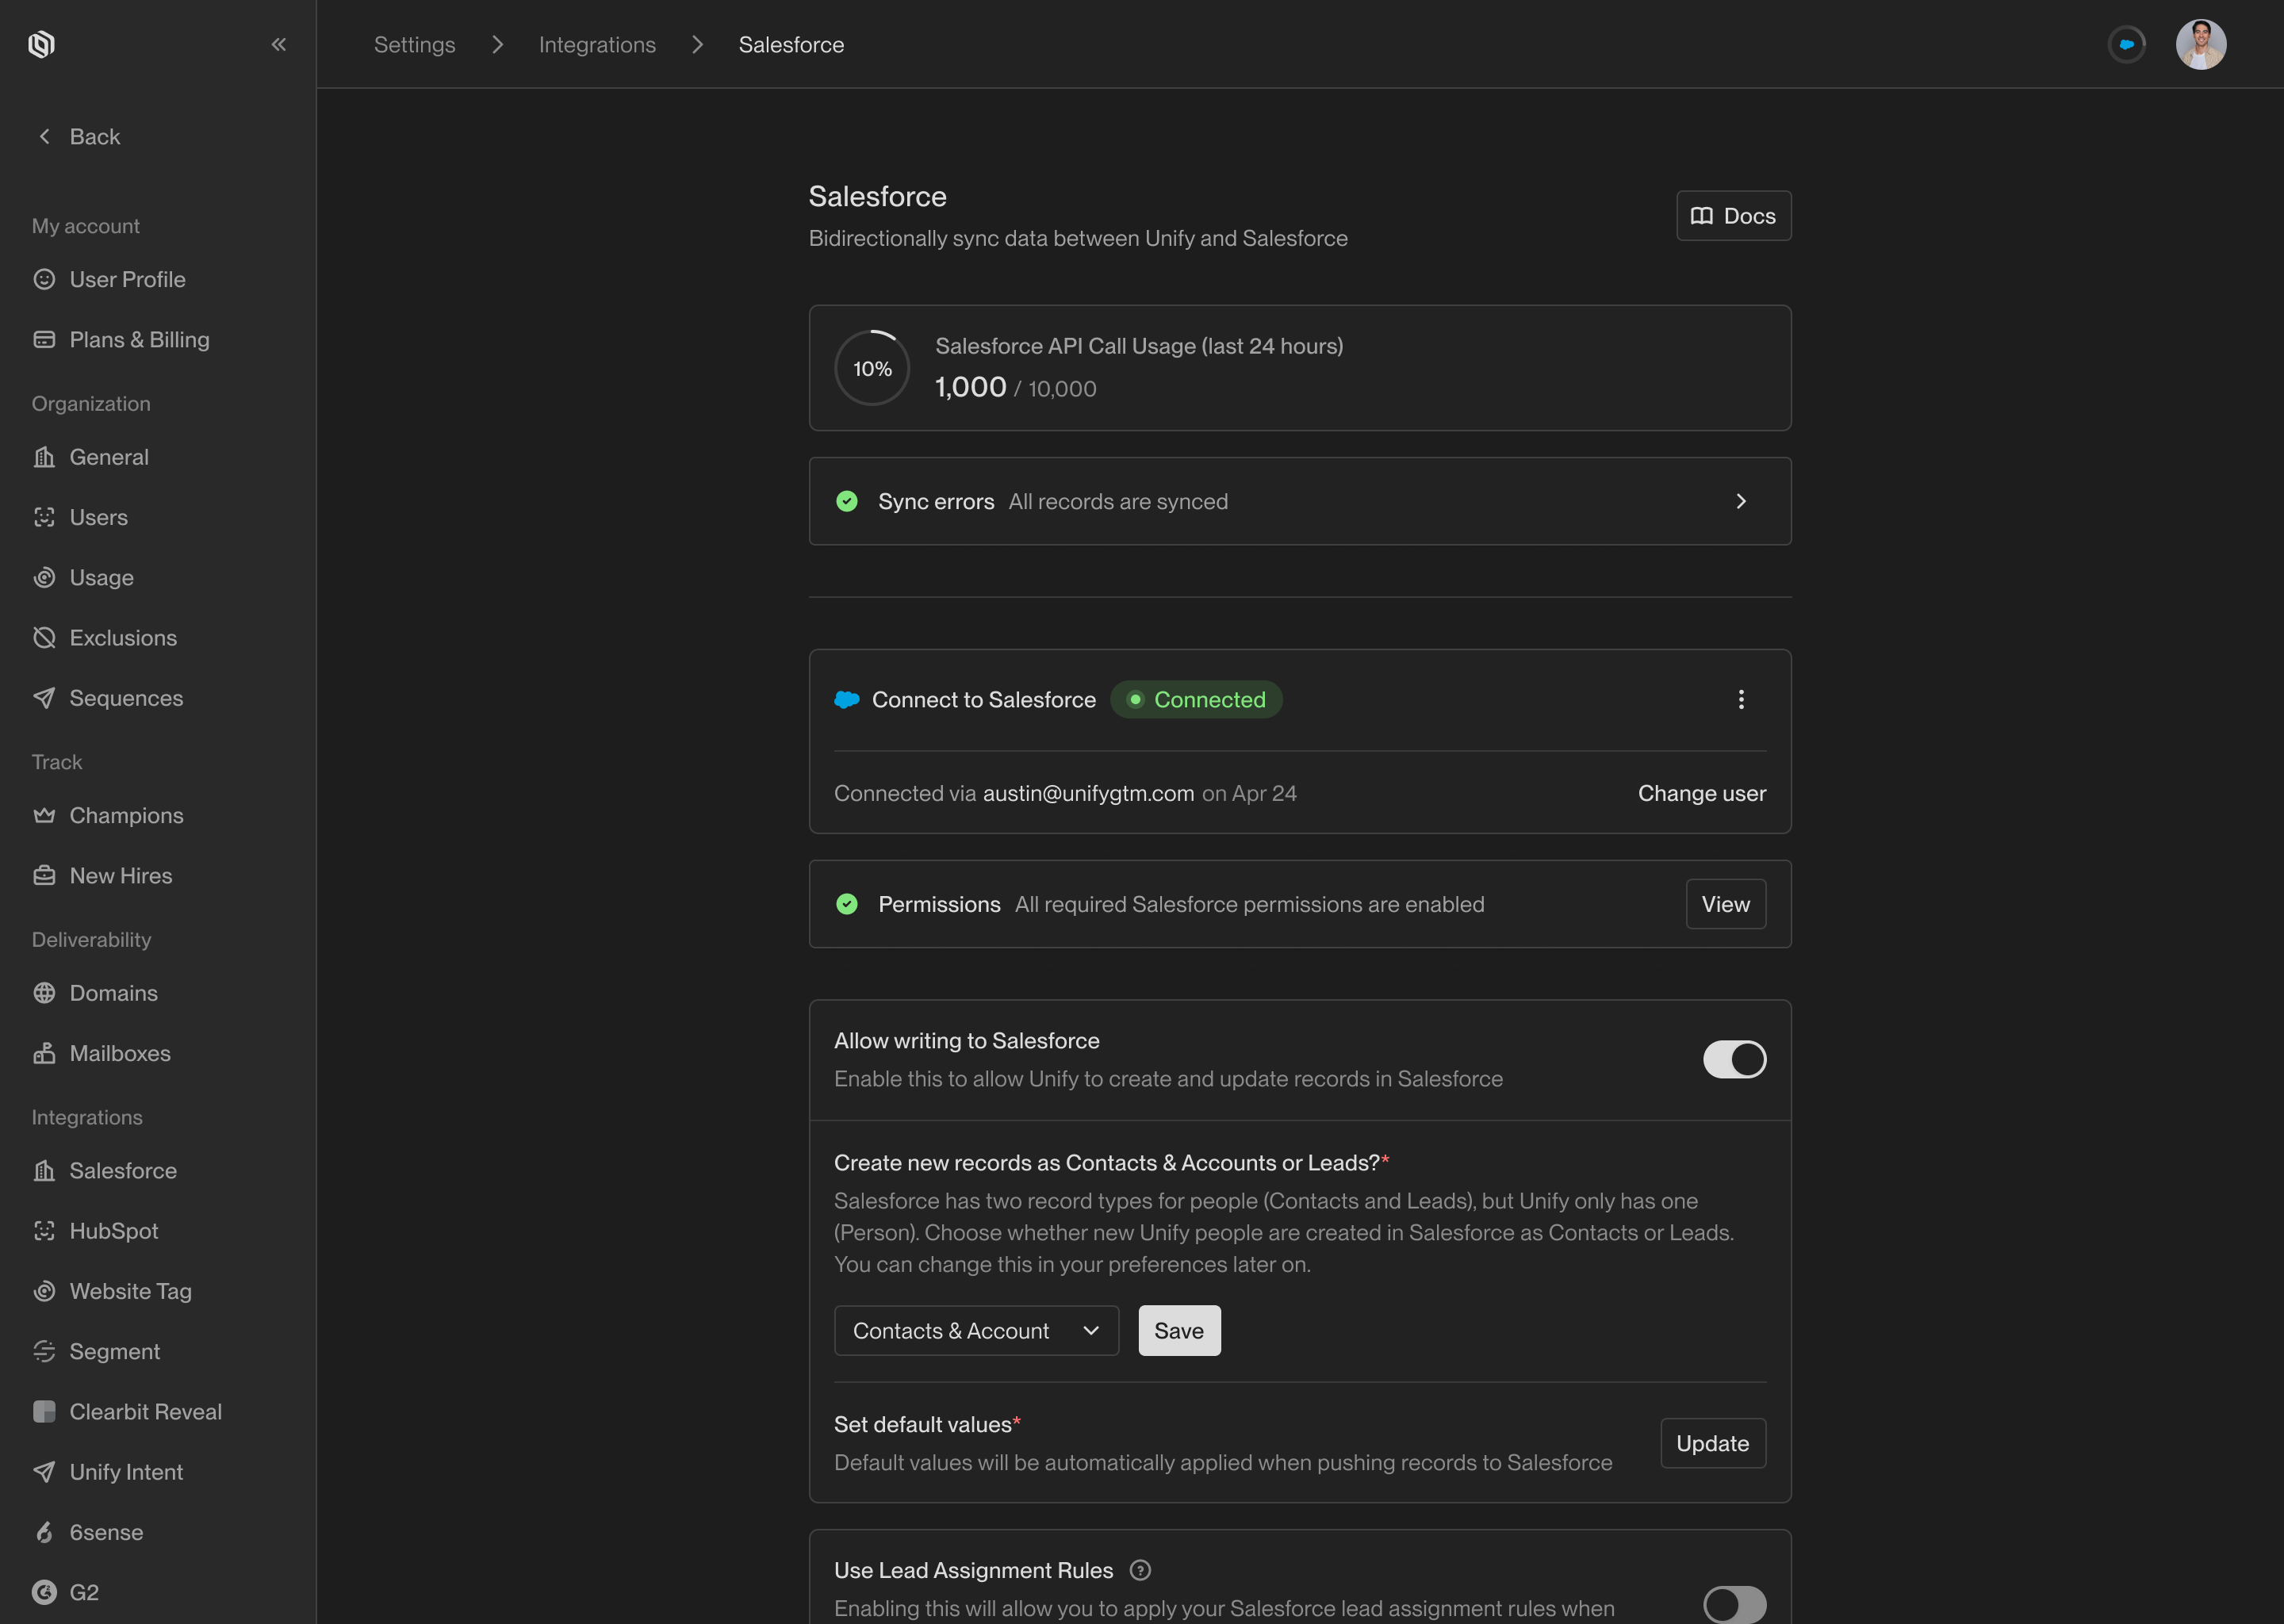
Pause.To enable Unify to write data back to Salesforce, activate the toggle next to
Enable writing to Salesforce. This will allow Unify to sync records back
to Salesforce.
The Salesforce integration settings page after setup is complete.