This guide outlines how to connect your HubSpot CRM to Unify.
In just a few steps, you can connect your HubSpot CRM to Unify and start syncing data bidirectionally. This unlocks a few key benefits when using Unify:
Unify’s integration with HubSpot is designed from the ground up to prevent many common pitfalls, including overwriting existing data or creating duplicate records.
Navigate to Settings -> HubSpot and select Connect. You will be redirected to the HubSpot authentication page where you can sign in and authorize Unify to access HubSpot data.
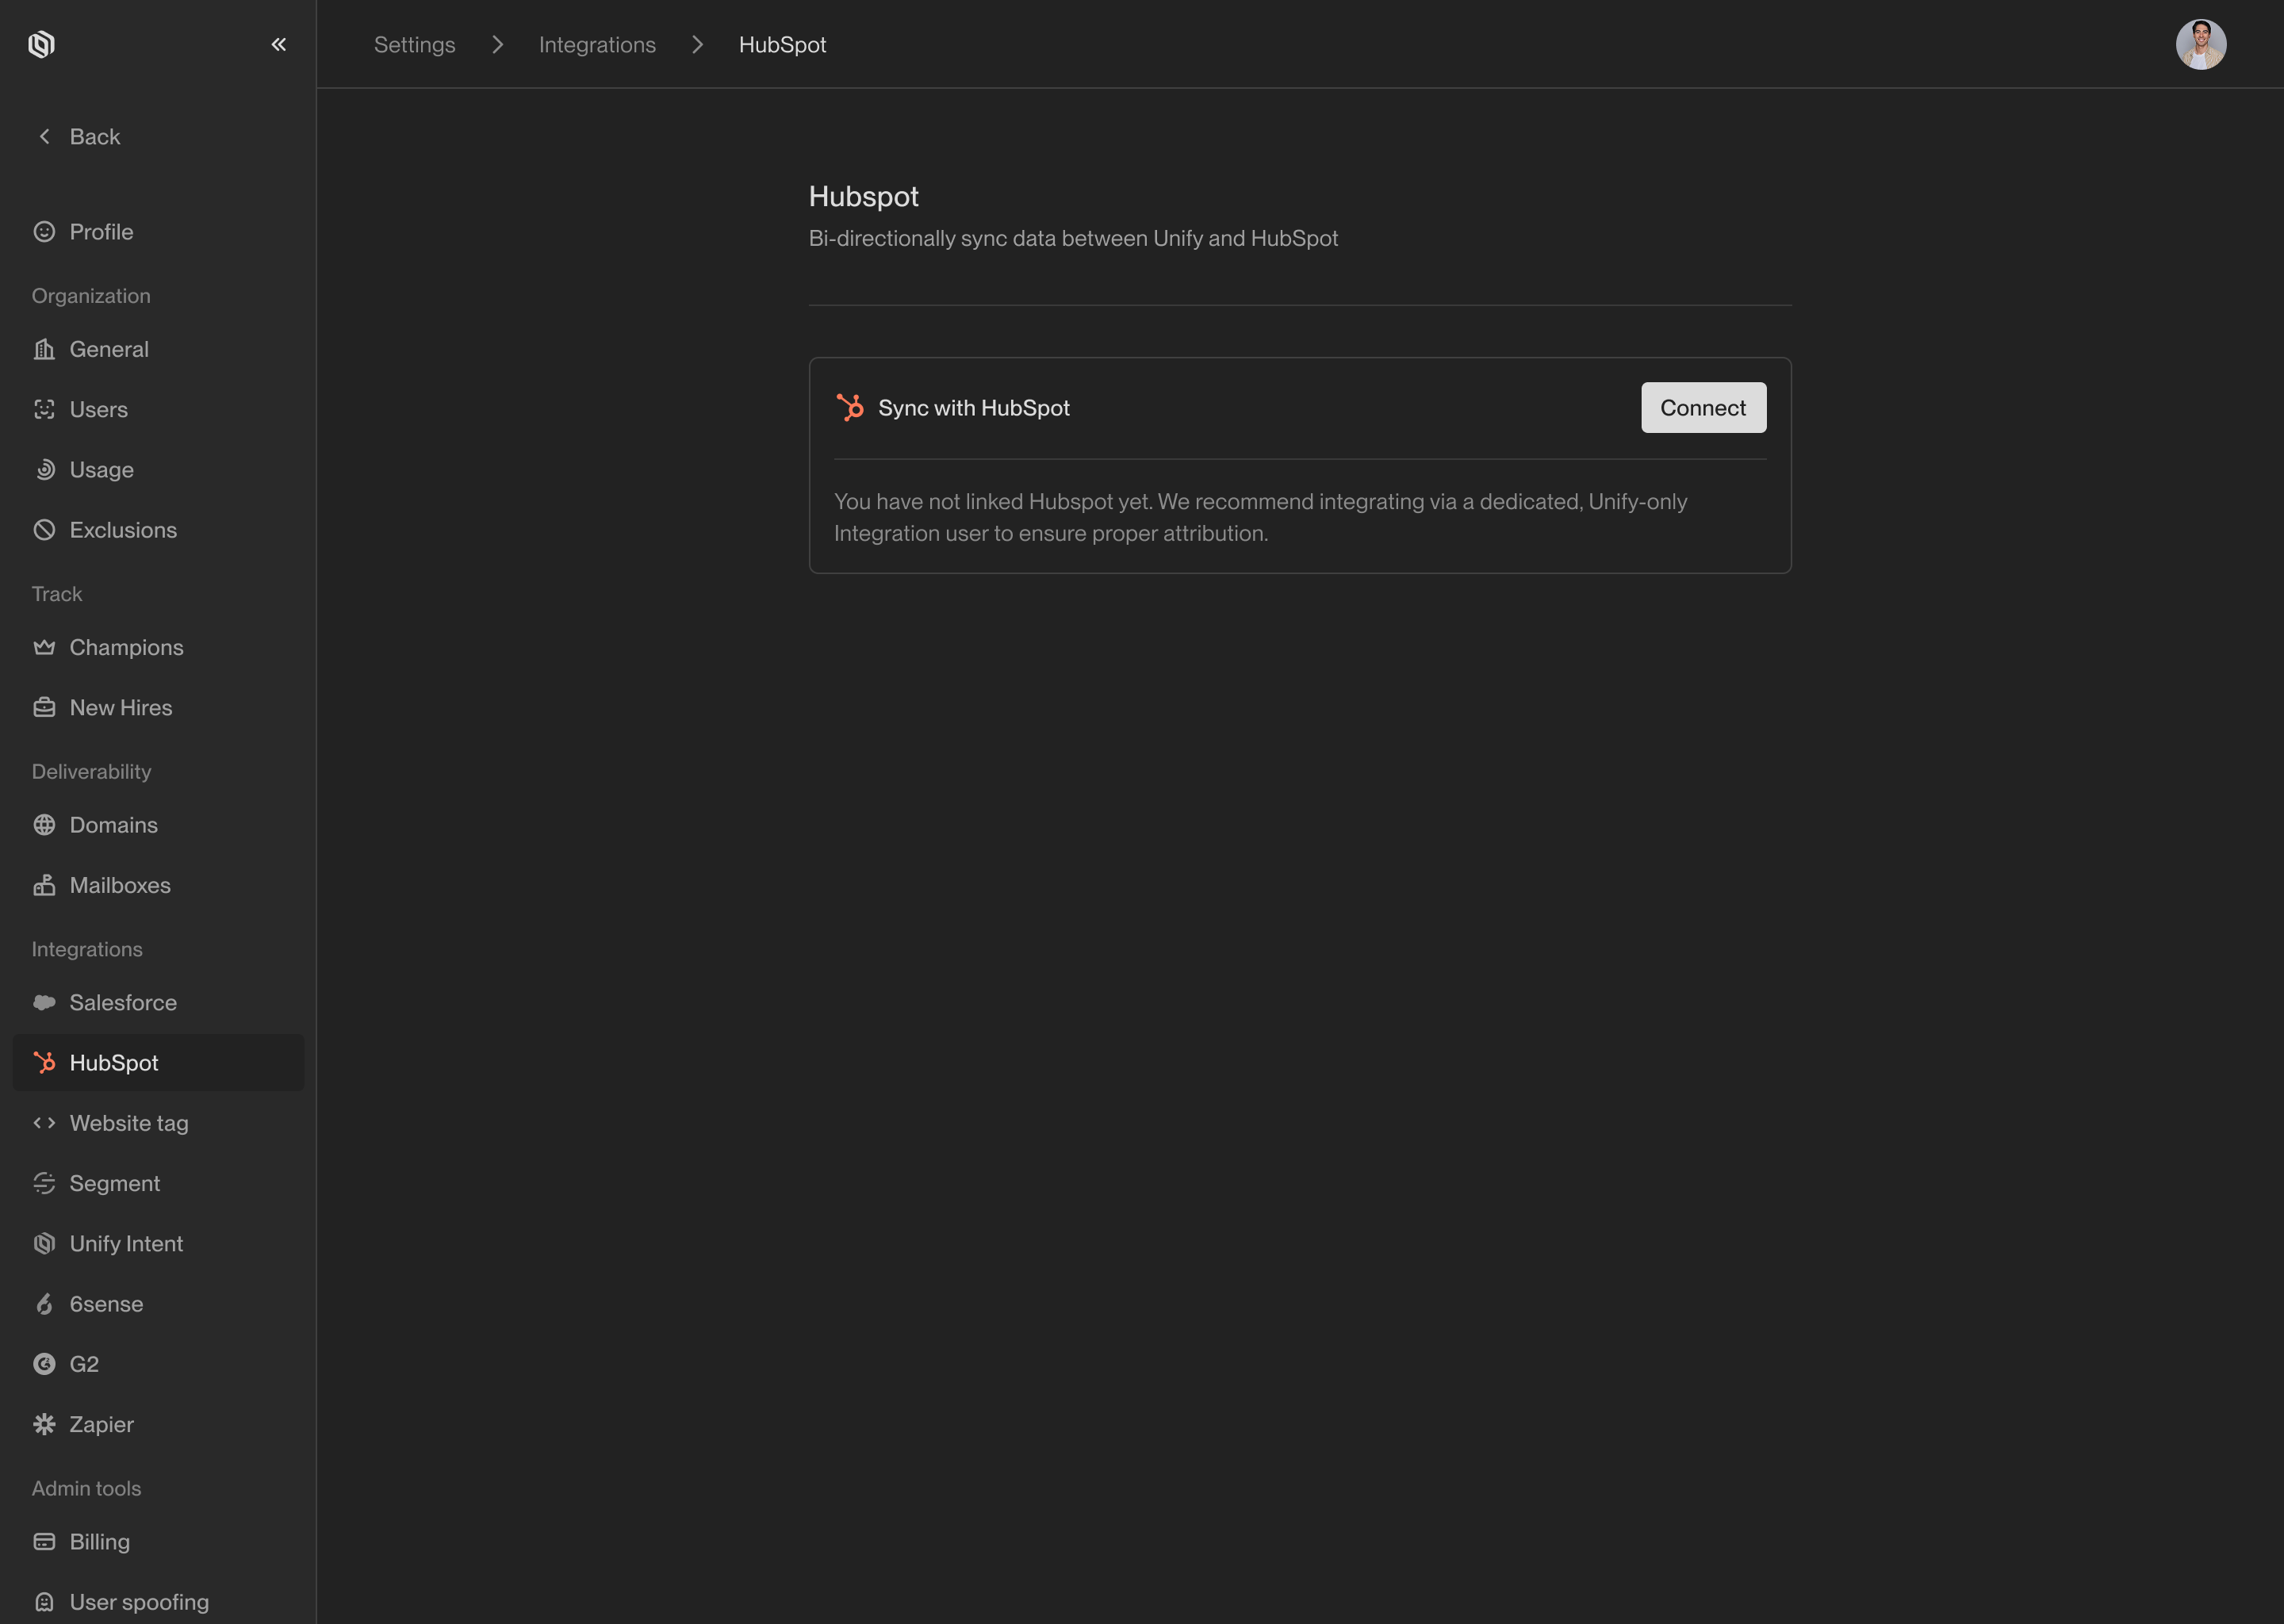
This screen will appear before you have connected a HubSpot instance.
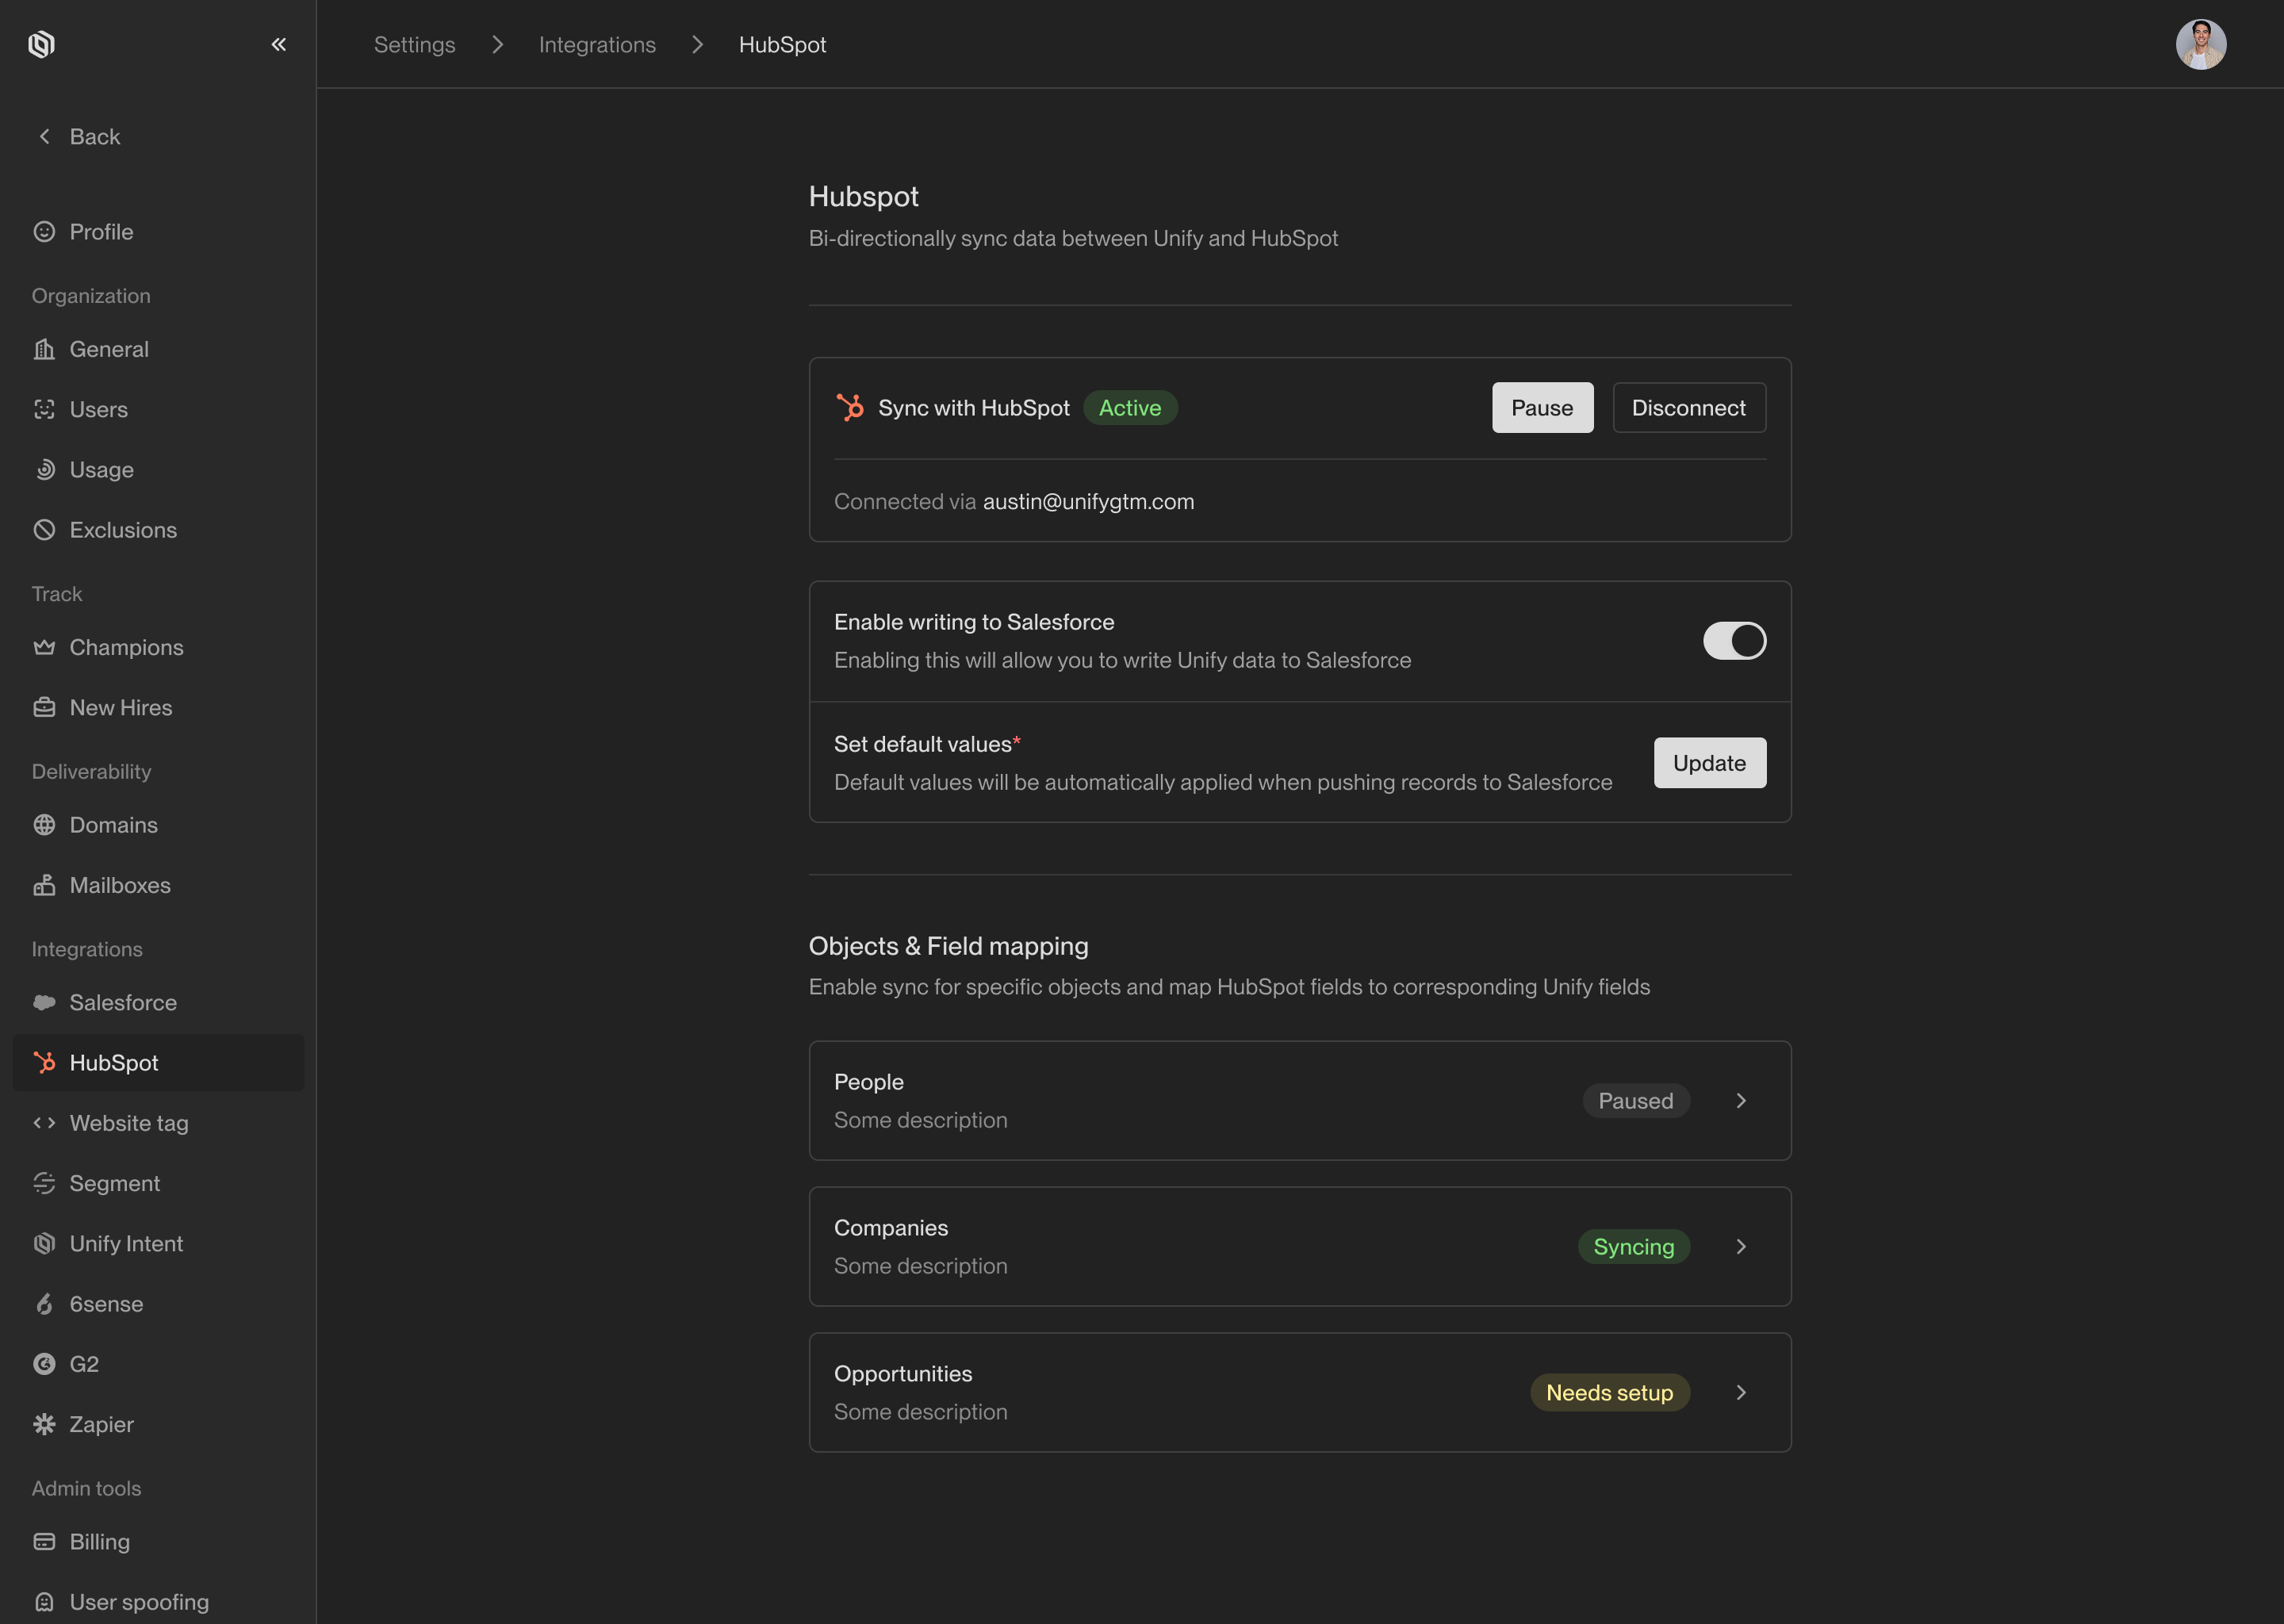
Once a connected, you will see the settings available for your HubSpot connection.
Unify provides granular control over which HubSpot properties map to which Unify fields. For each object, select Create Mapping and update any fields you wish to customize.
In most cases, the default options will be a good starting point. You can always return to change these mappings in the future.
The field mappings page lets you customize which fields Unify can read and write.
See Field Mappings for details on how field mappings work and the available options.
Once you’re satisfied with your integration settings and field mappings, you can begin syncing data into Unify by selecting Resume. If at any point you want to pause syncs again, you can return to this page and select Pause.
To enable Unify to write data back to HubSpot, activate the toggle next to Enable writing to HubSpot. This will allow Unify to sync records back to HubSpot.
The HubSpot integration settings page after setup is complete.
Configure mappings between Unify fields and HubSpot properties.
Specify default values that should be used when writing to HubSpot.
This guide outlines how to connect your HubSpot CRM to Unify.
In just a few steps, you can connect your HubSpot CRM to Unify and start syncing data bidirectionally. This unlocks a few key benefits when using Unify:
Unify’s integration with HubSpot is designed from the ground up to prevent many common pitfalls, including overwriting existing data or creating duplicate records.
Navigate to Settings -> HubSpot and select Connect. You will be redirected to the HubSpot authentication page where you can sign in and authorize Unify to access HubSpot data.
This screen will appear before you have connected a HubSpot instance.
Once a connected, you will see the settings available for your HubSpot connection.
Unify provides granular control over which HubSpot properties map to which Unify fields. For each object, select Create Mapping and update any fields you wish to customize.
In most cases, the default options will be a good starting point. You can always return to change these mappings in the future.
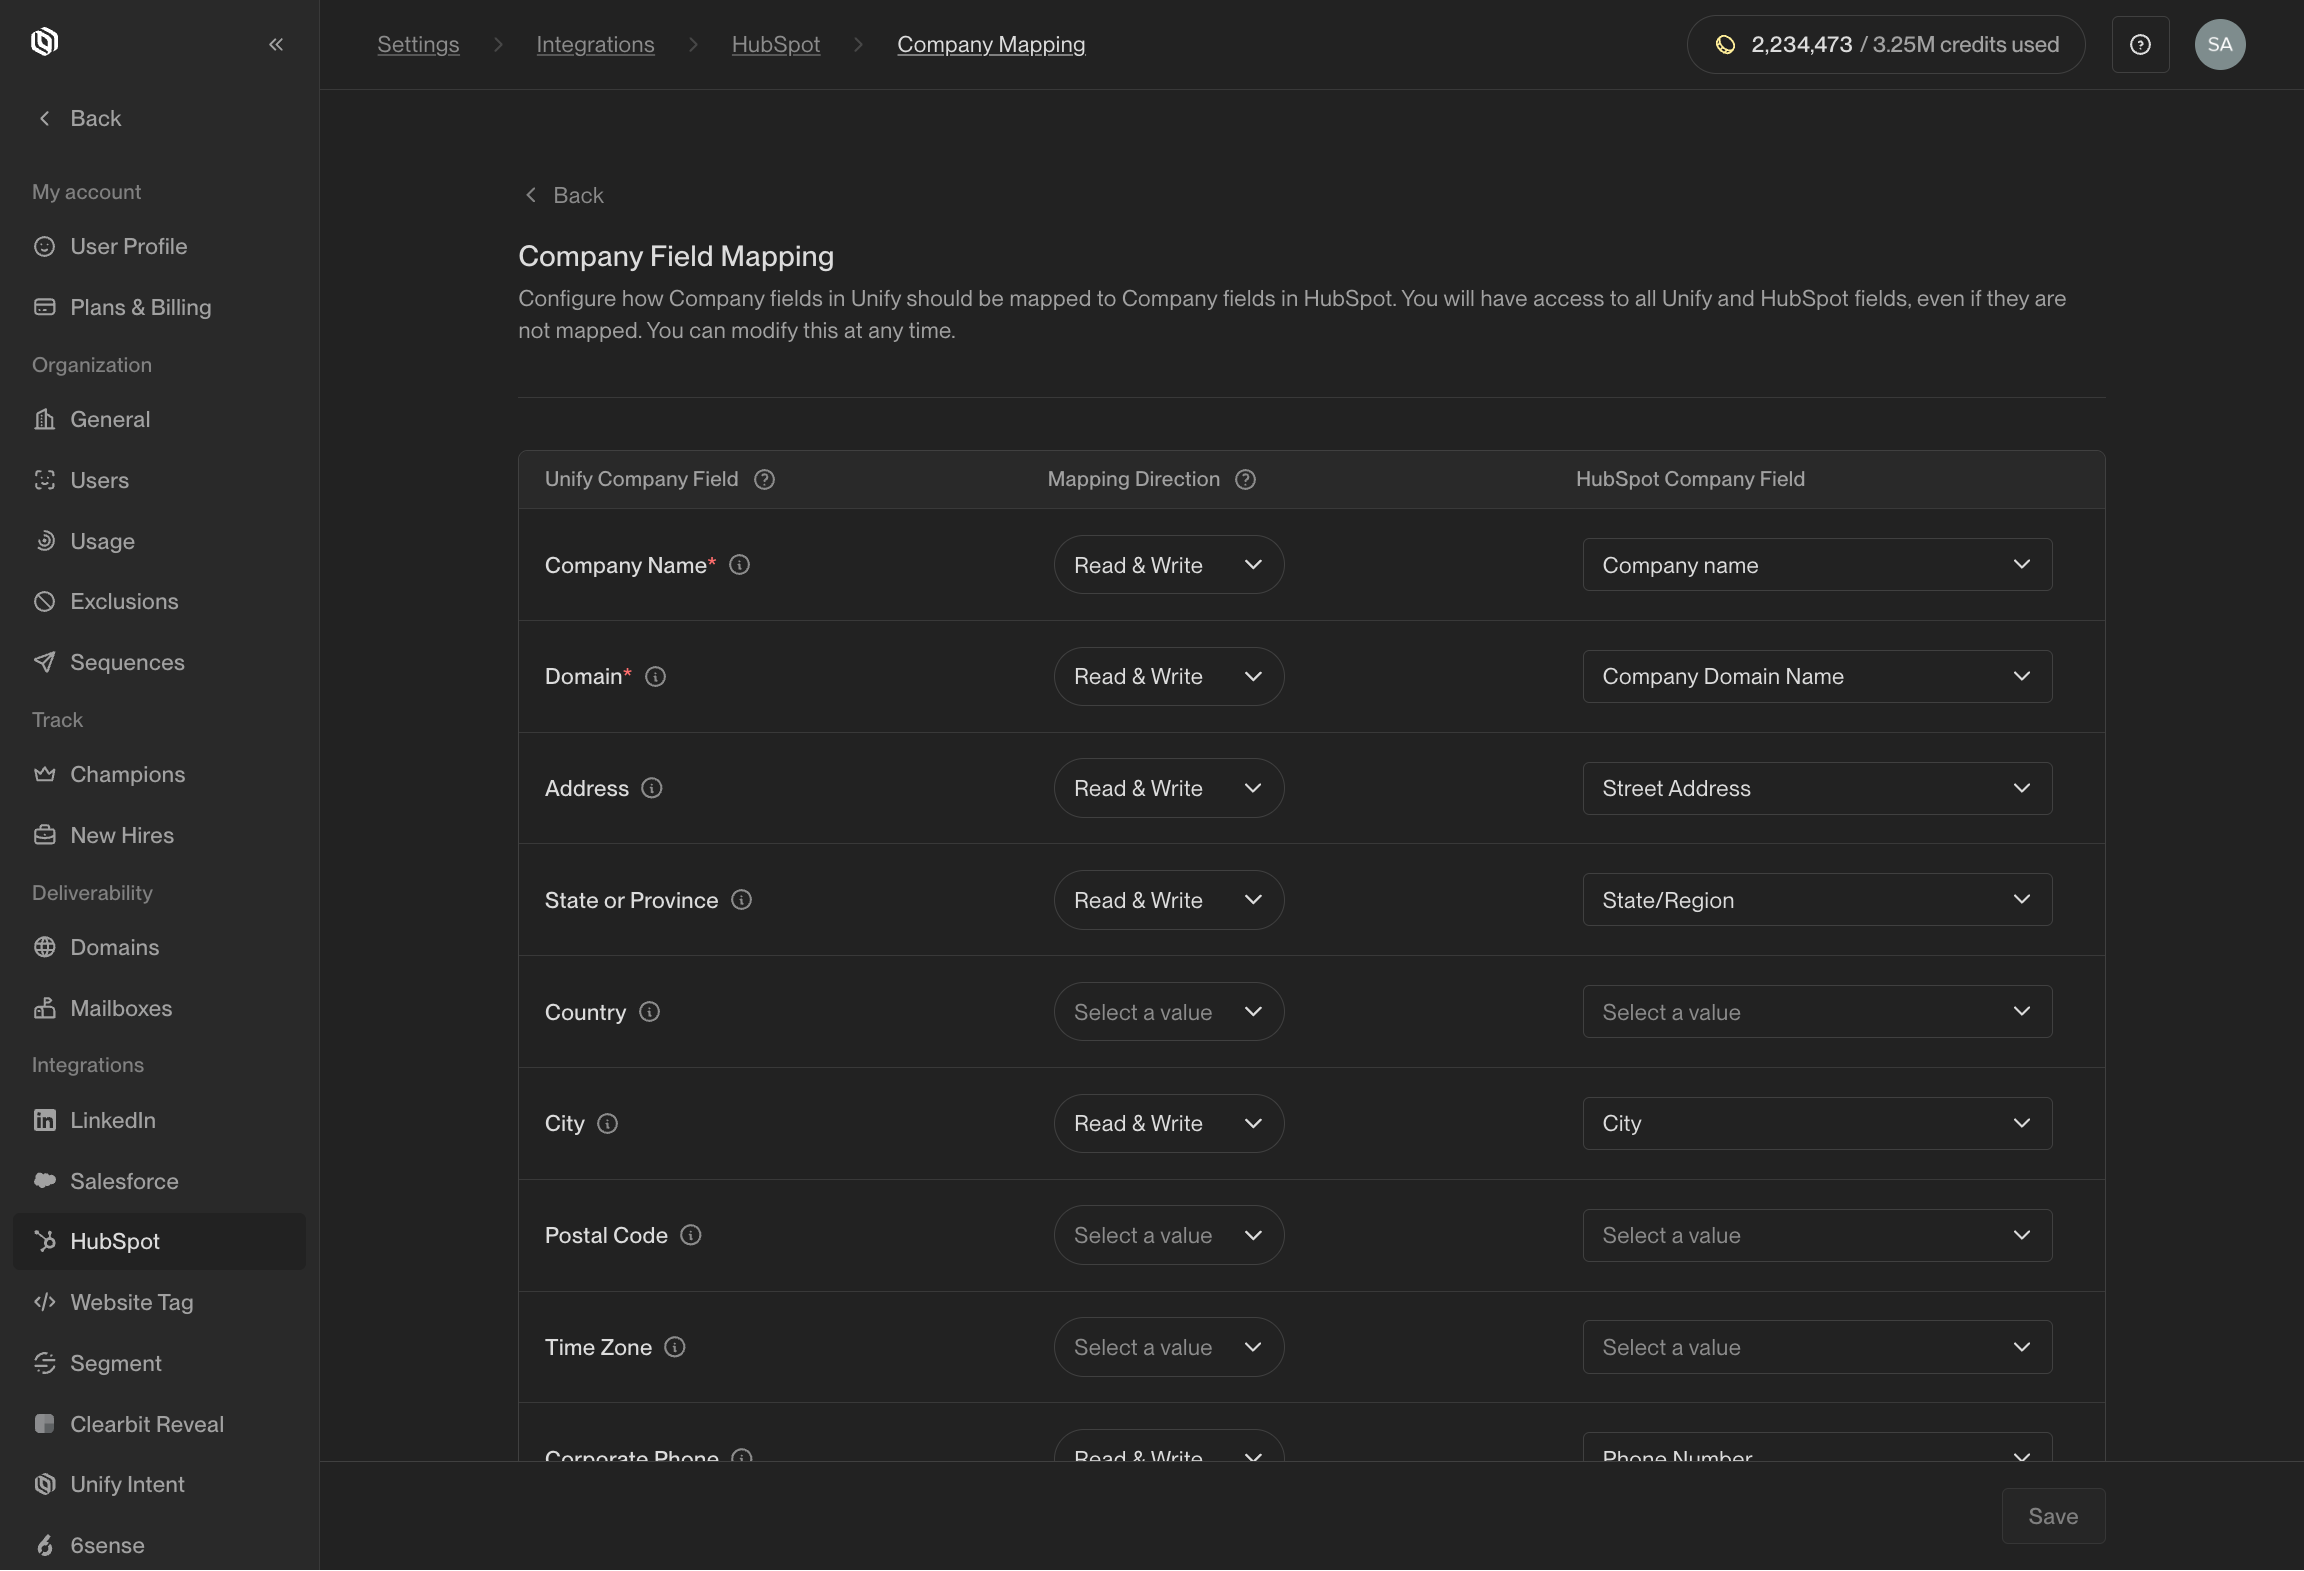
The field mappings page lets you customize which fields Unify can read and write.
See Field Mappings for details on how field mappings work and the available options.
Once you’re satisfied with your integration settings and field mappings, you can begin syncing data into Unify by selecting Resume. If at any point you want to pause syncs again, you can return to this page and select Pause.
To enable Unify to write data back to HubSpot, activate the toggle next to Enable writing to HubSpot. This will allow Unify to sync records back to HubSpot.
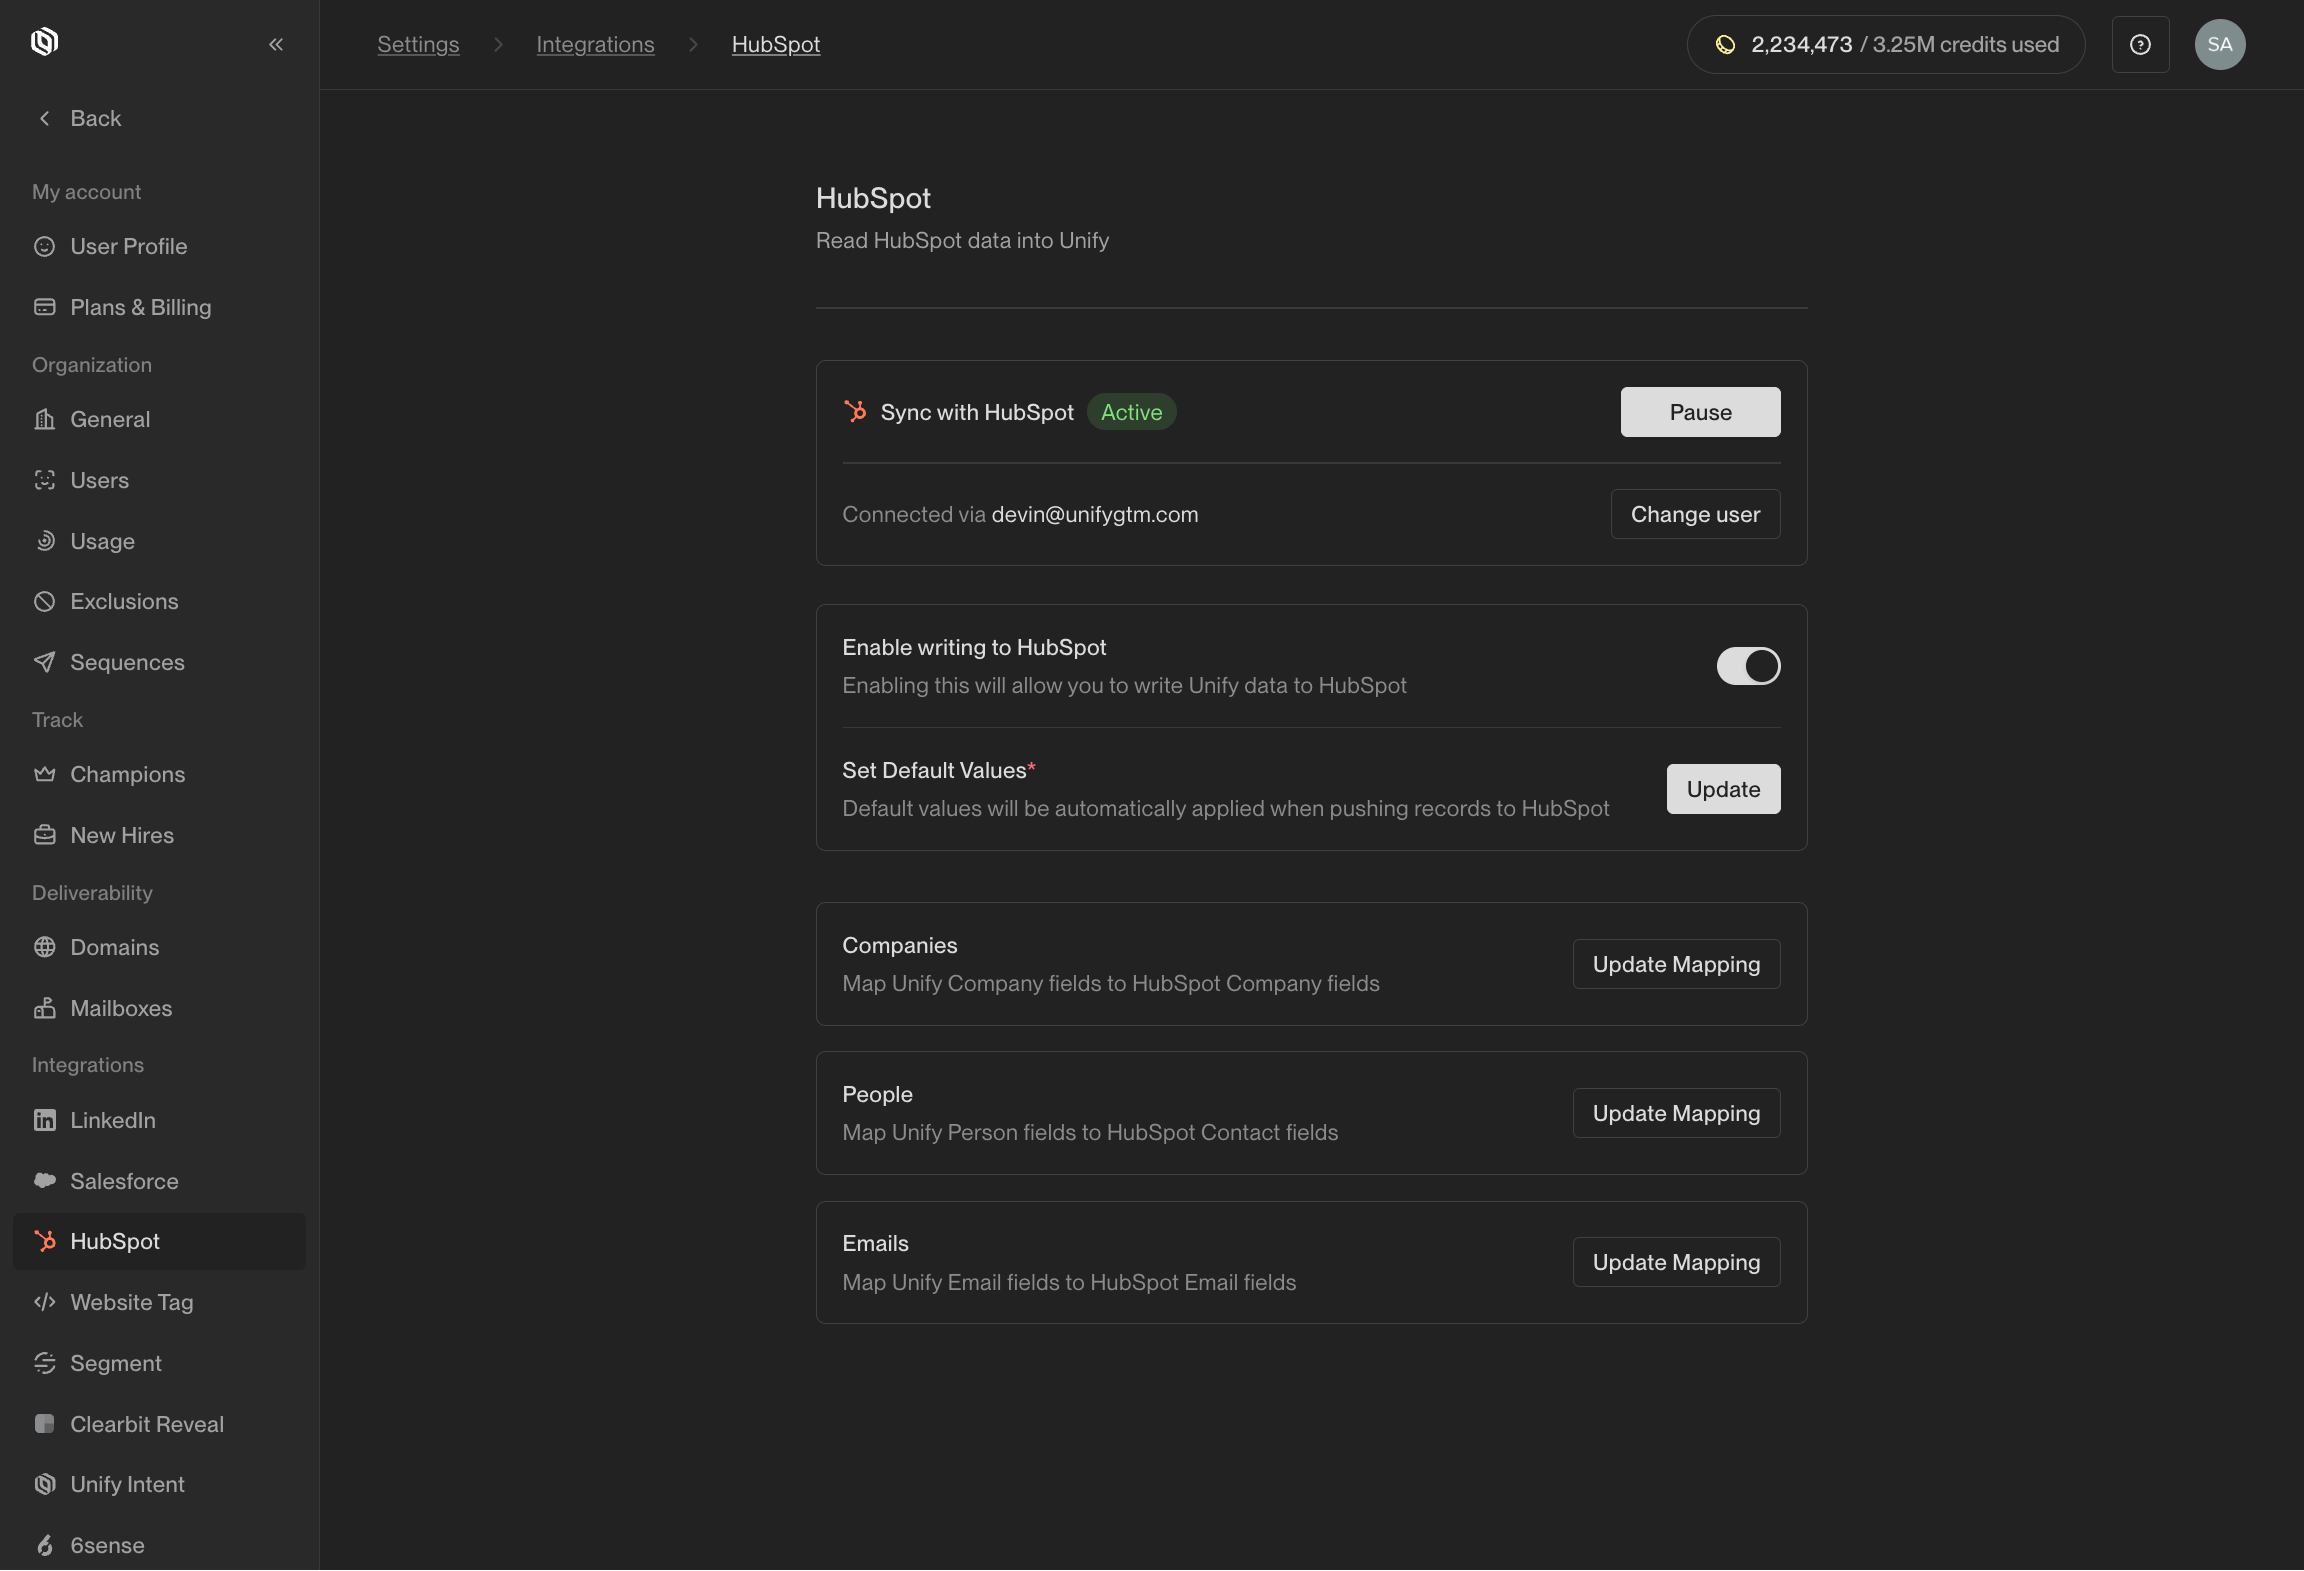
The HubSpot integration settings page after setup is complete.
Configure mappings between Unify fields and HubSpot properties.
Specify default values that should be used when writing to HubSpot.