Overview
Plays are automated workflows that let you build and execute repeatable strategies. In this guide, you’ll learn the basics of how Plays work and create one from scratch.What are Plays?
Building scalable and effective sales, marketing, and GTM strategies requires successfully coordinating two key components:- Data: Countless data sources go into building scalable automations. This data is traditionally scattered across tools and databases, but Unify centralizes it in one place.
- Actions: Researching companies, identifying decision-makers, executing multi-channel outreach, and more. Taking the right action at the right time is crucial to success.
Tutorial preview
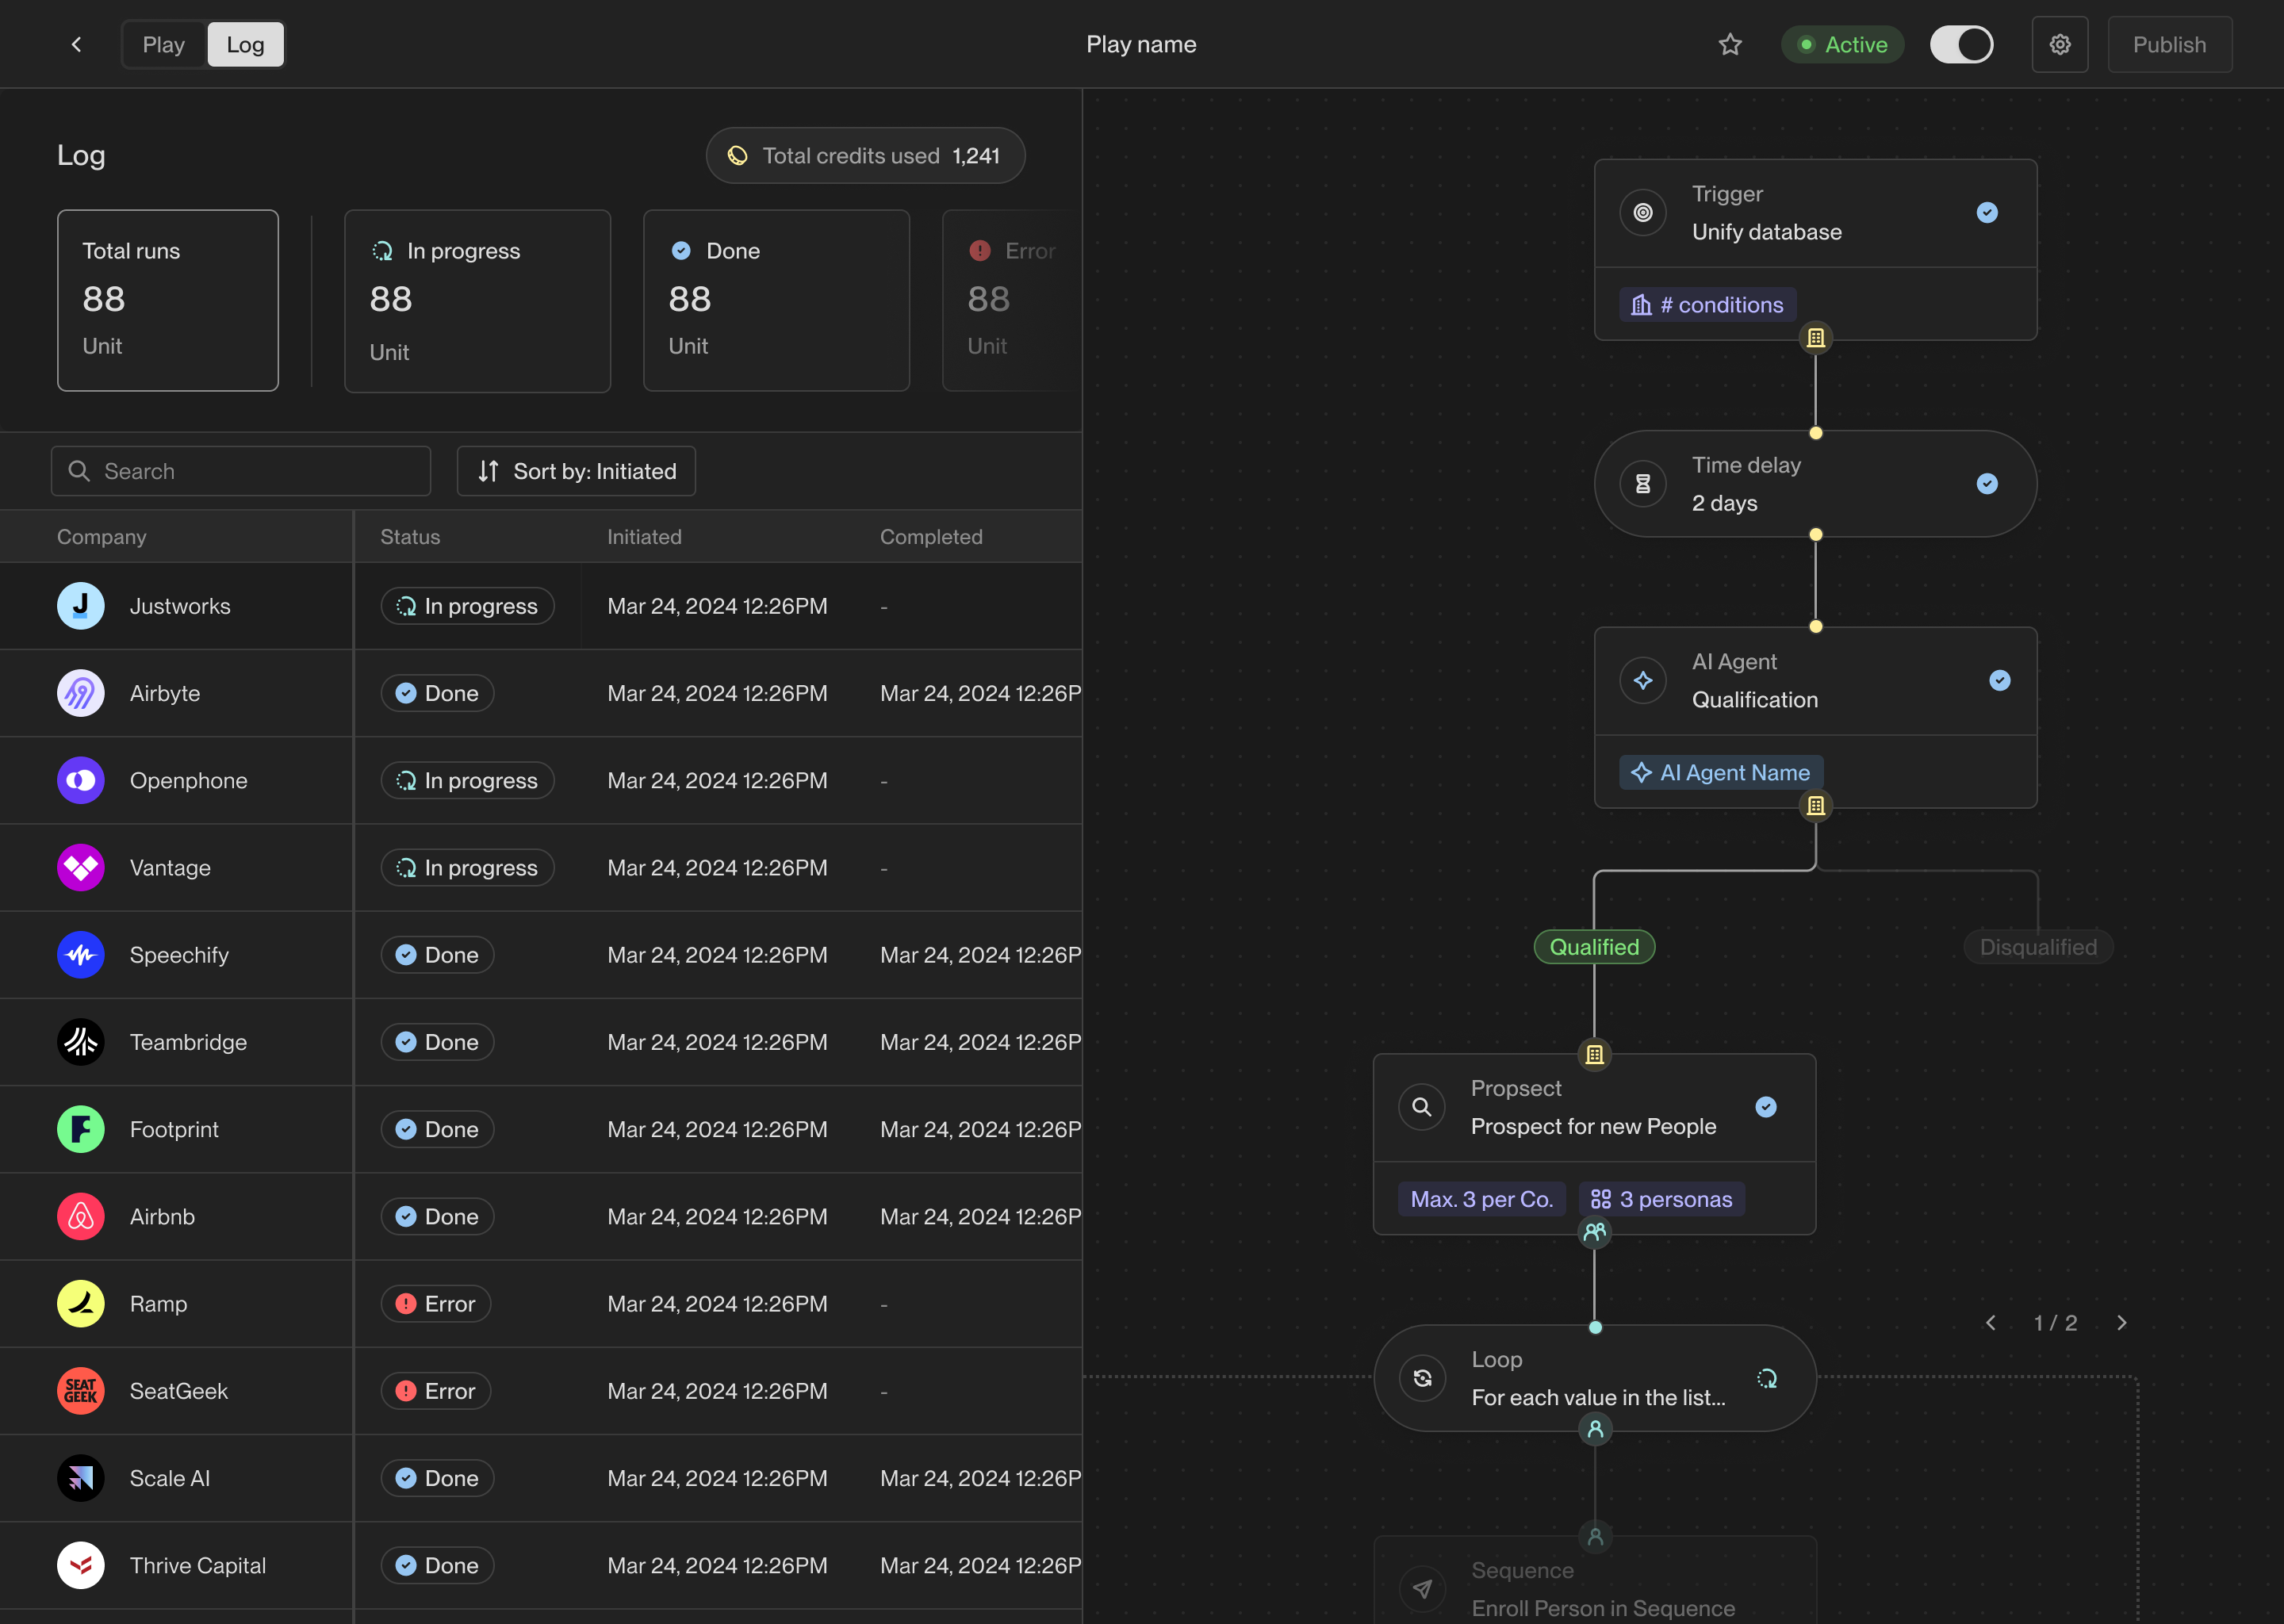
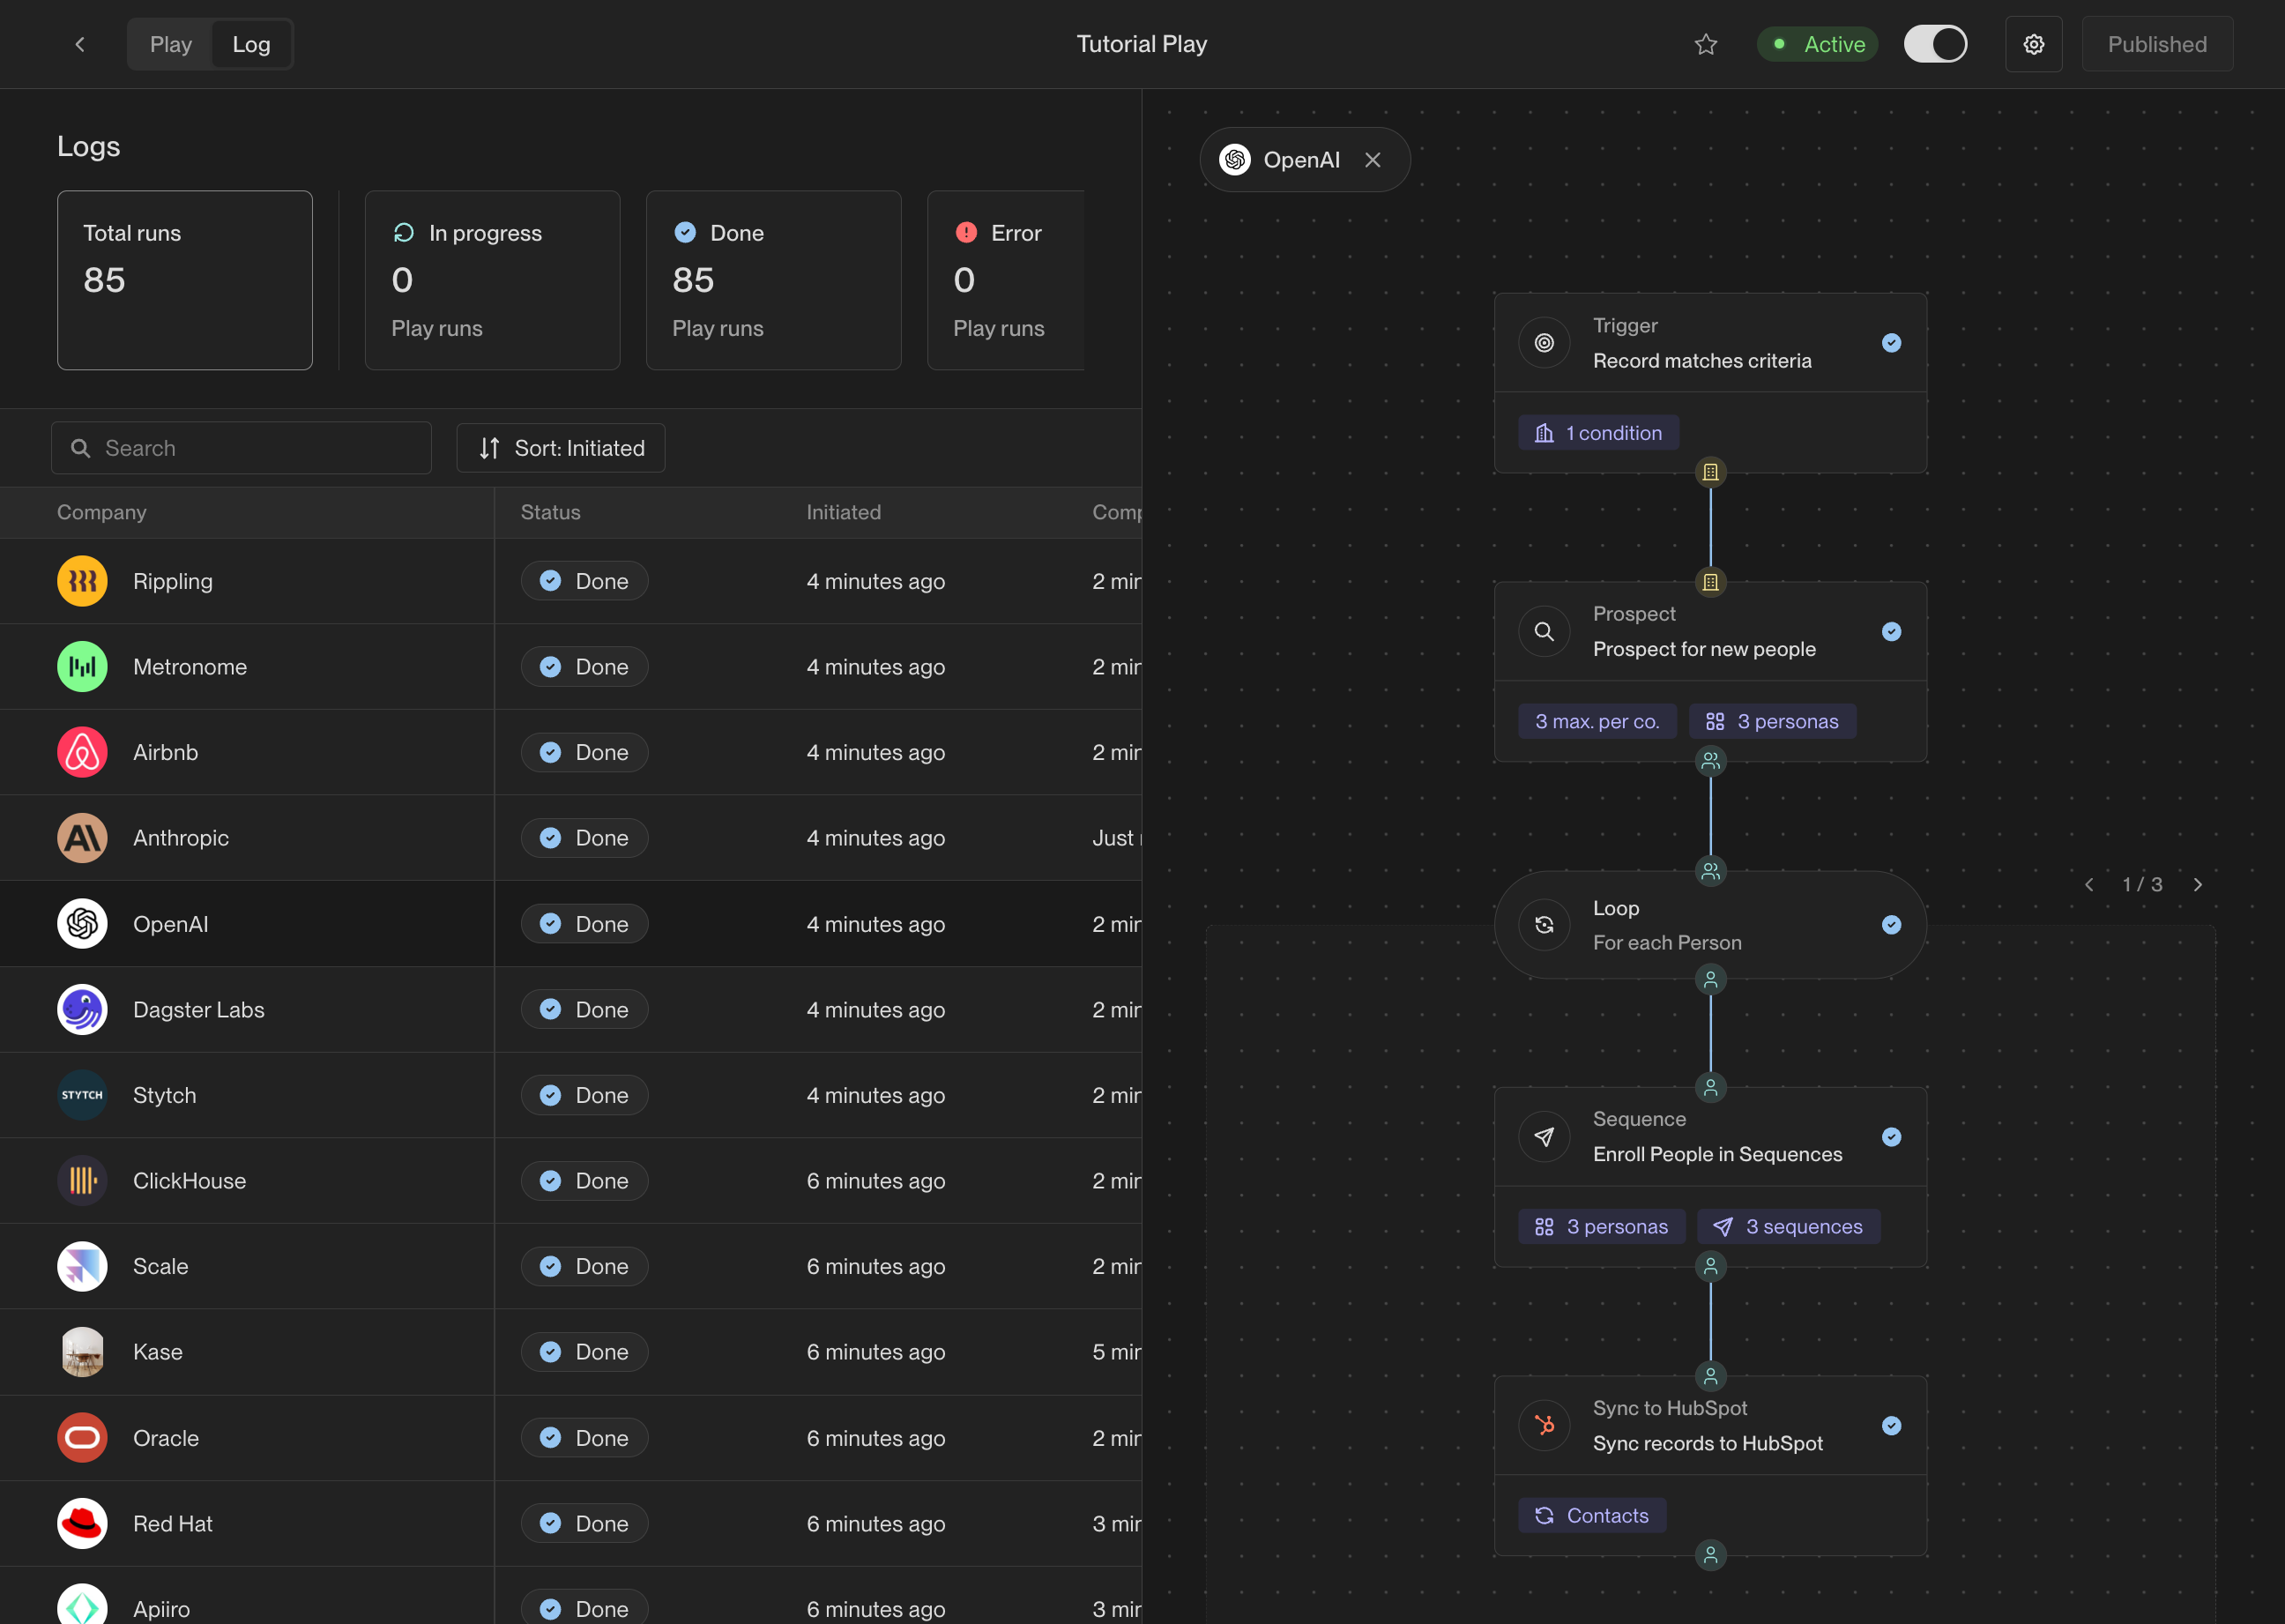
One of the most popular use cases for Plays is to find prospects at companies that are visiting your website and enroll them in outbound sequences. This is a great example of a warm outbound campaign that targets key decision-makers at companies showing buying intent. In this guide, you’ll create a Unify Play that runs on companies visiting your website and performs the following actions:- Prospect: Find new people at the company that match your buyer personas.
- Sequence: Enroll the new prospects in a sequence to send them emails.
- Sync to CRM: Sync newly found people to Salesforce or HubSpot.
Walkthrough
Step 1: Create a new Play
Look for the Plays tab in the sidebar and click on it. This is where you will create and manage all your team’s Plays. To create a new Play, click the New Play button.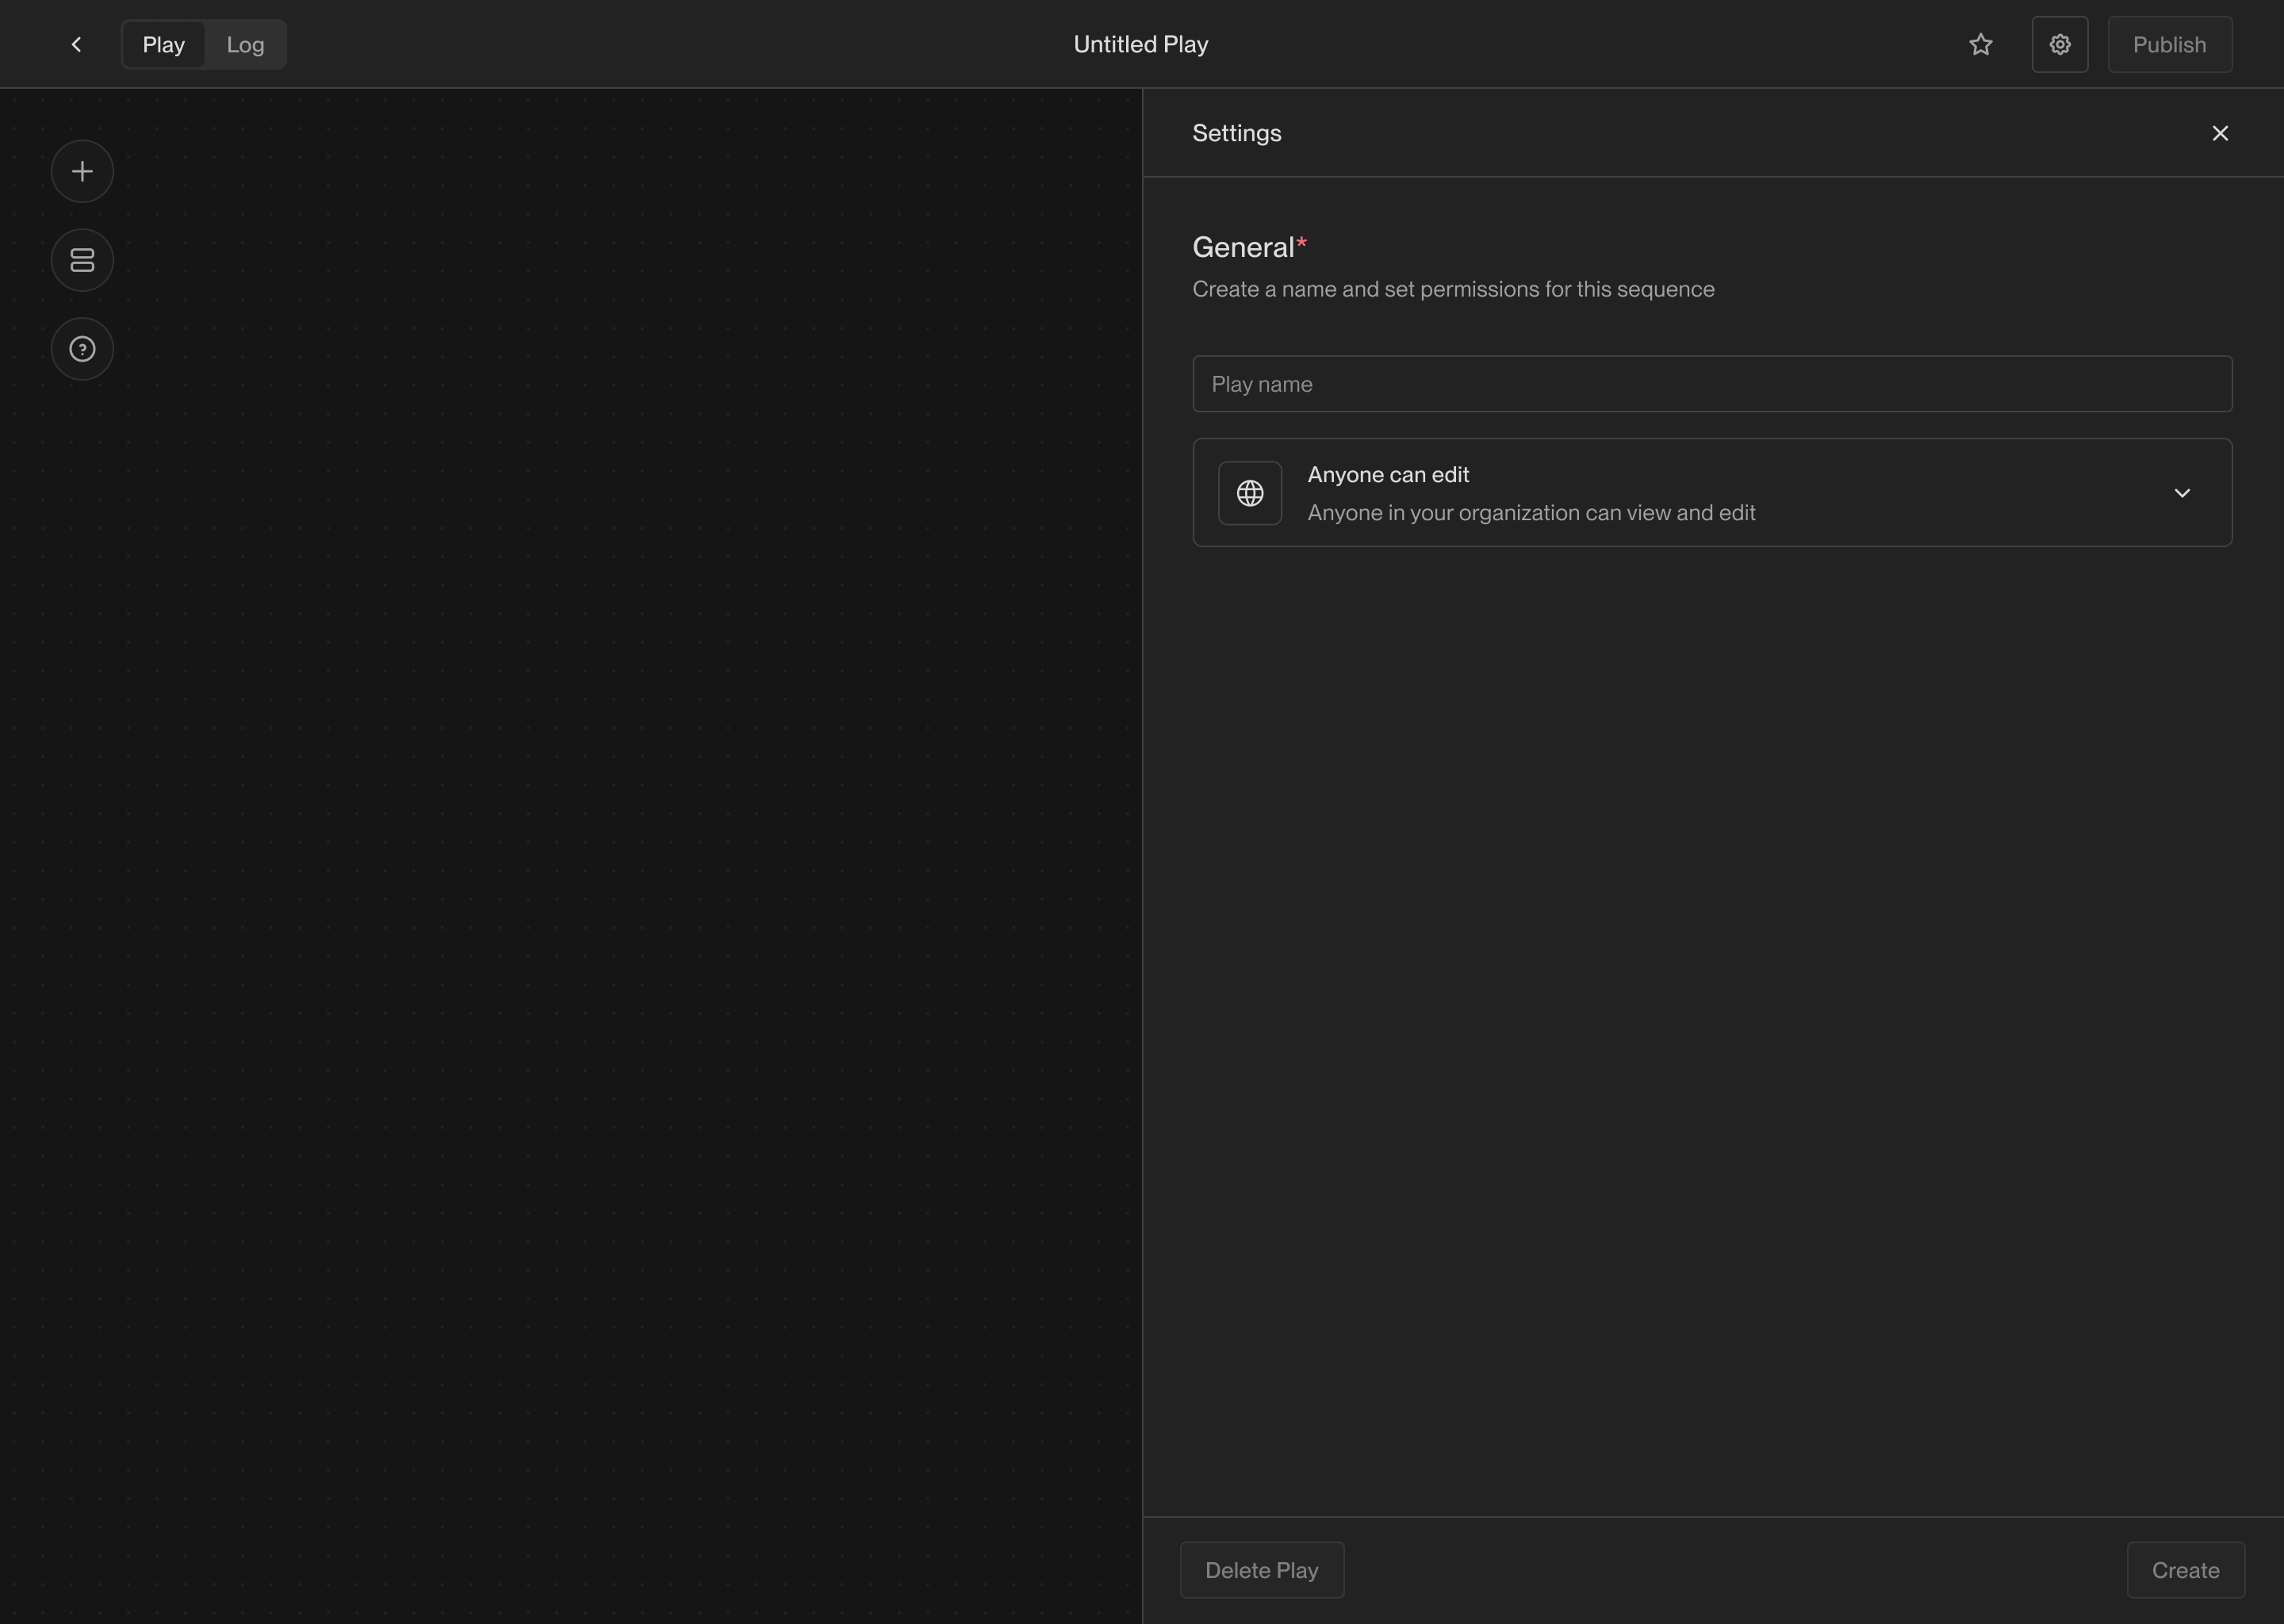
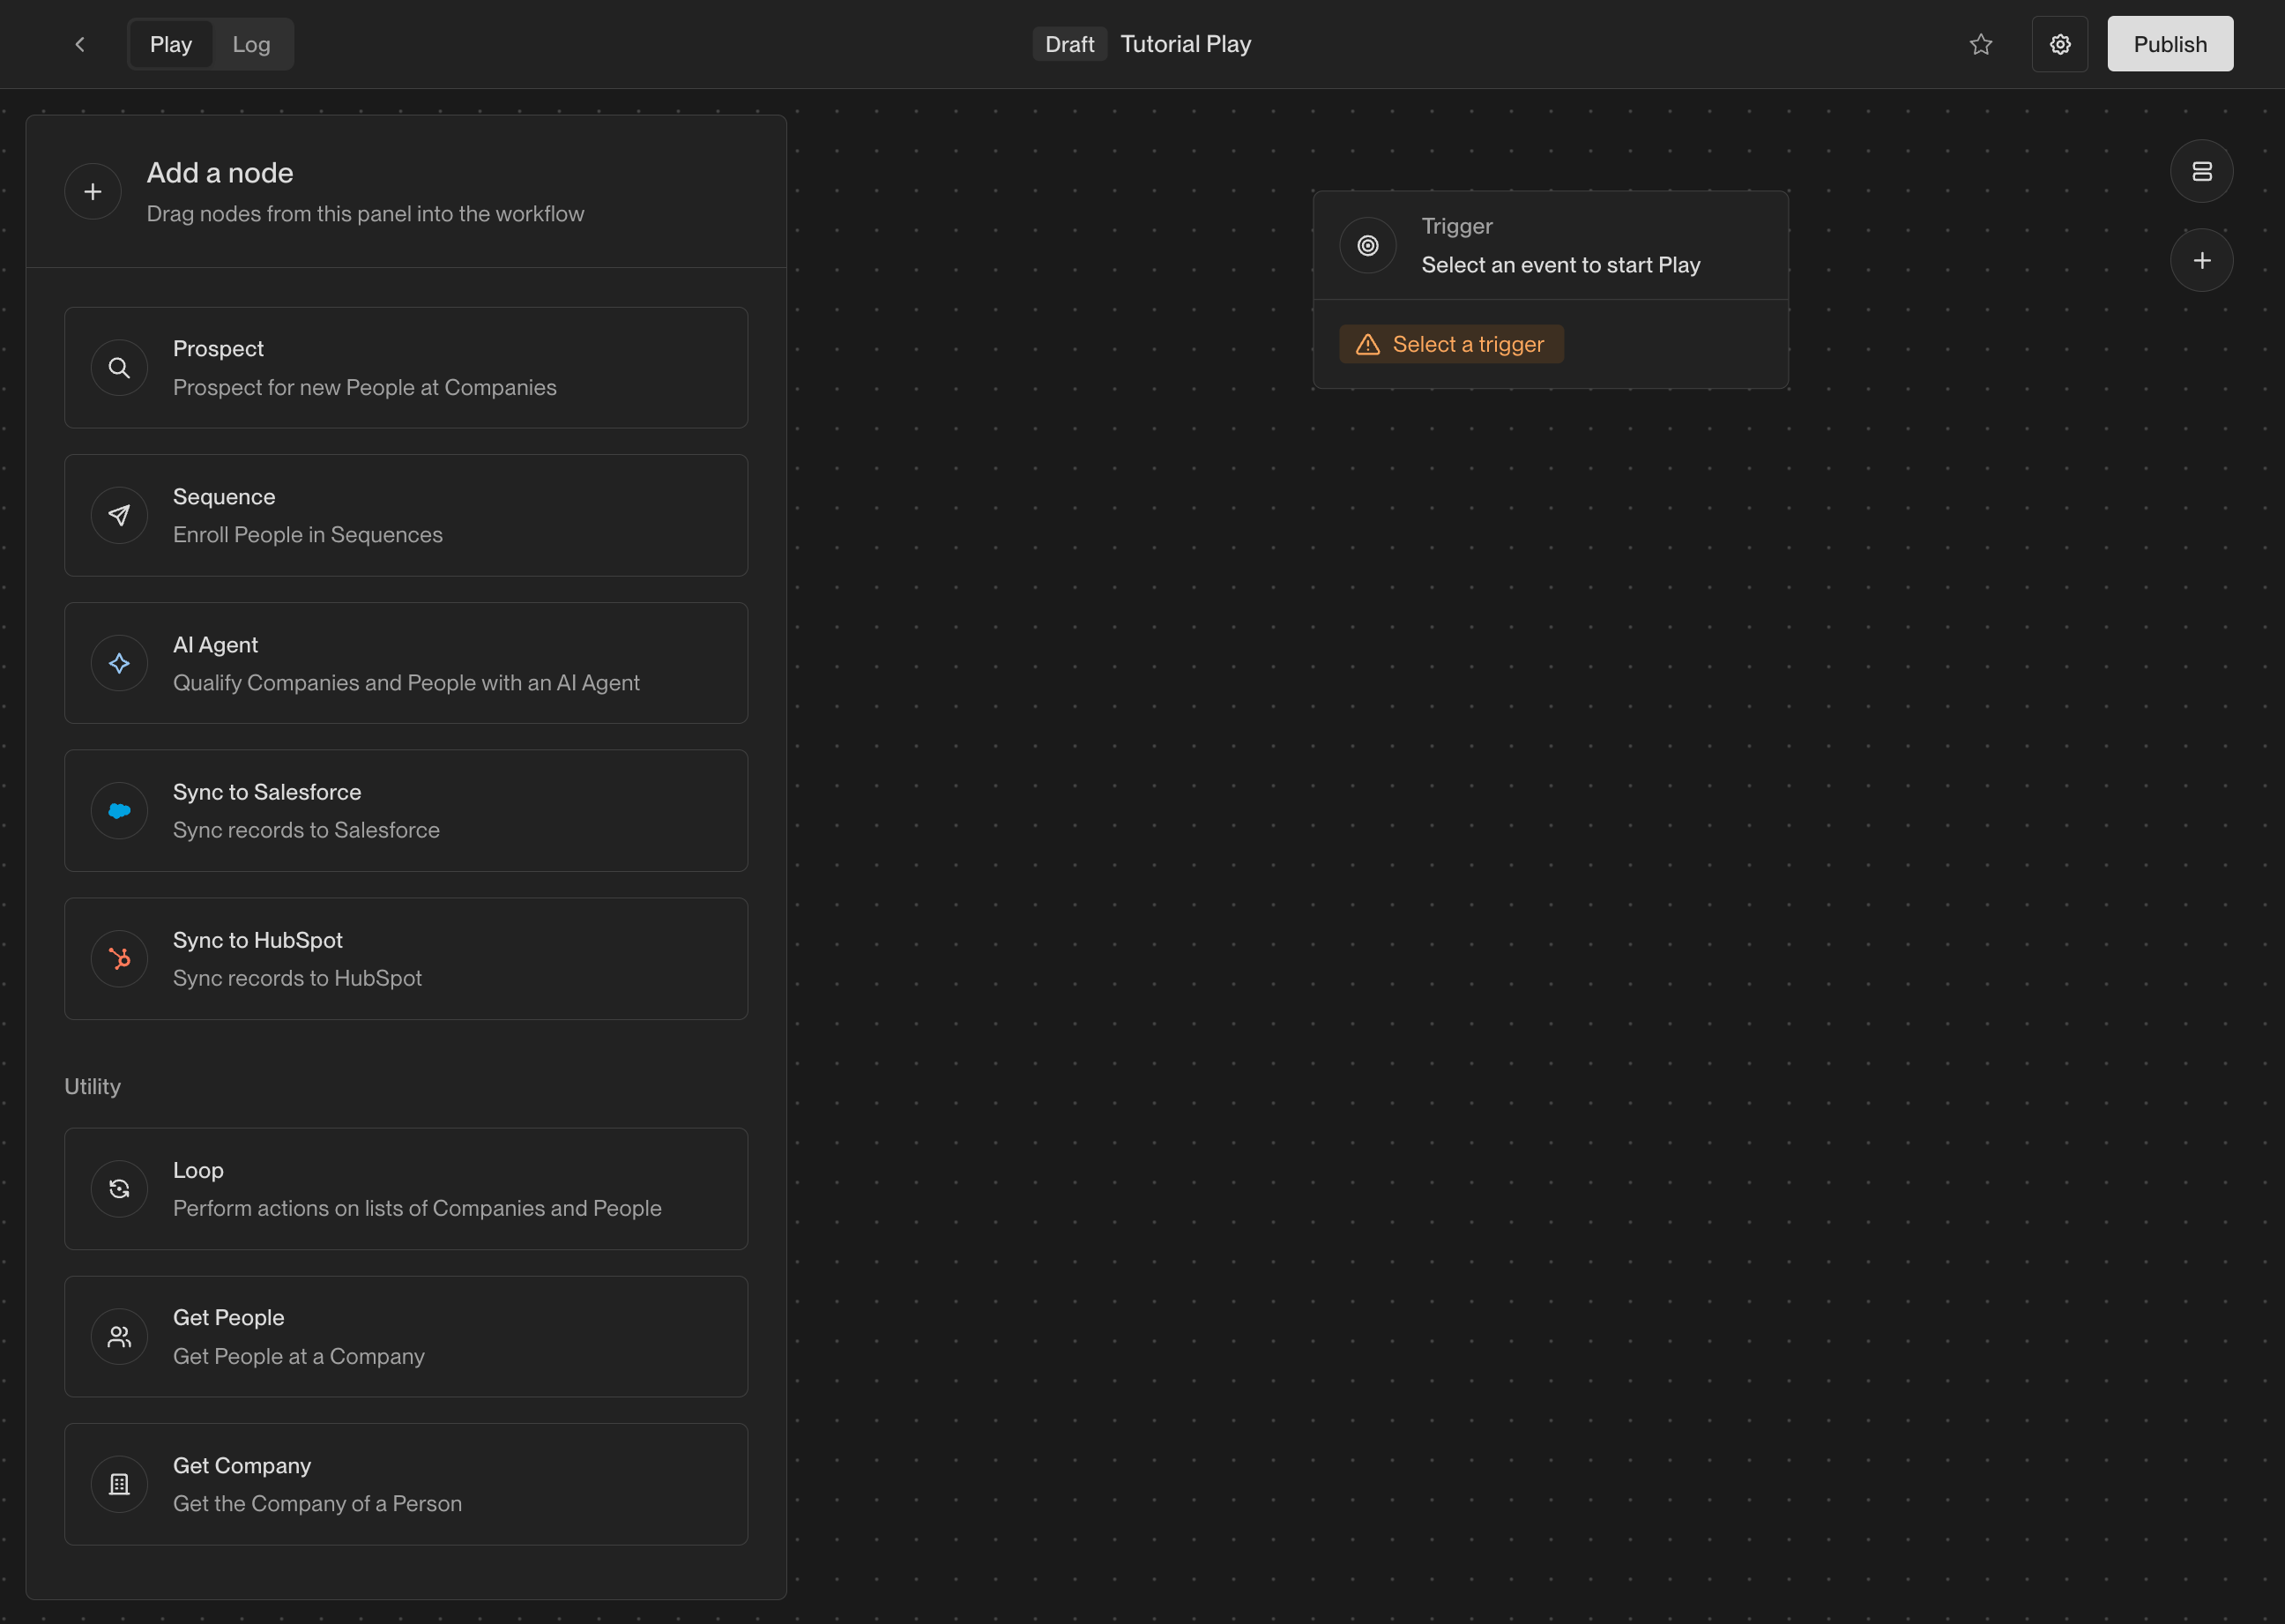
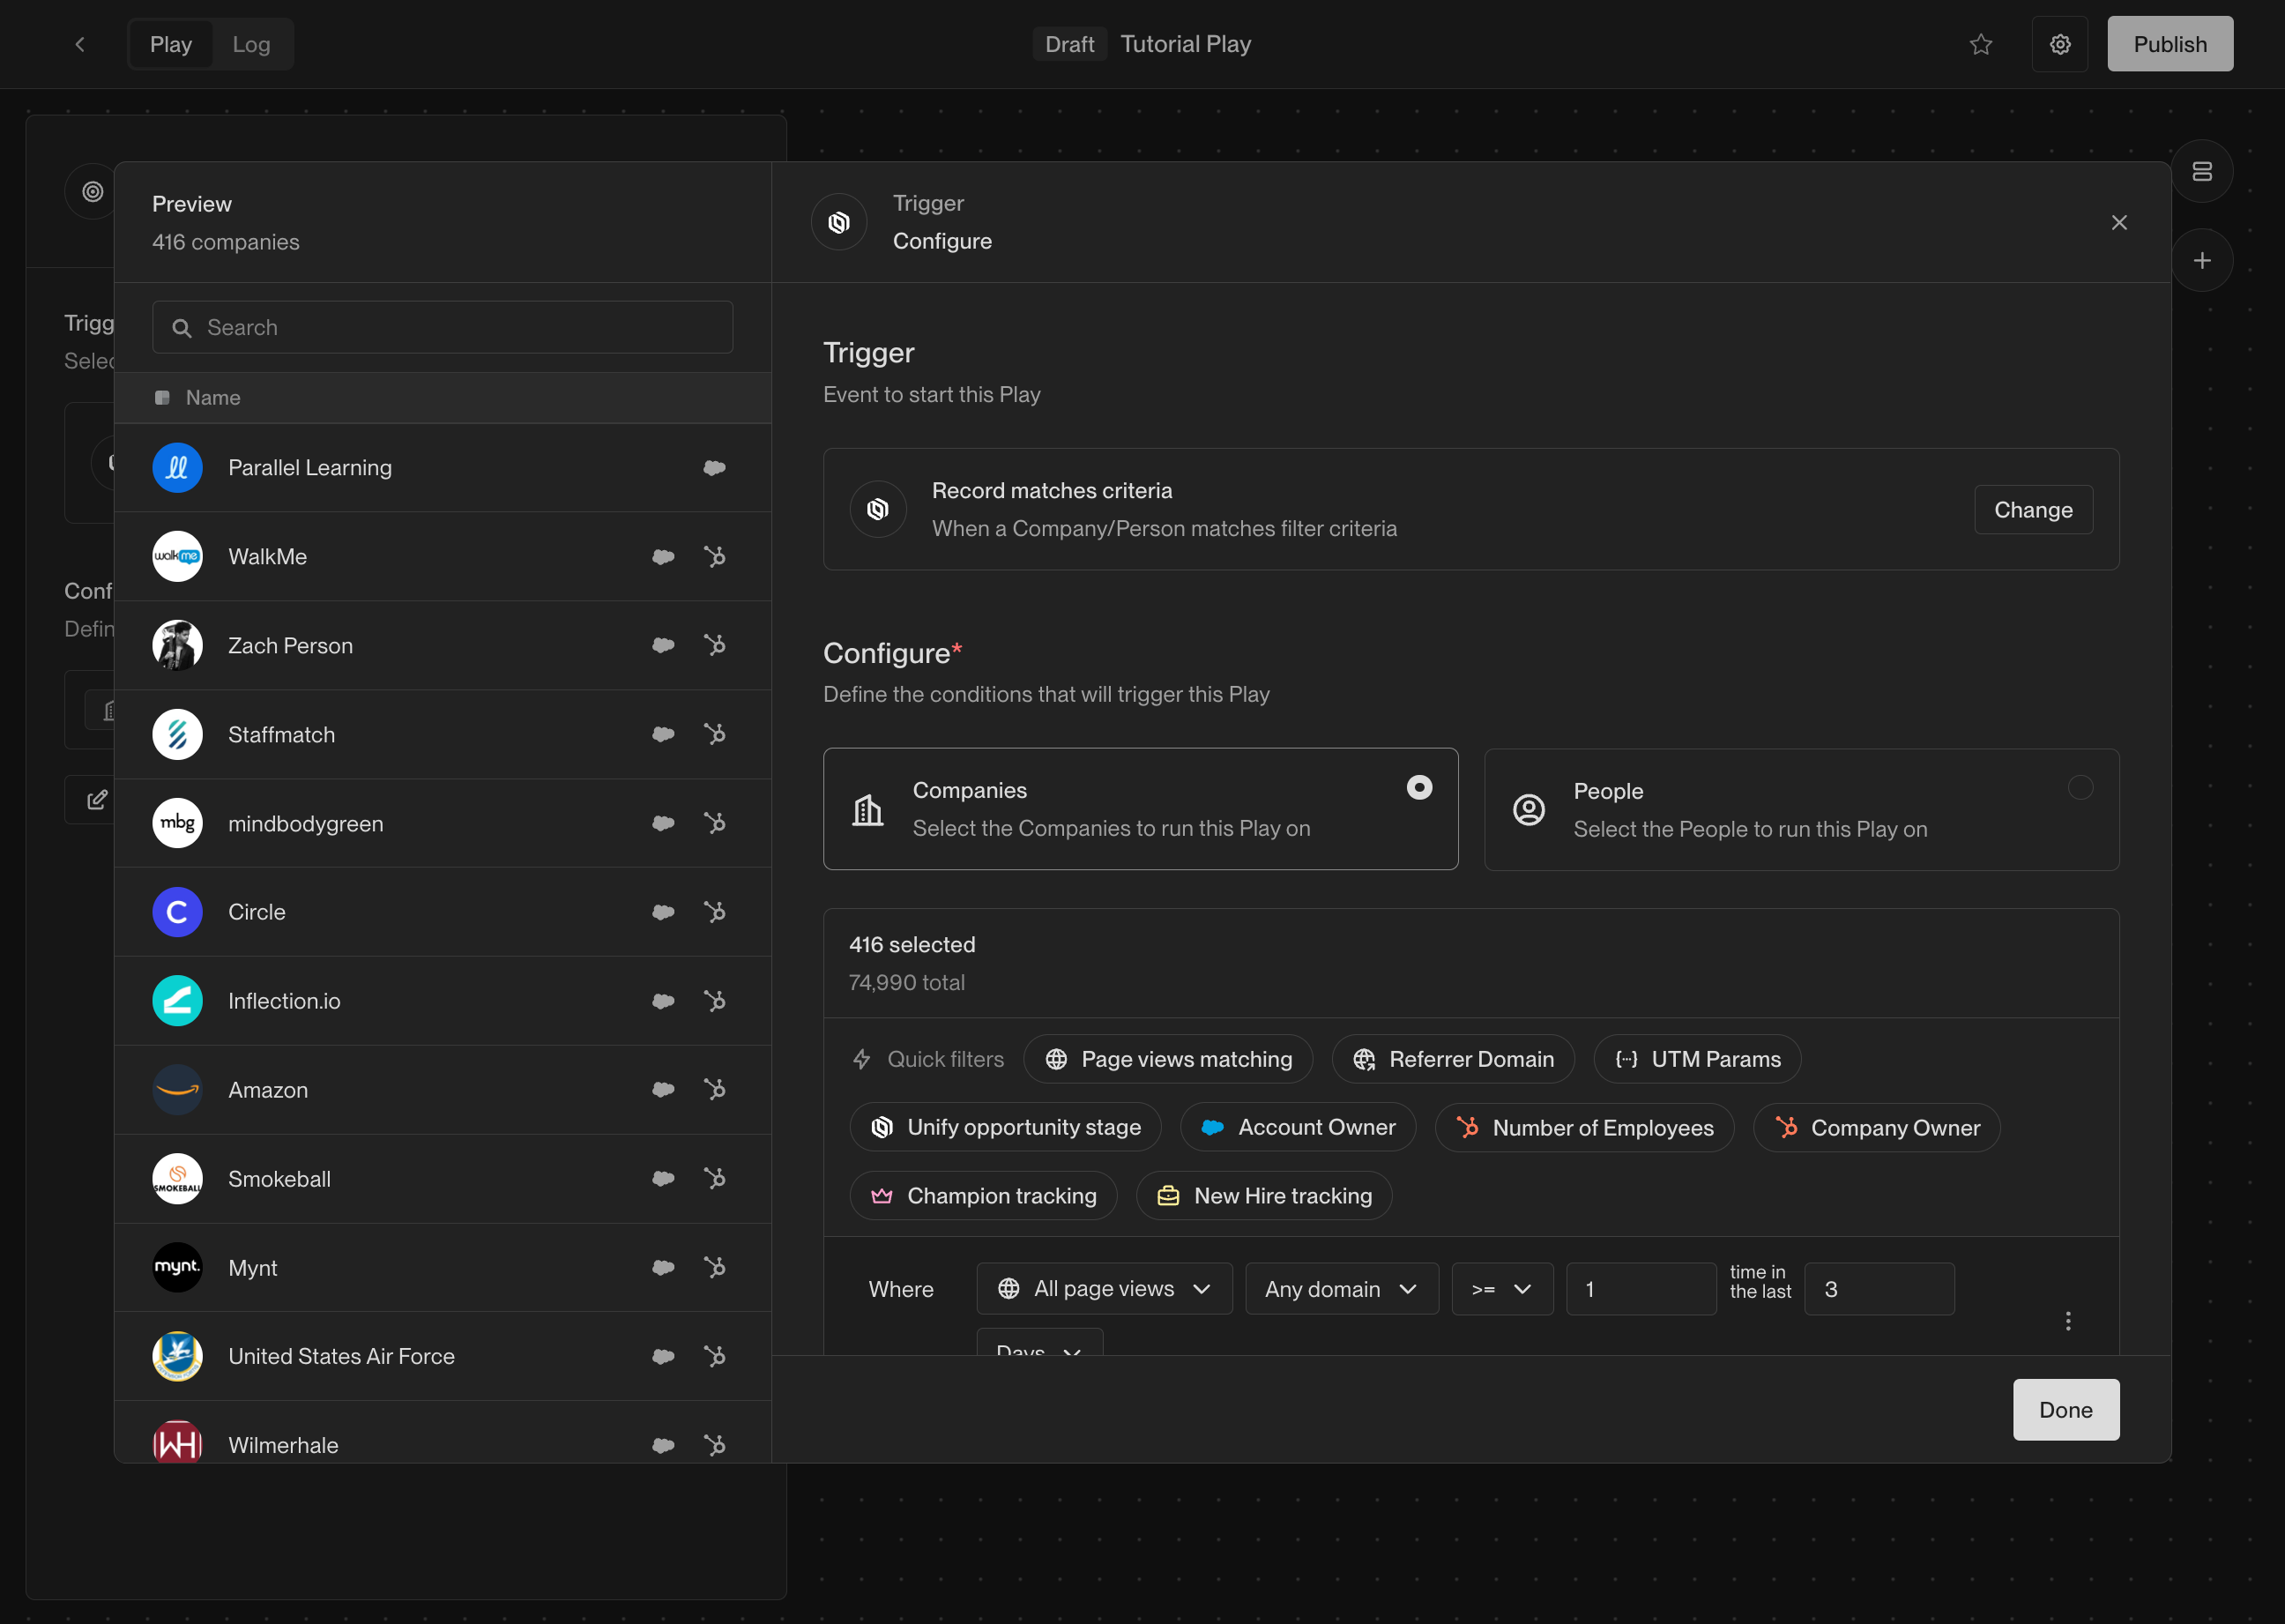
Step 2: Choose a trigger
Once you’ve created a new Play, you will see the Play Builder. The first step when building any Play is to choose a trigger. The trigger lets you specify exactly when the Play should run and which companies or people it should run on. In the center of the builder, you will see an action that says Select a trigger. Click on it to show the trigger configuration panel. For this Play, choose the Website visitors template.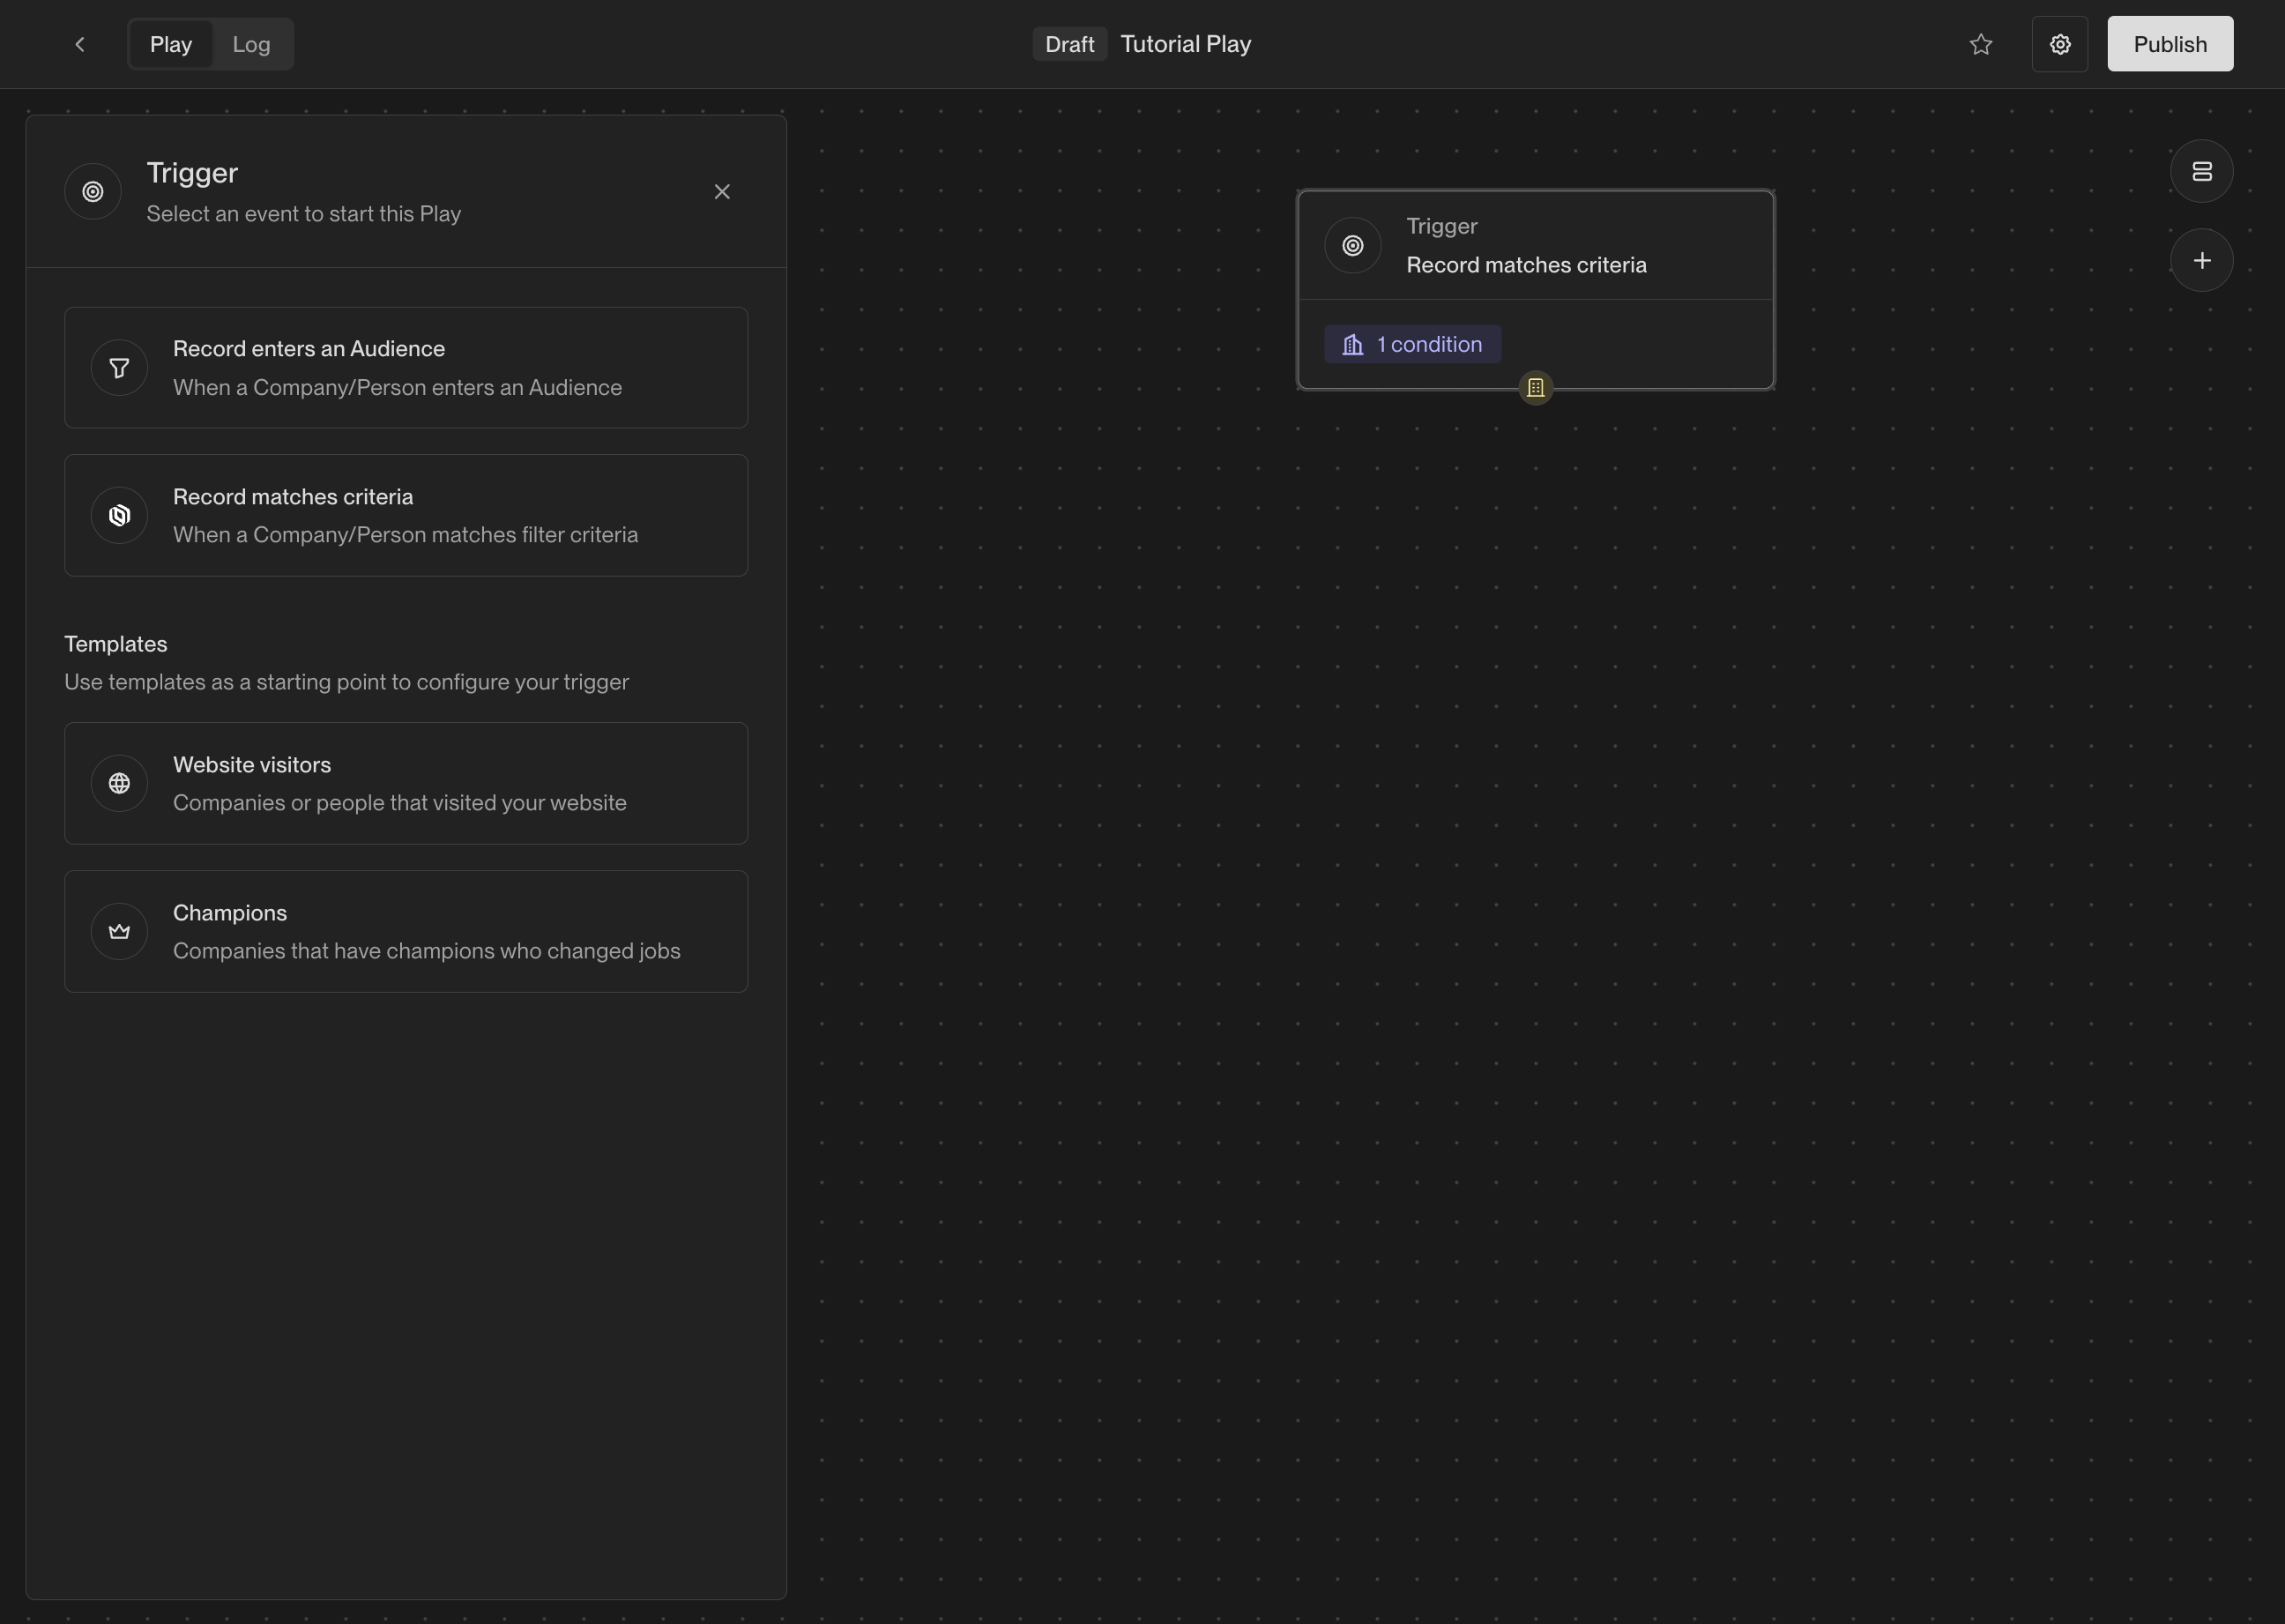
Step 3: Add actions
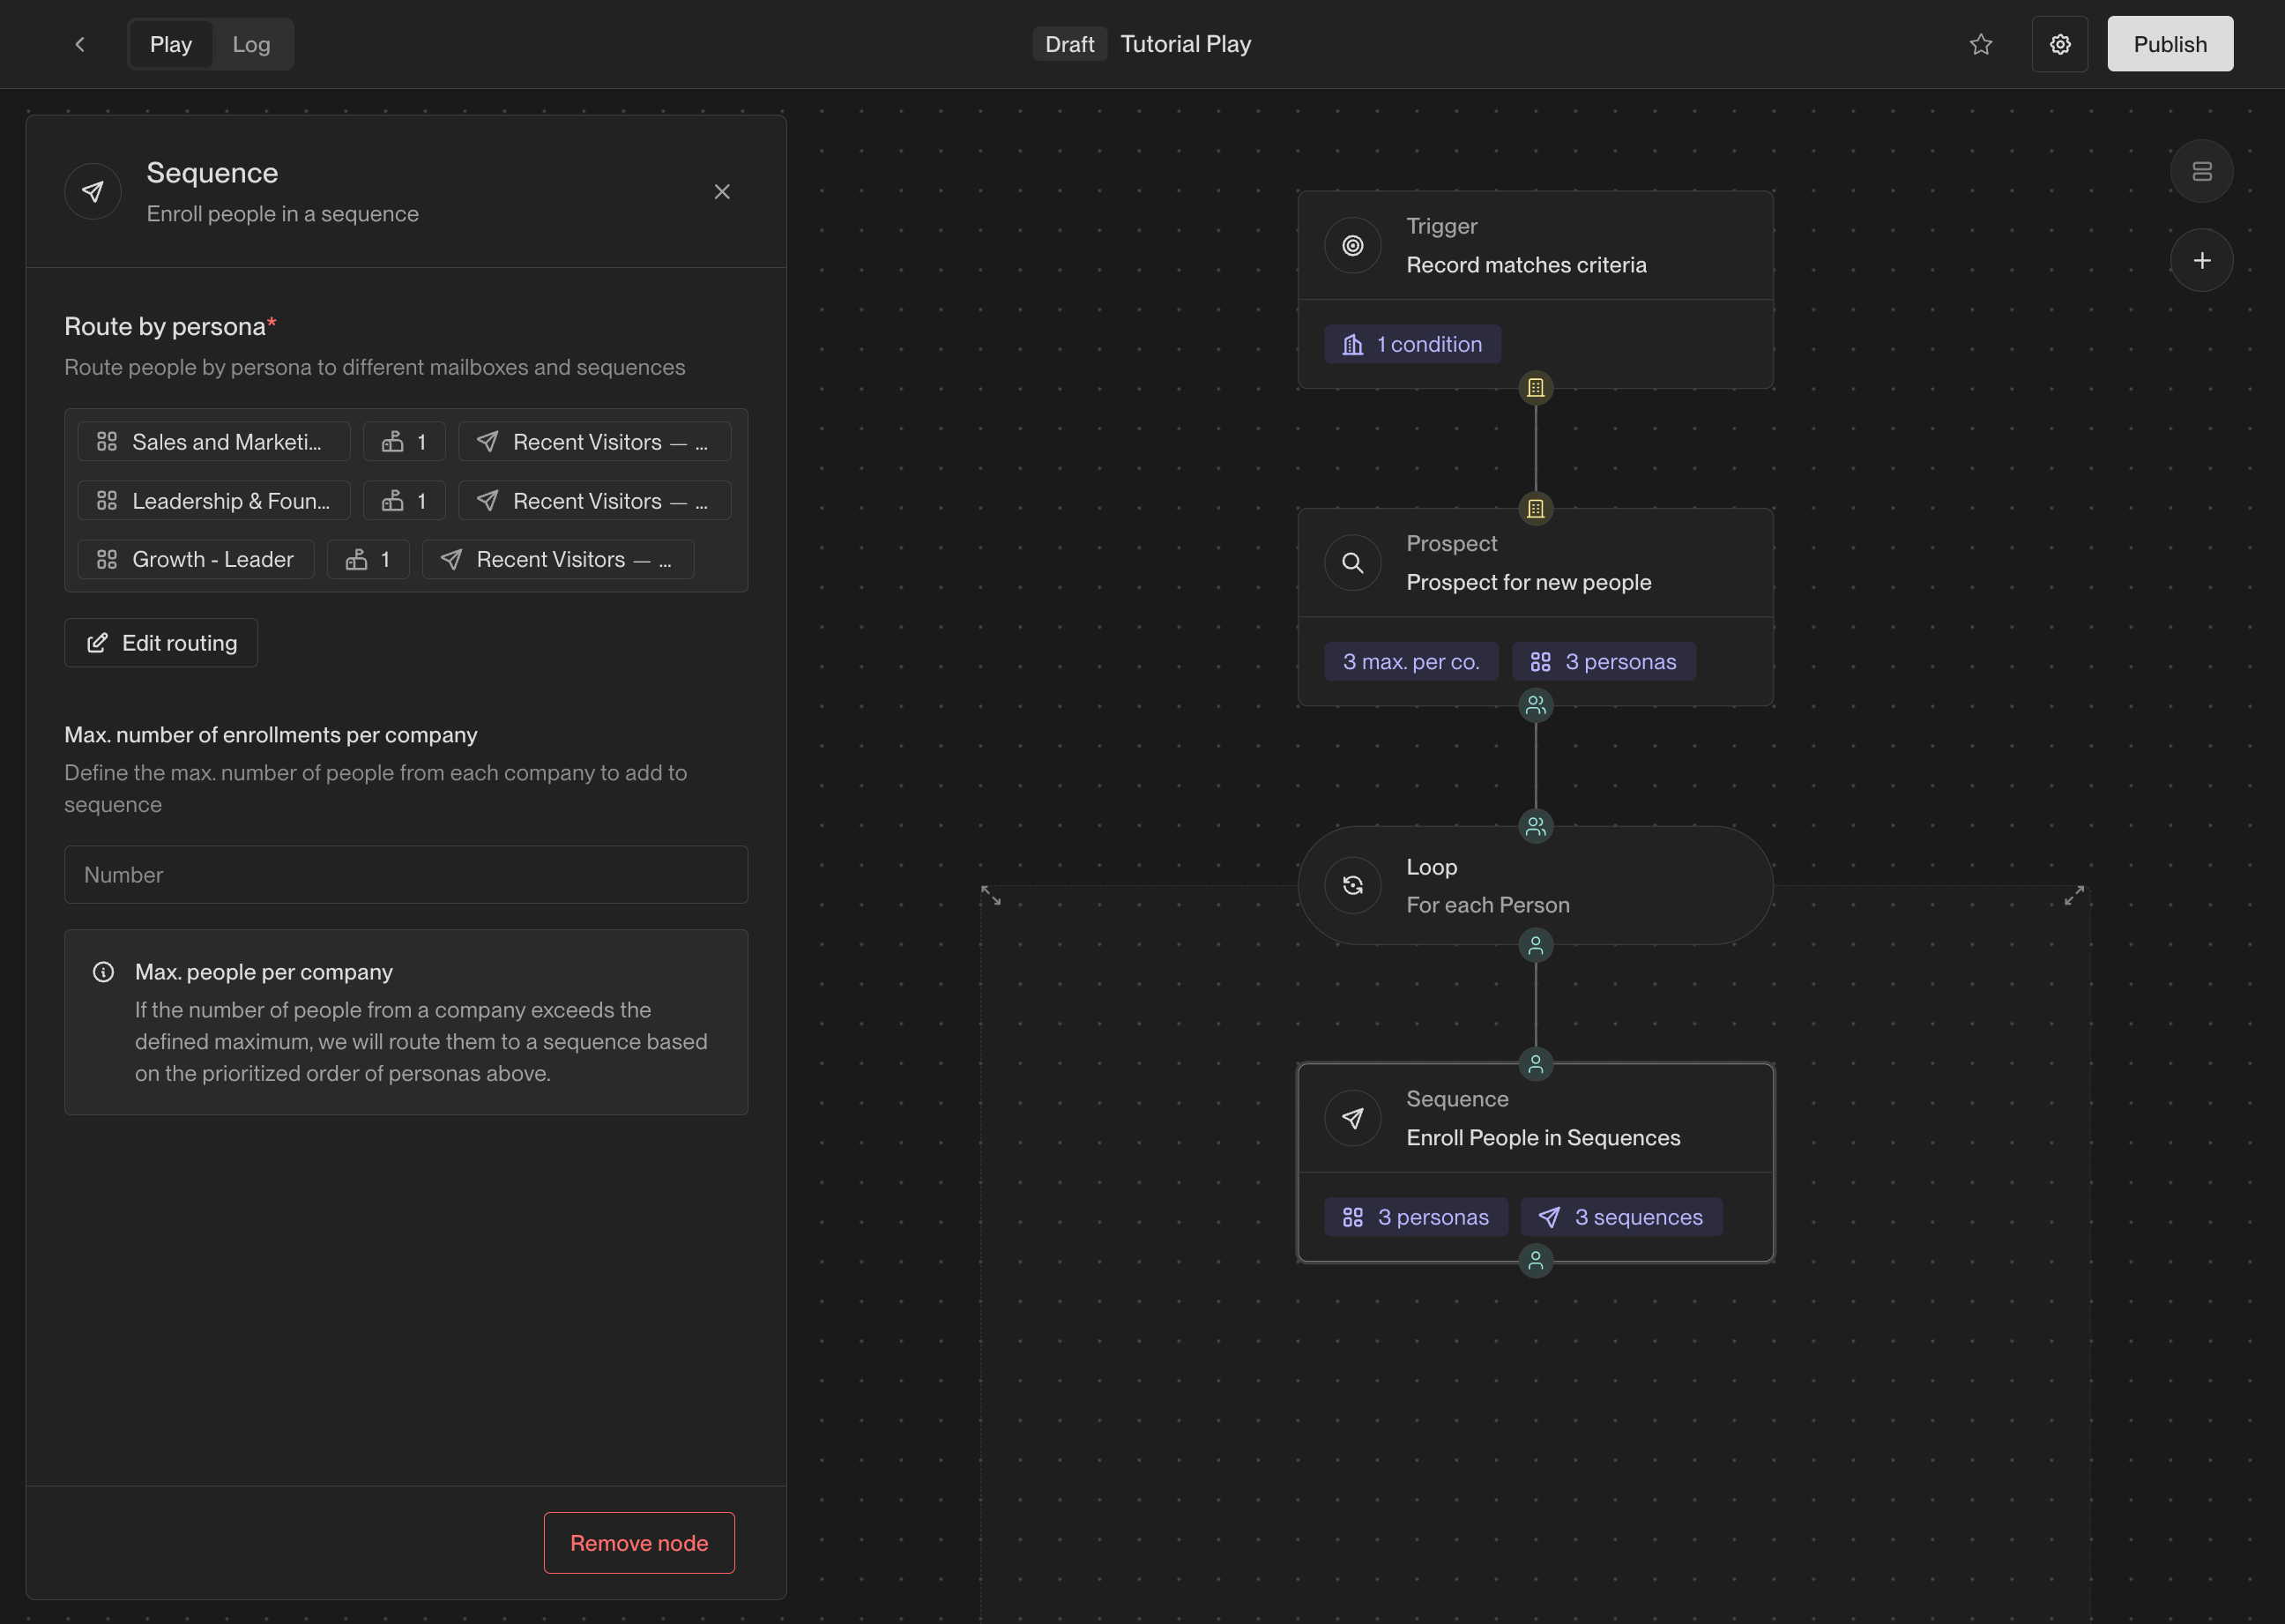
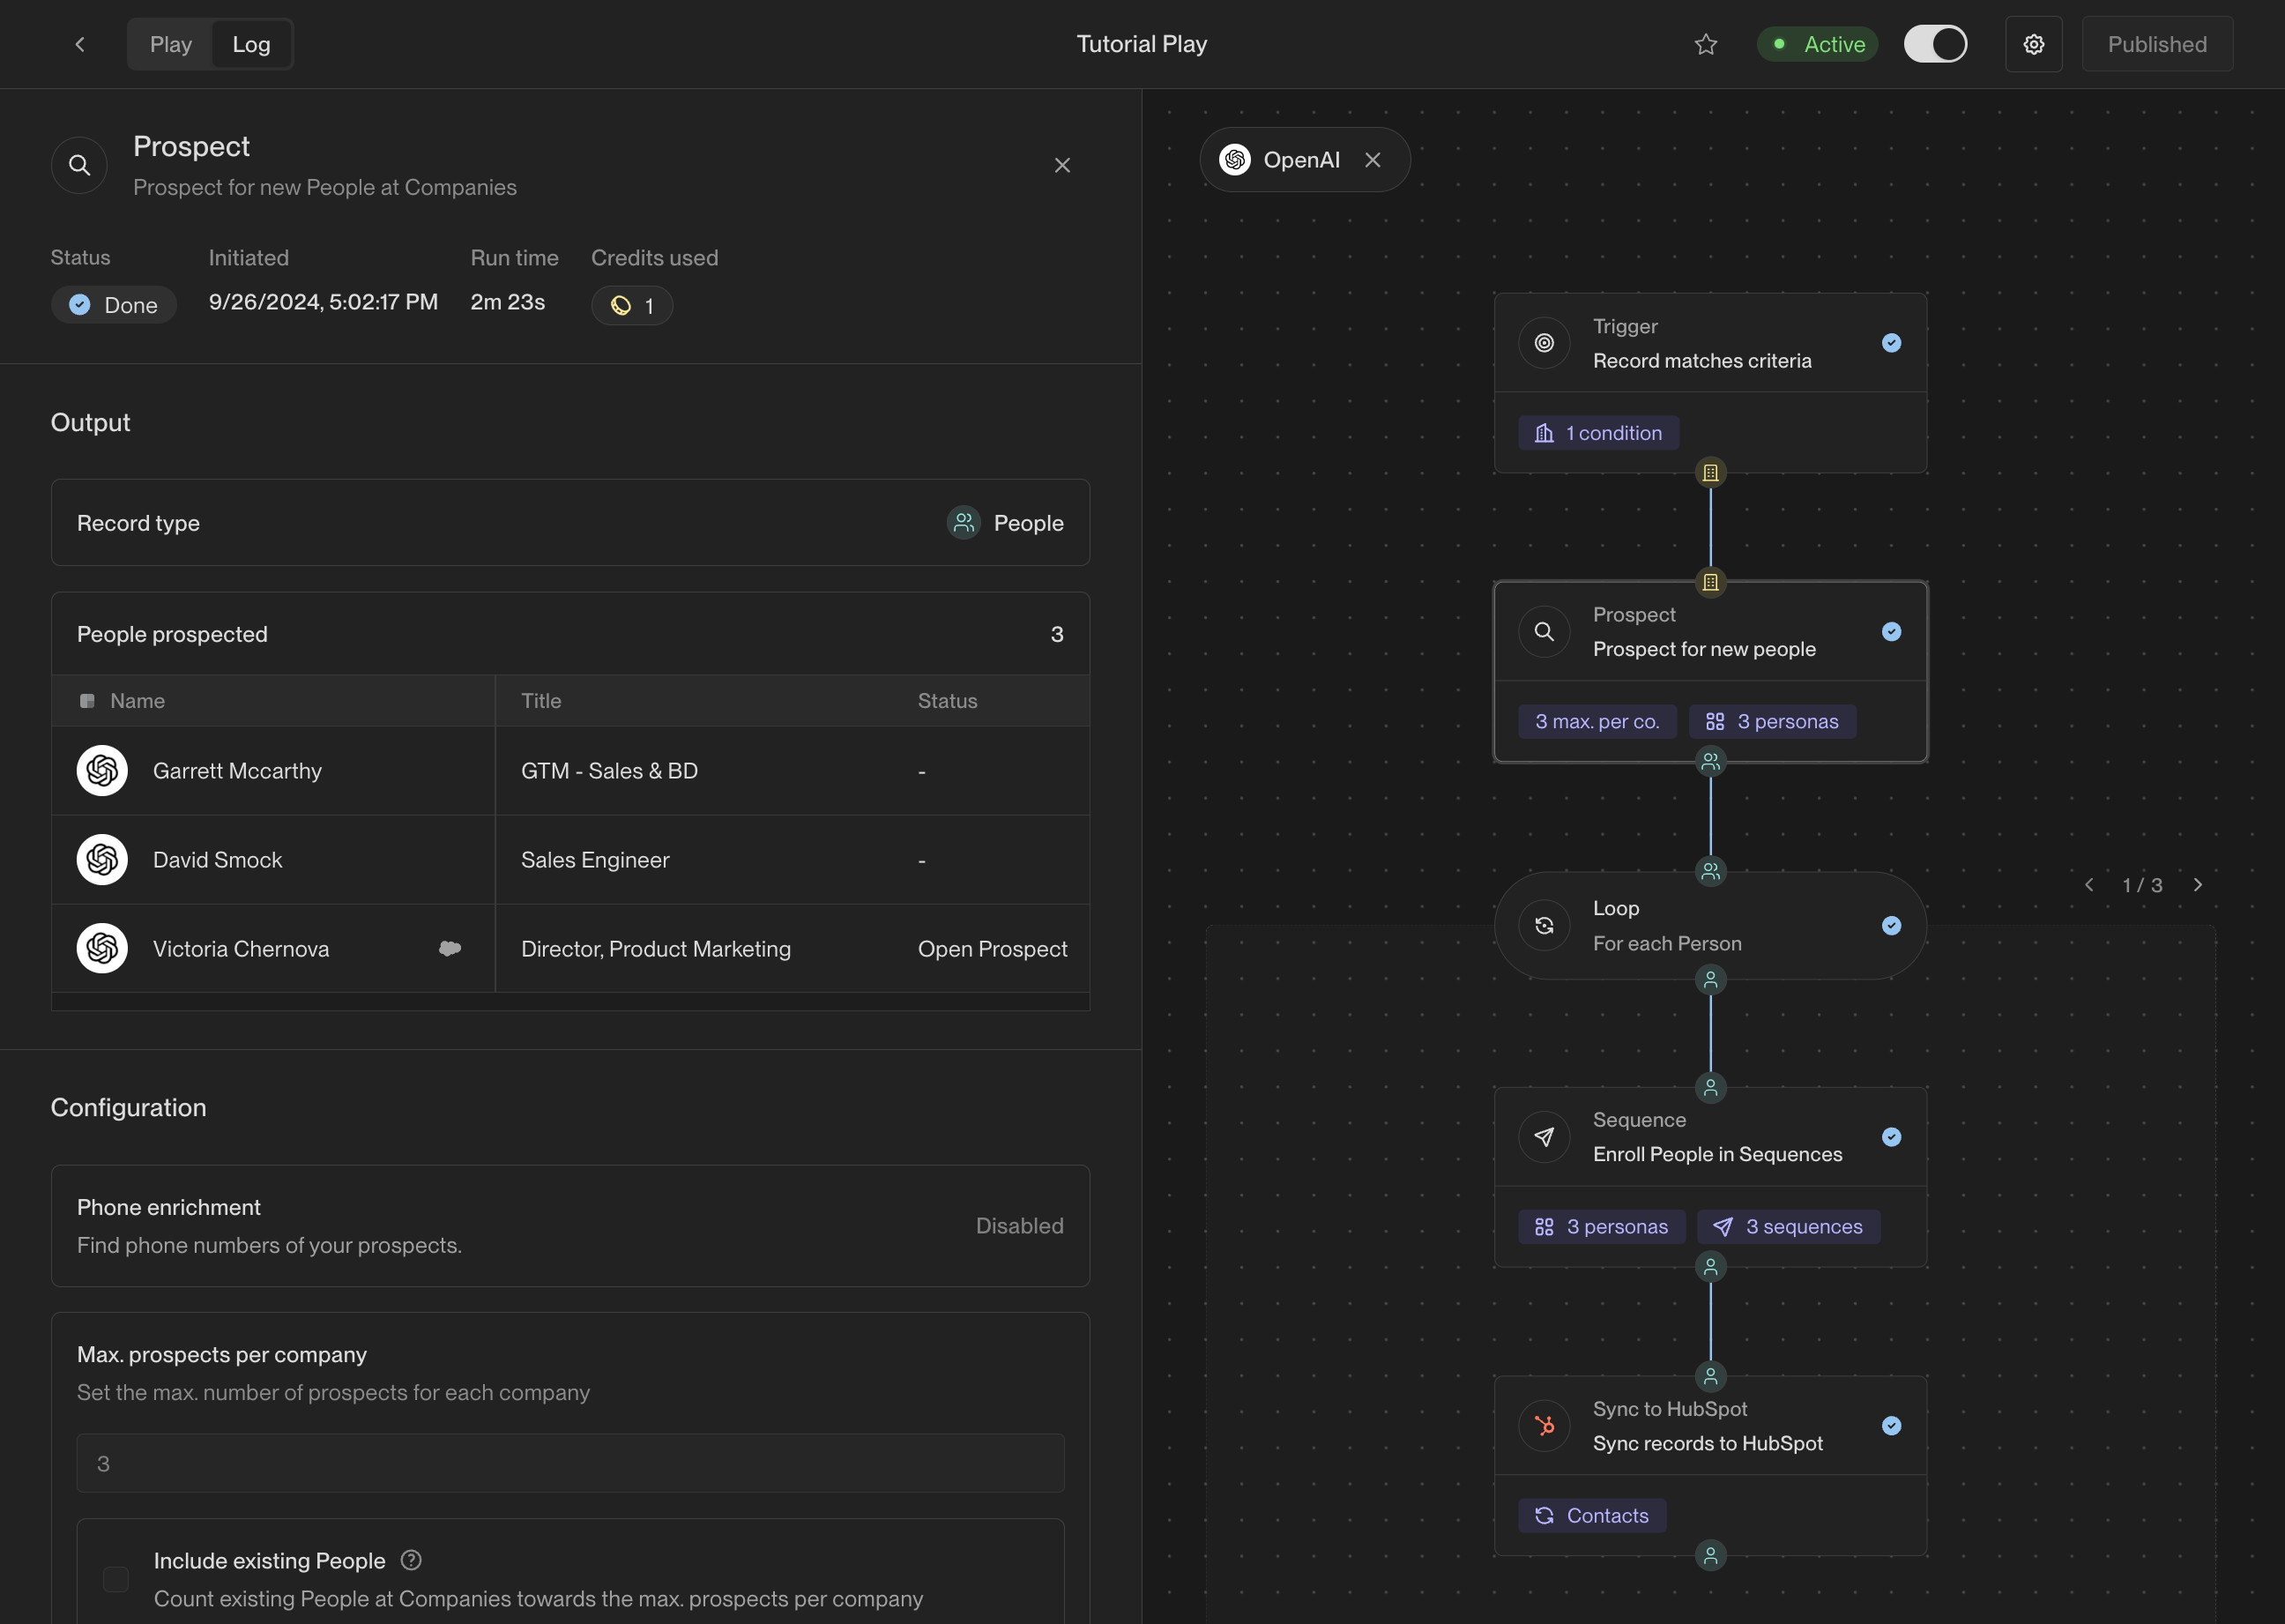
Now that the trigger has been selected, it’s time to start adding actions. There are many actions to choose from, and you can configure them in countless ways. For this Play, we’re going to start simple and add three actions.Prospect for people
Start by adding a prospecting action. This action will take the company coming from the trigger and search for relevant prospects. Drag the Prospect for People action from the action list and drop it into the builder.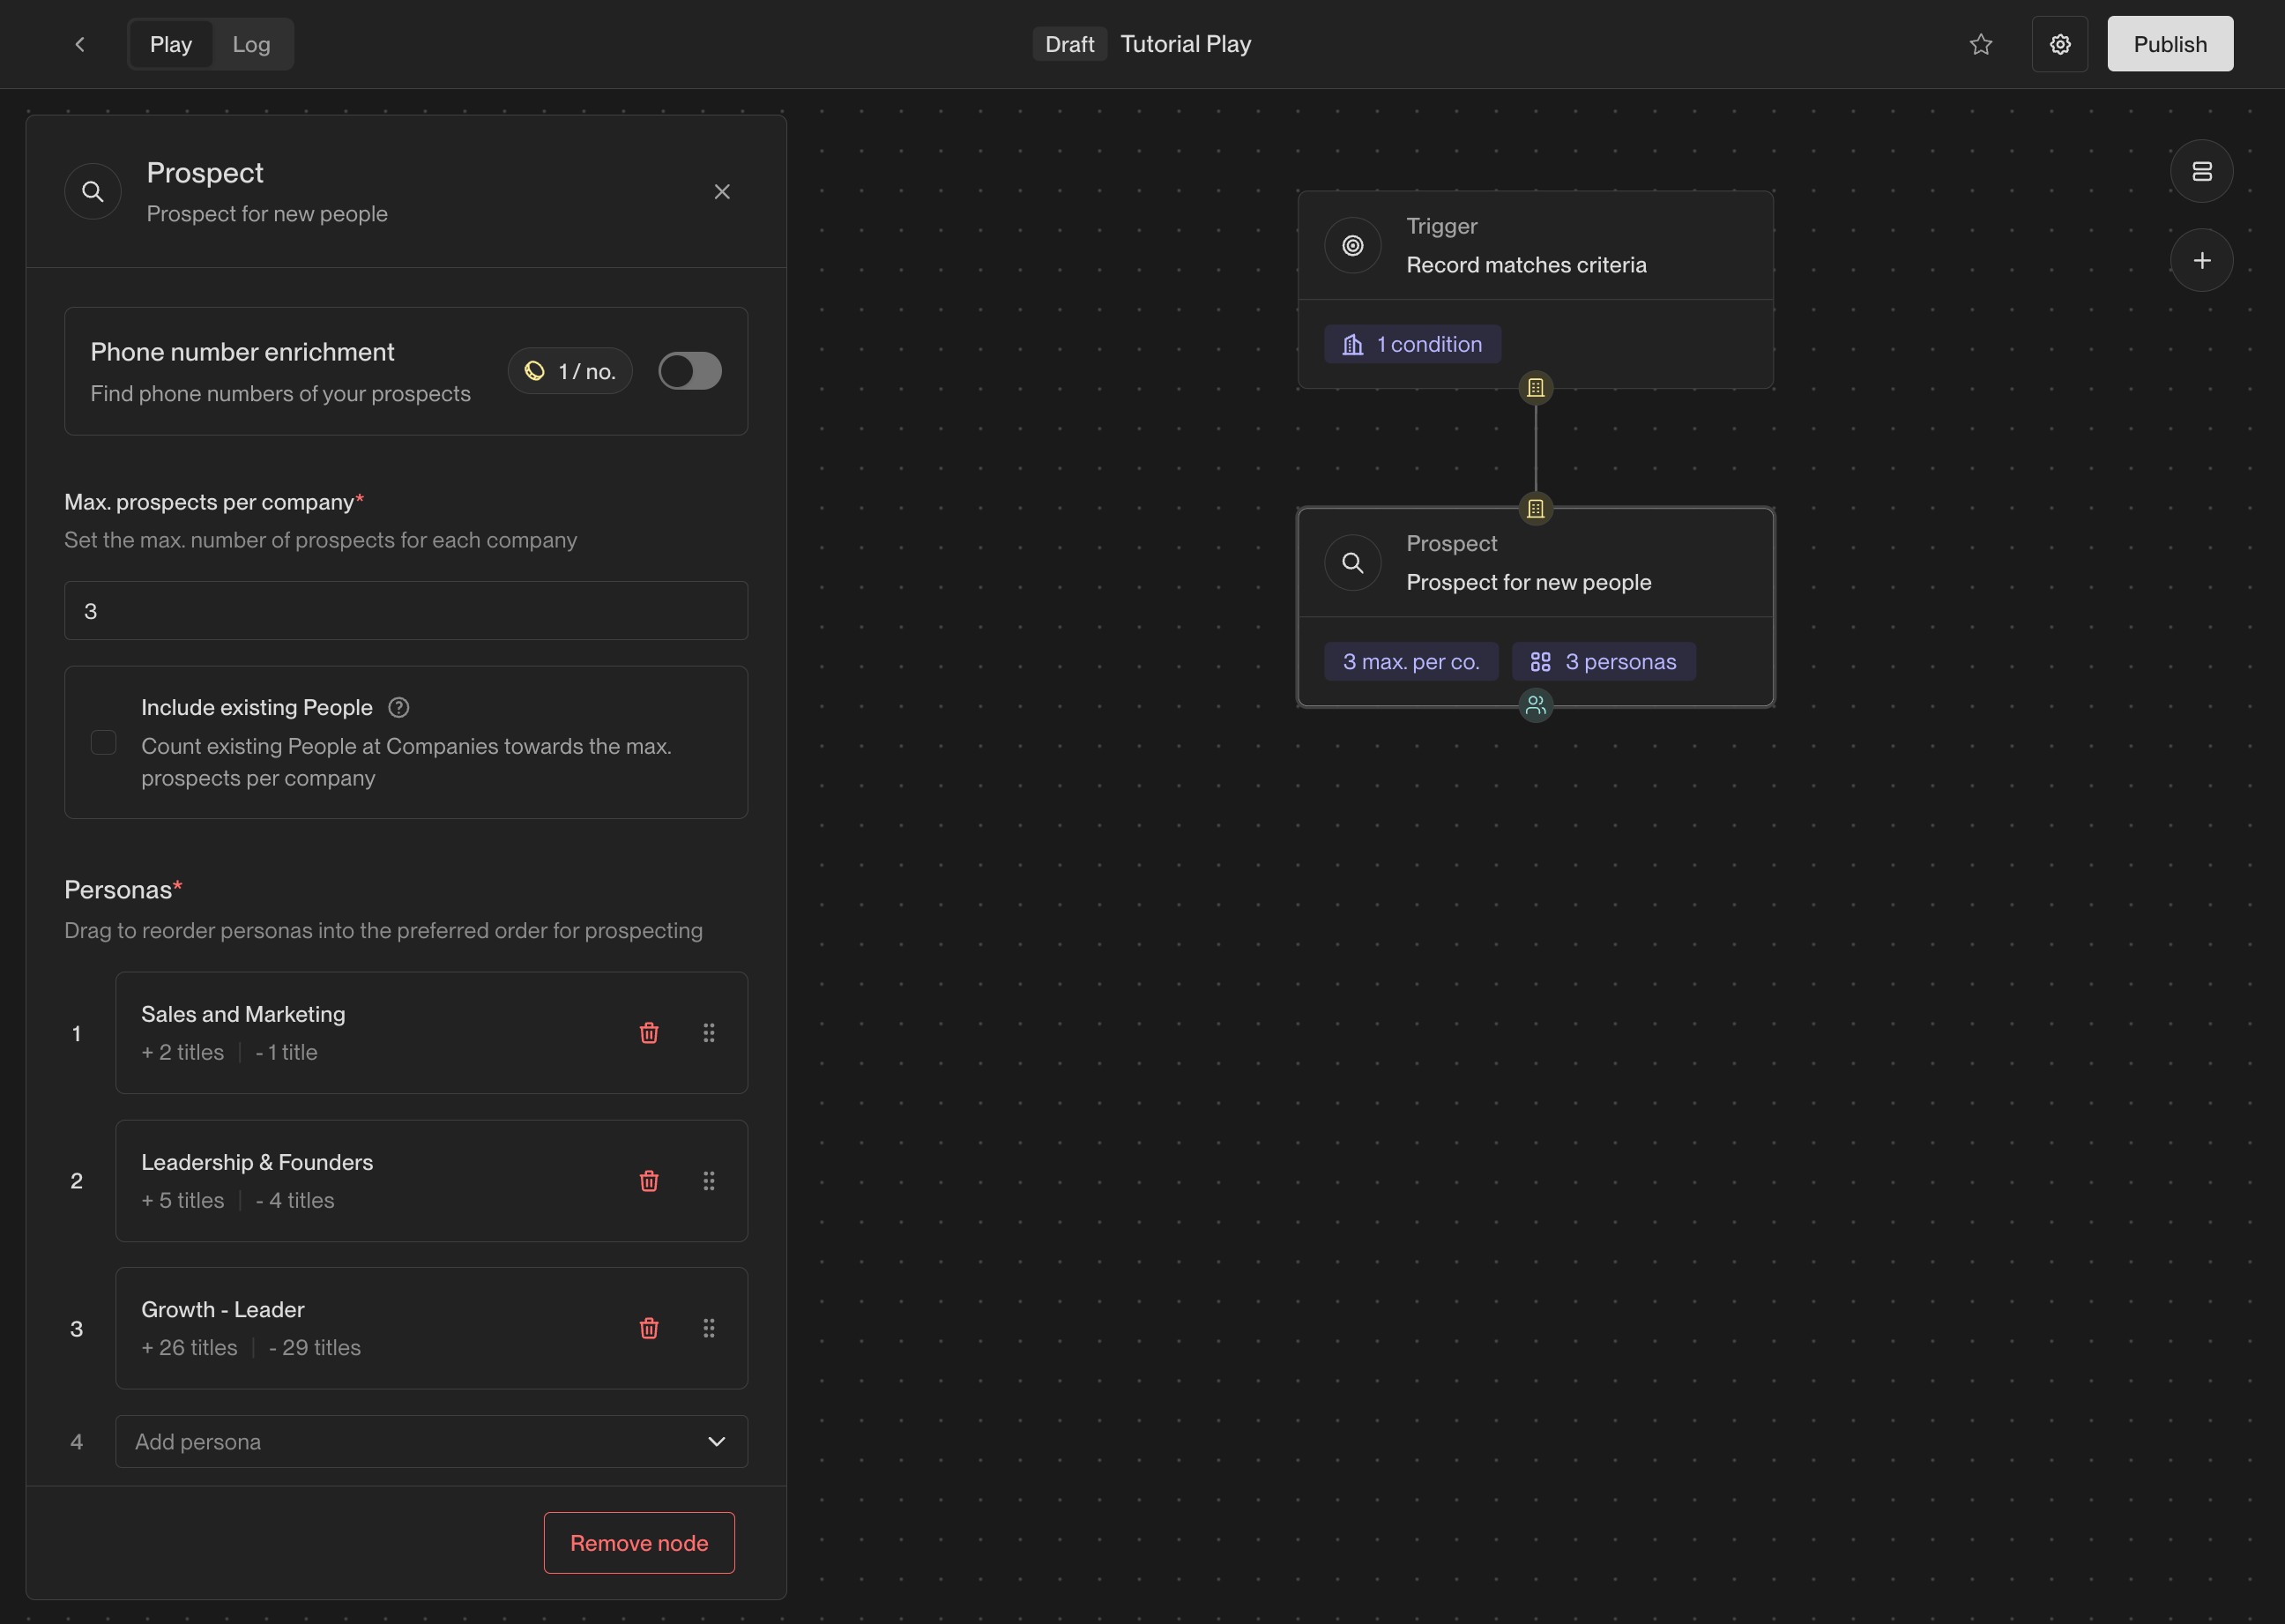
- Max. prospects per company: This is how many prospects you want to find at each company. We recommend starting with 2-4 prospects per company.
- Personas: These are the personas to search for. You can select from existing personas or create new ones. Unify will find people matching these personas in order, so list them in order of preference.
Loop
Next, add a Loop action. The prospecting action will return a list of people found at the company, and the loop will run subsequent actions once for each person in the list.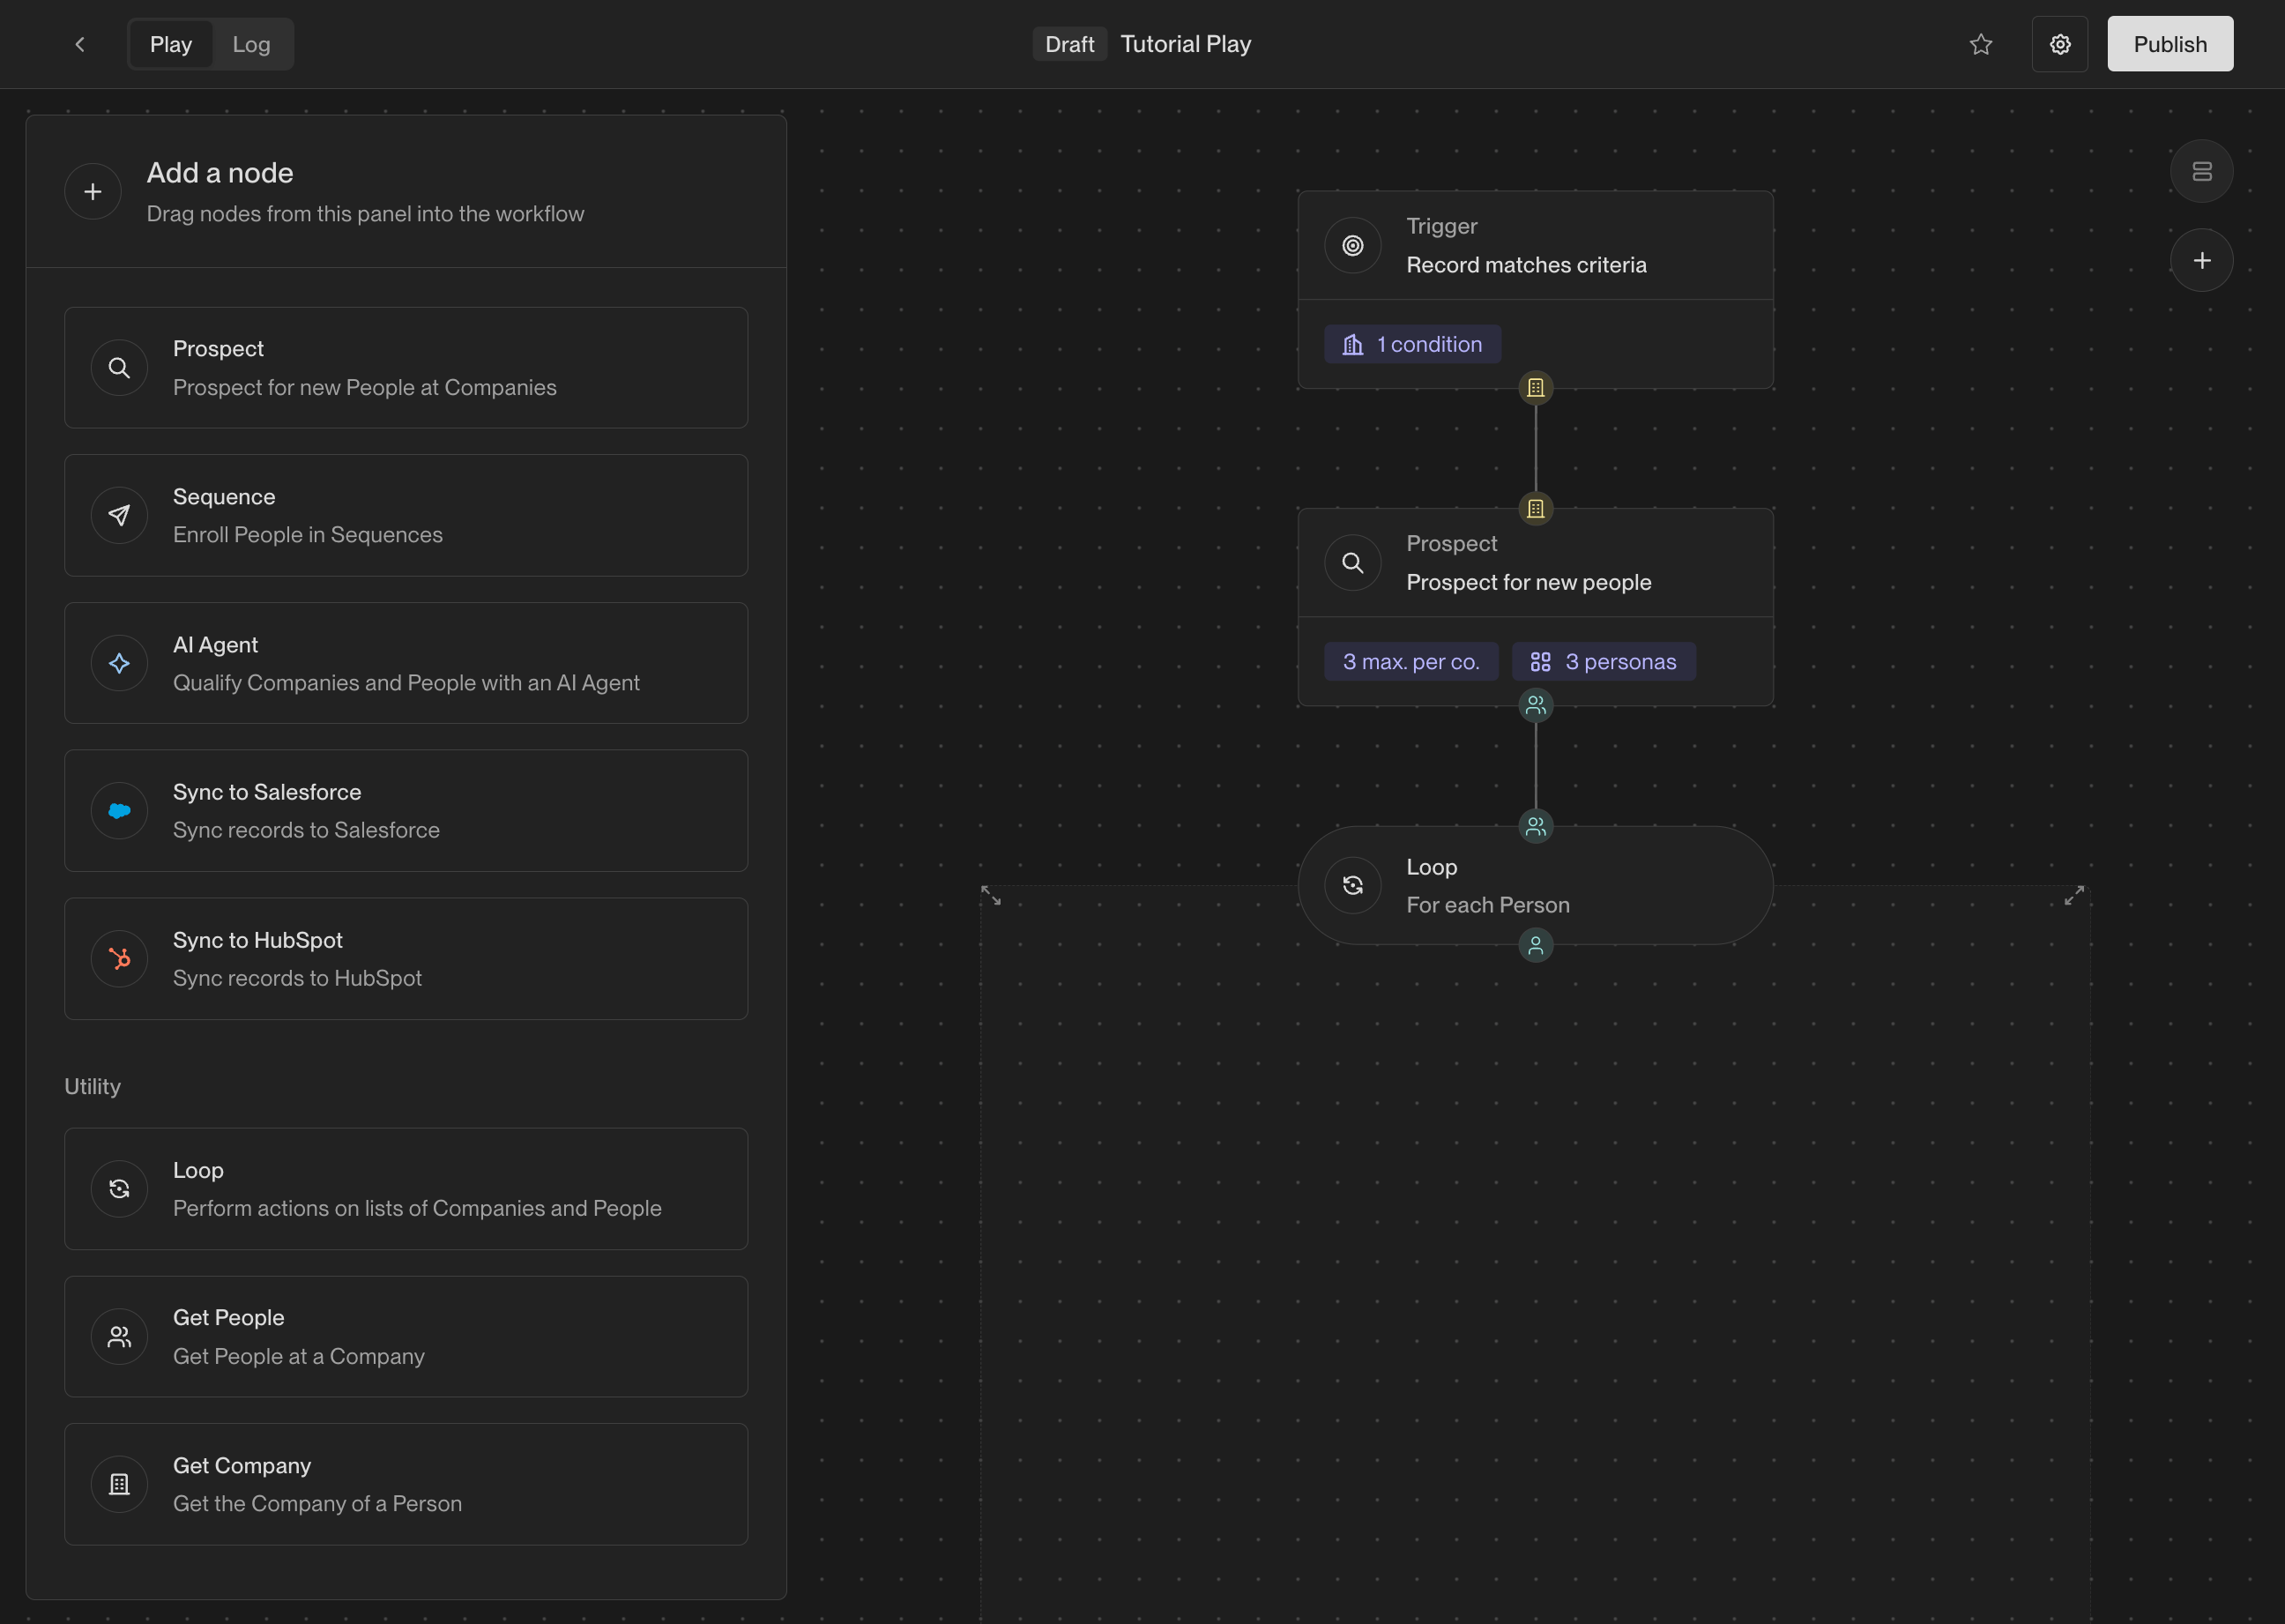
| Symbol | Value | |
|---|---|---|
| A single person record. | ||
| A list of one or more person records. | ||
| A single company record. |
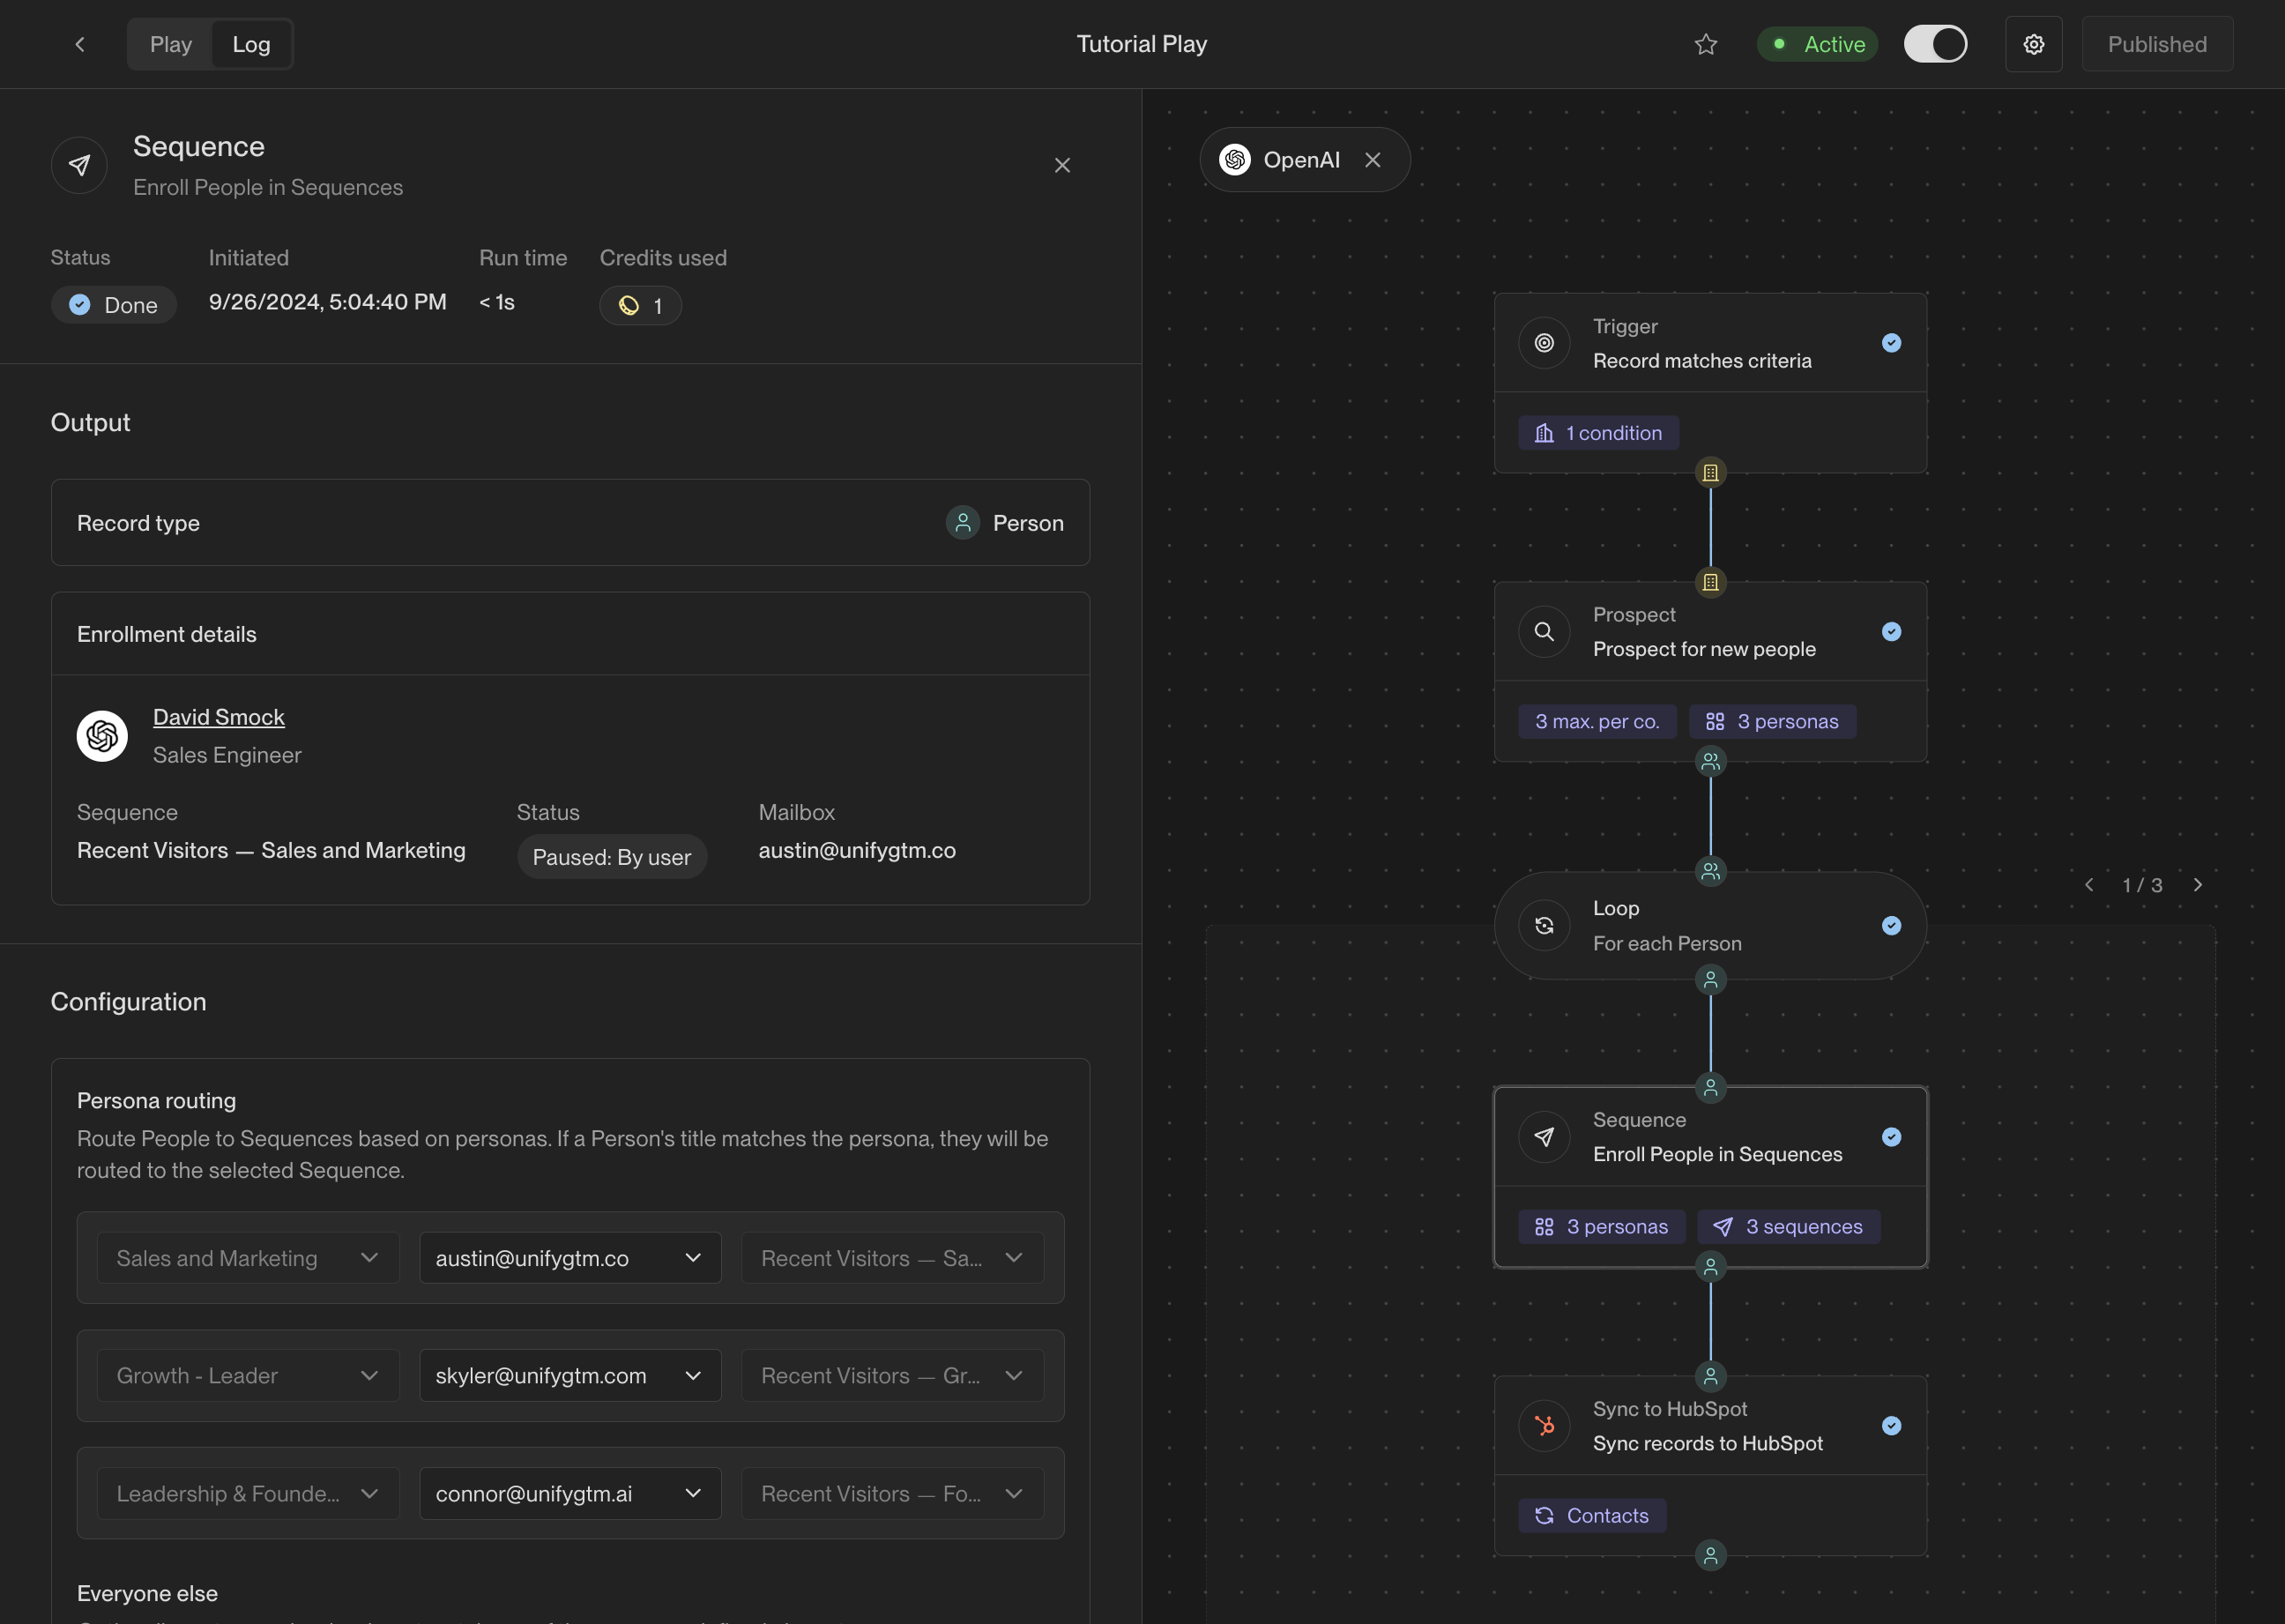
Sequence enrollment
Now place a Sequence action inside the loop. This will enroll each person into a Unify Sequence. Once added, you can configure the sequence enrollment action by routing personas to the desired sequences and mailboxes. To speed up the process, click the Add prospect personas button to automatically reuse all of the personas you selected in the prospecting action.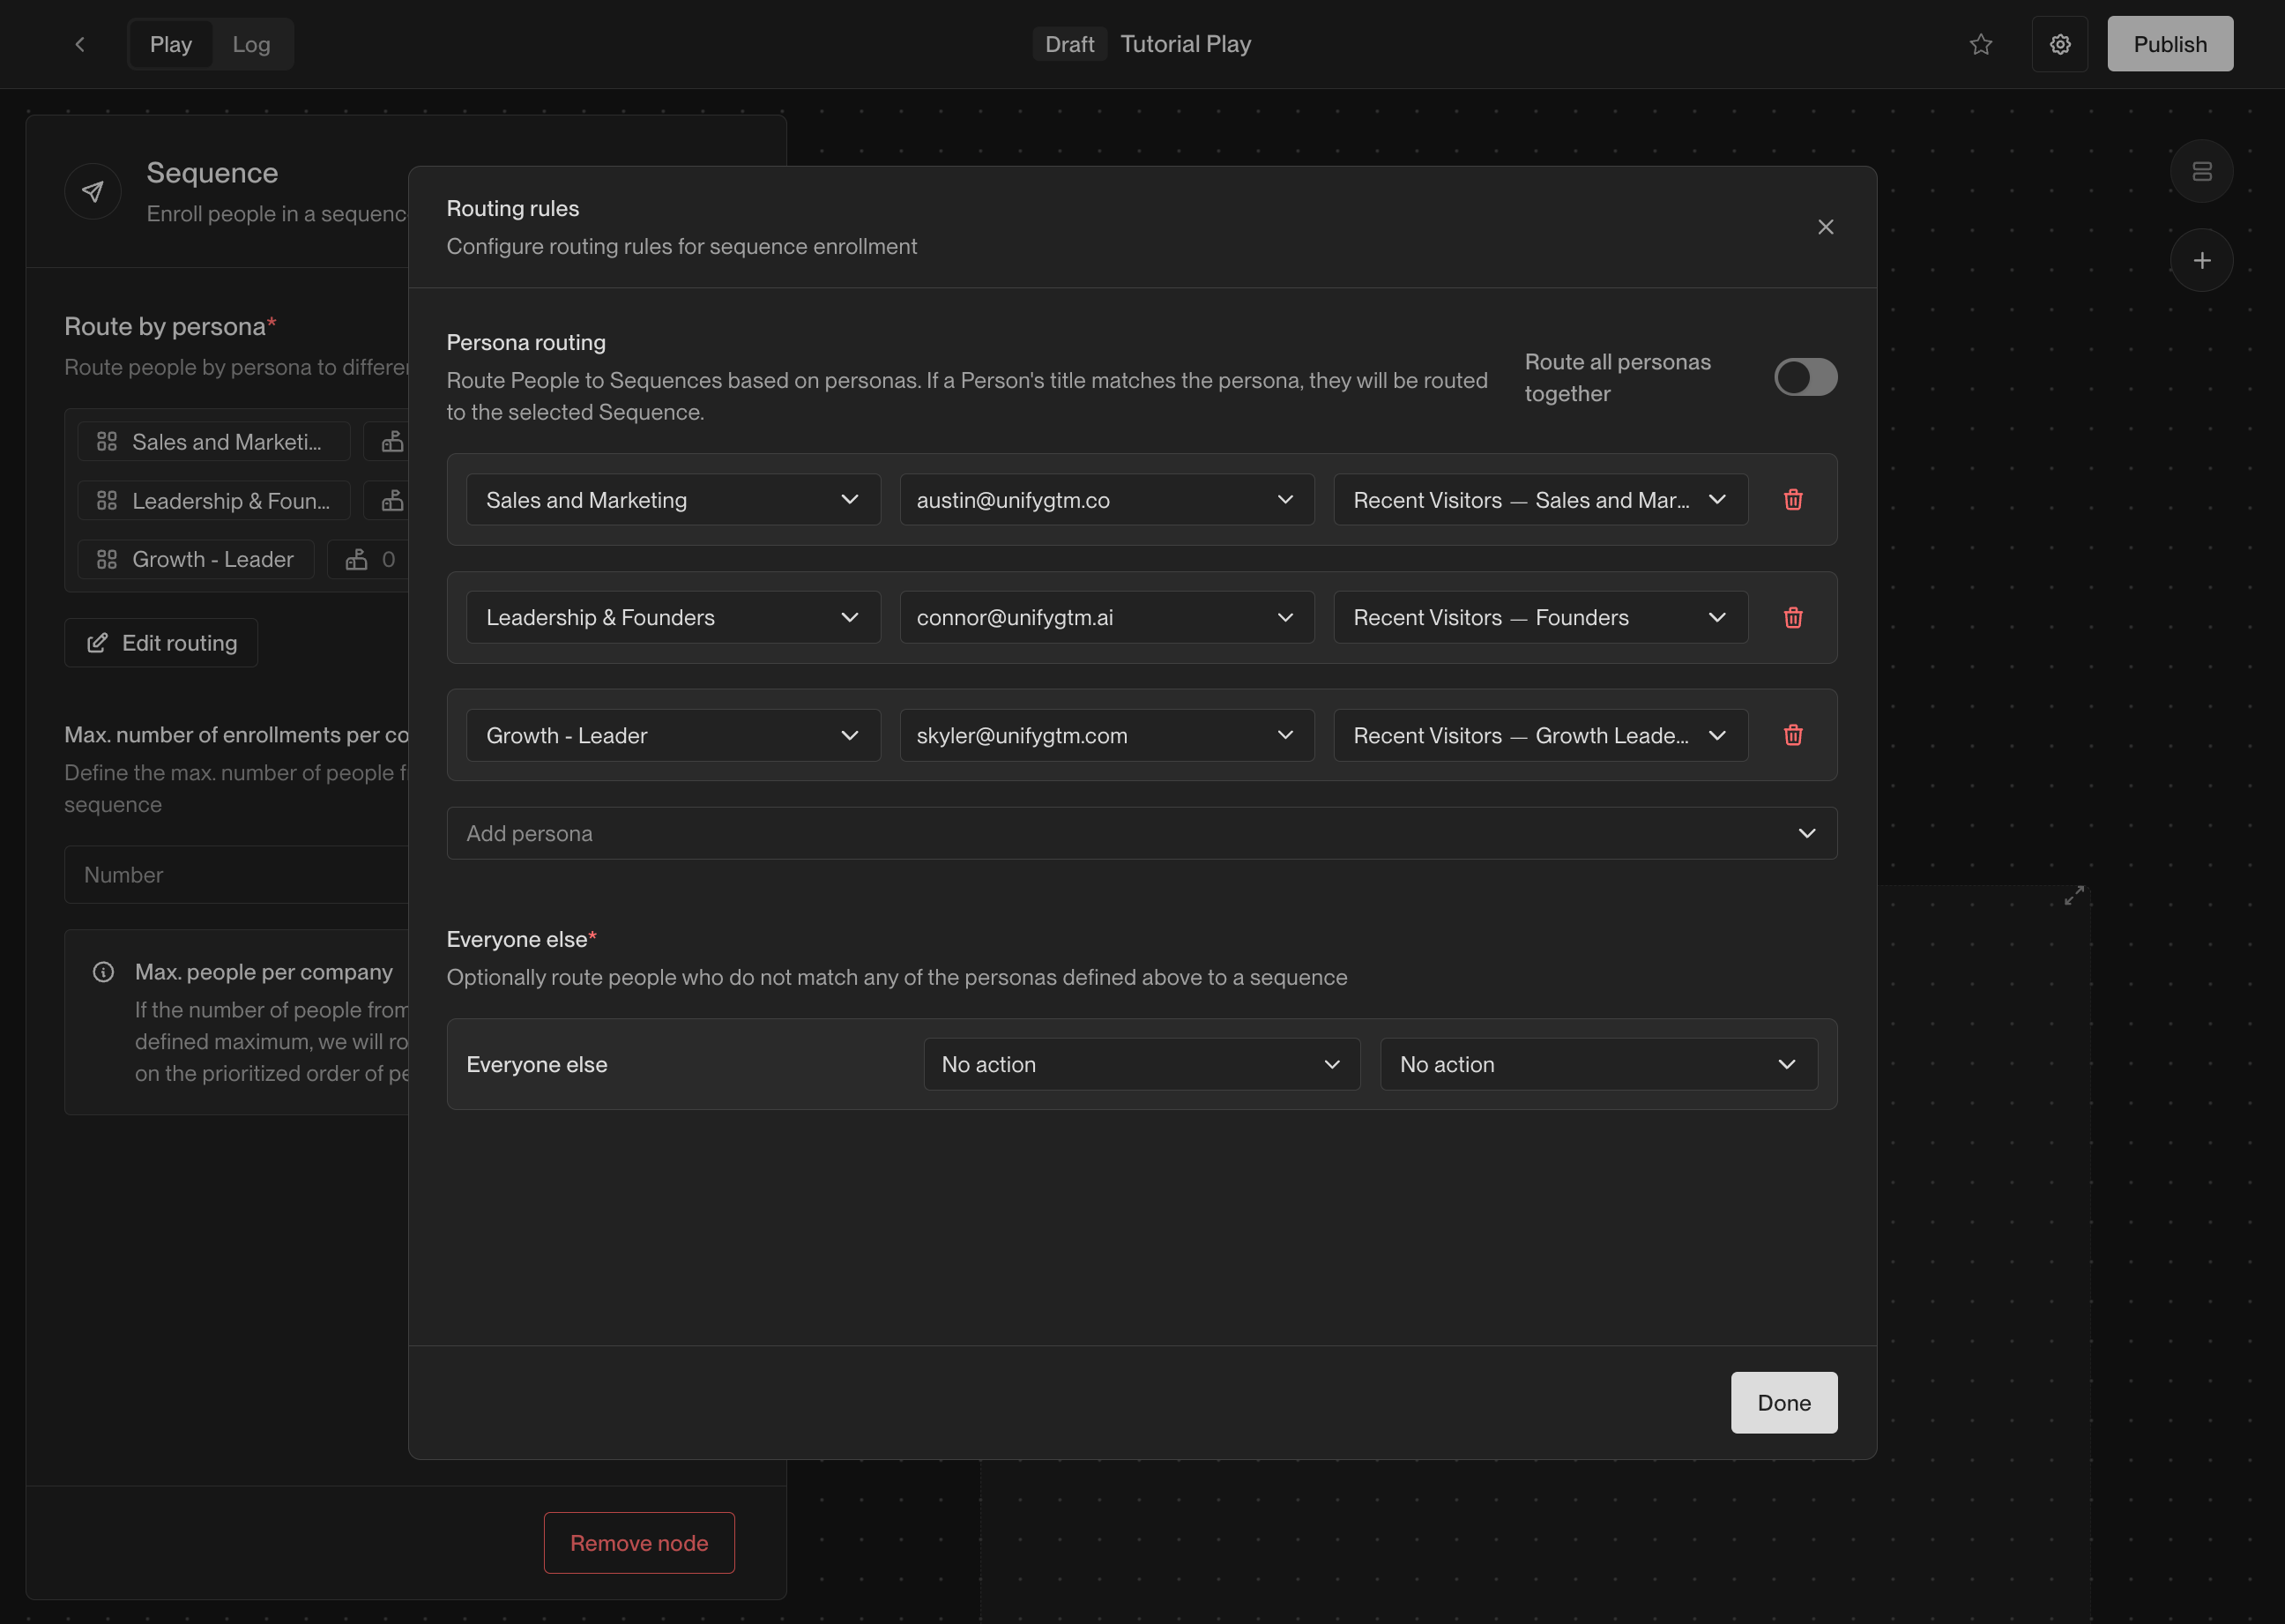
Sync to CRM
Finally, add an action to sync each new person to your CRM. Depending on which CRM you’ve connected in Unify, you will see either a Sync to Salesforce or Sync to HubSpot action.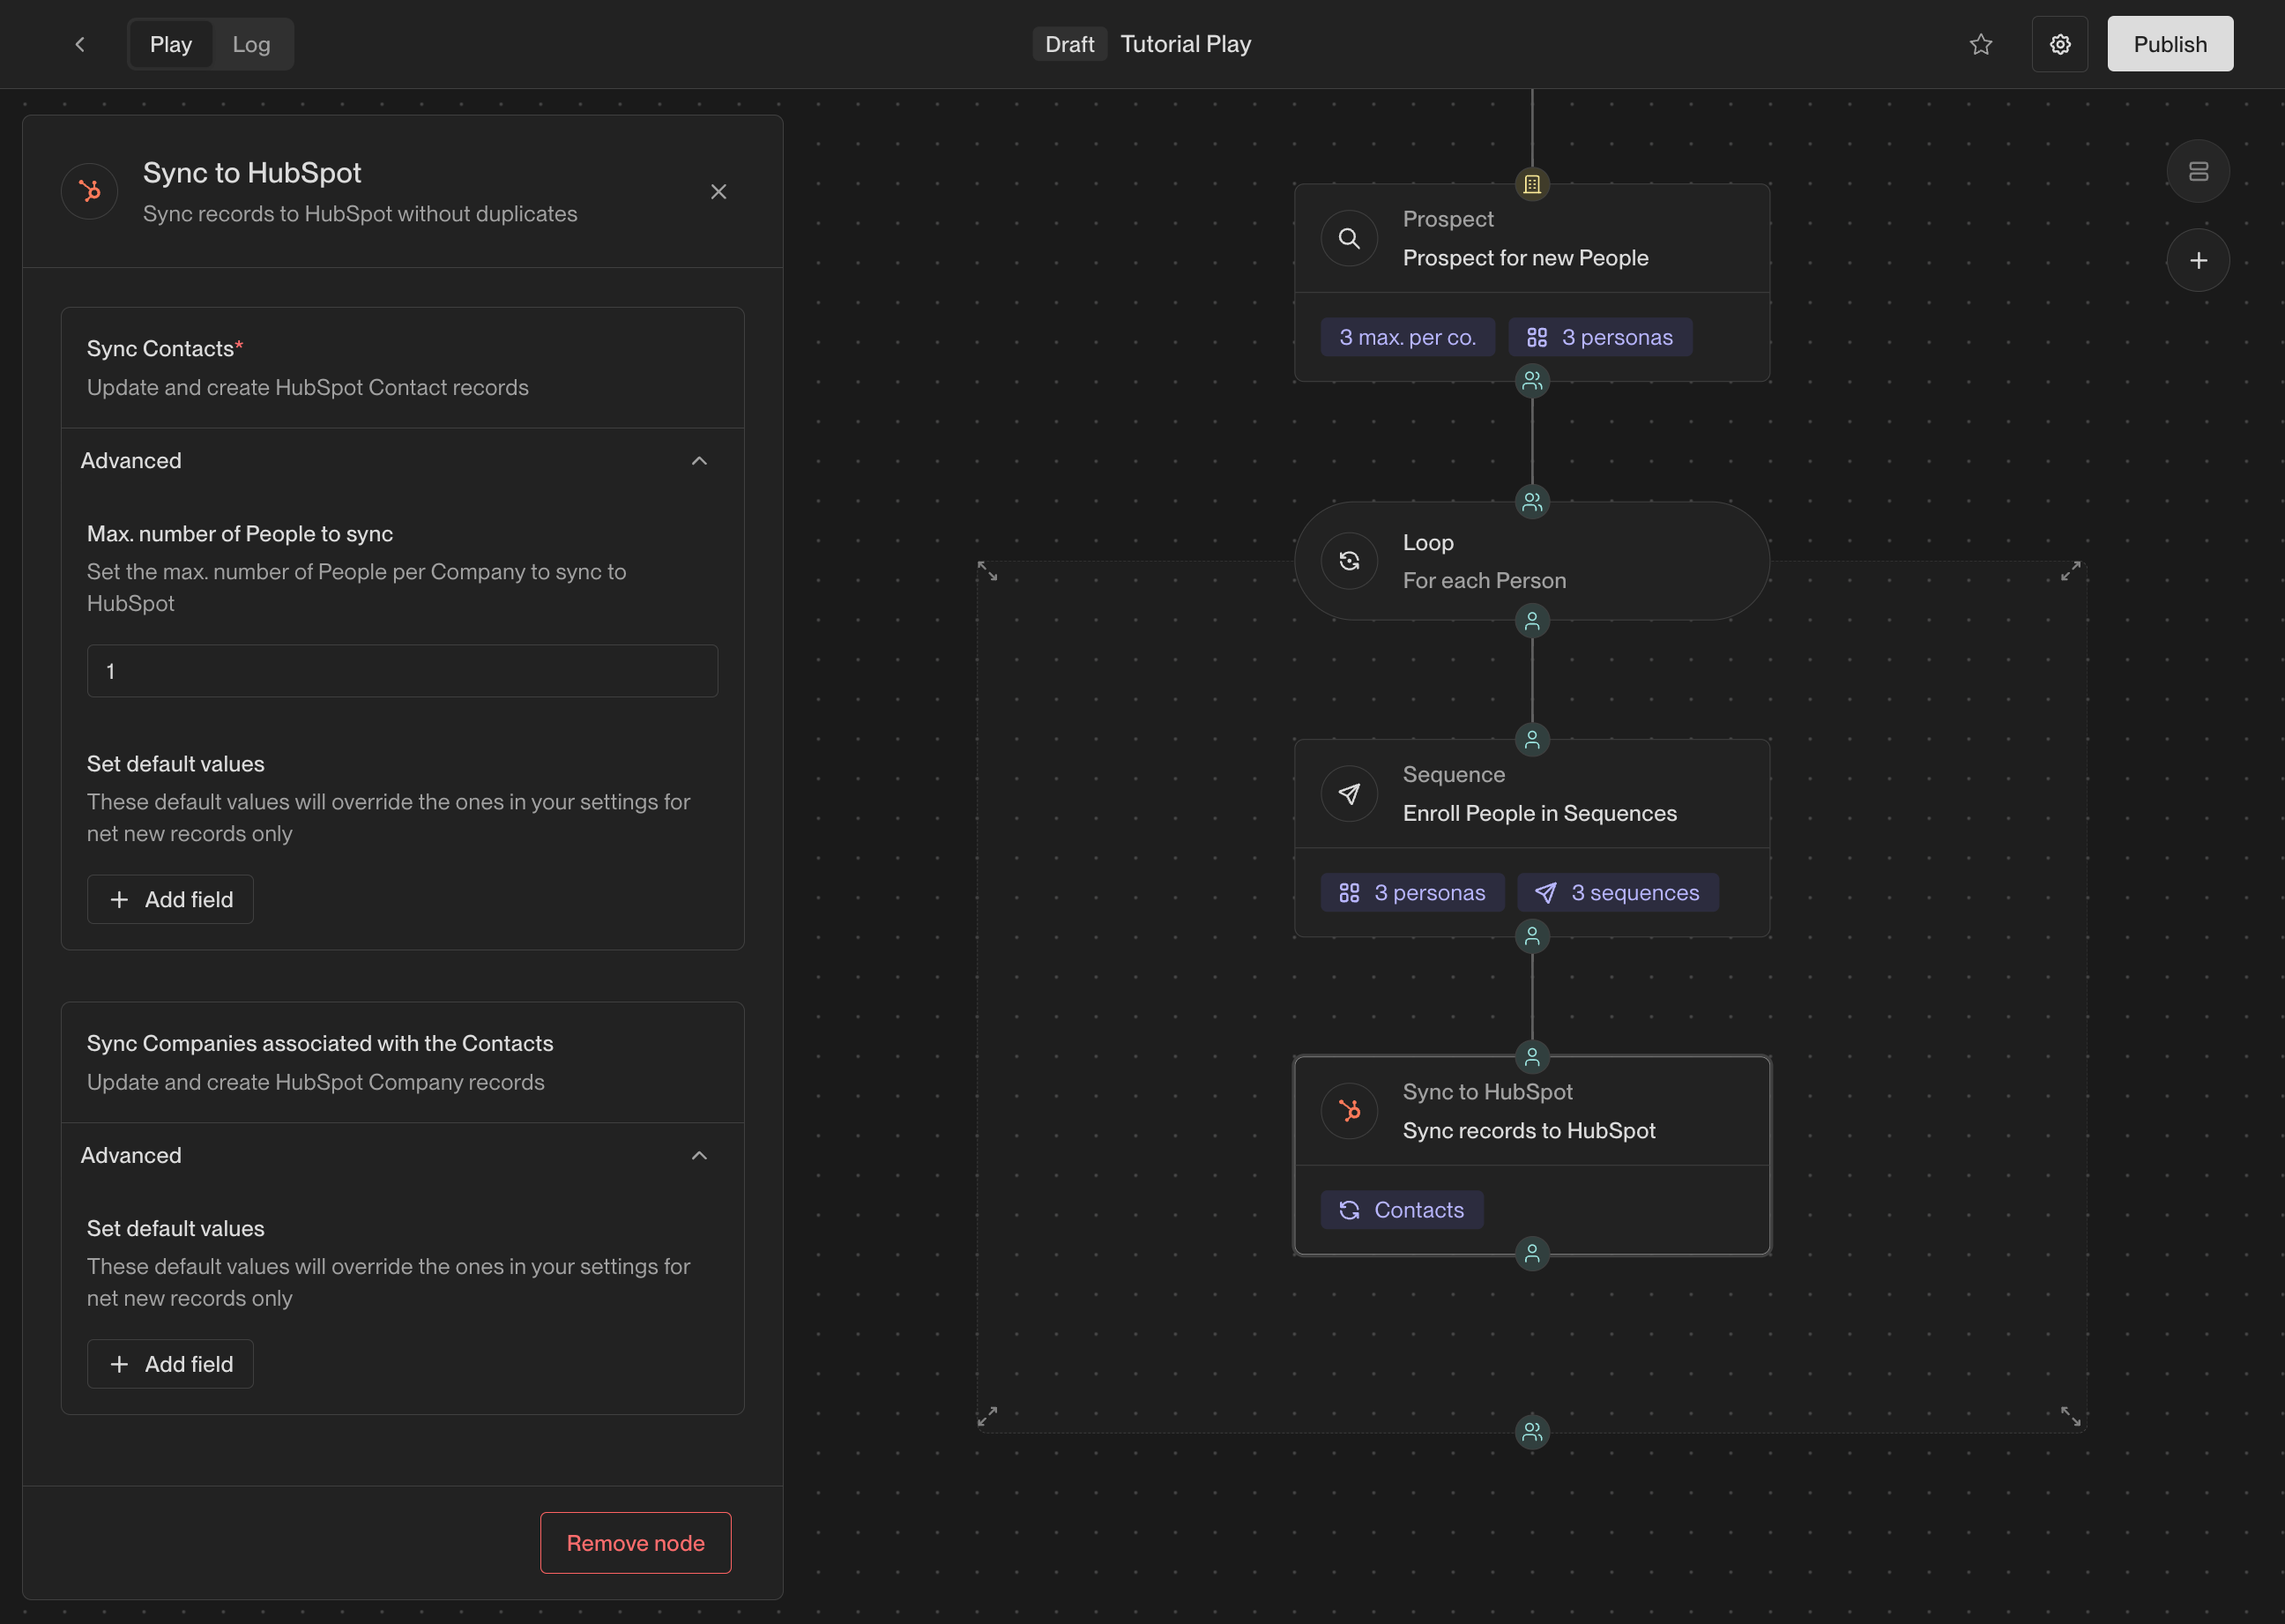
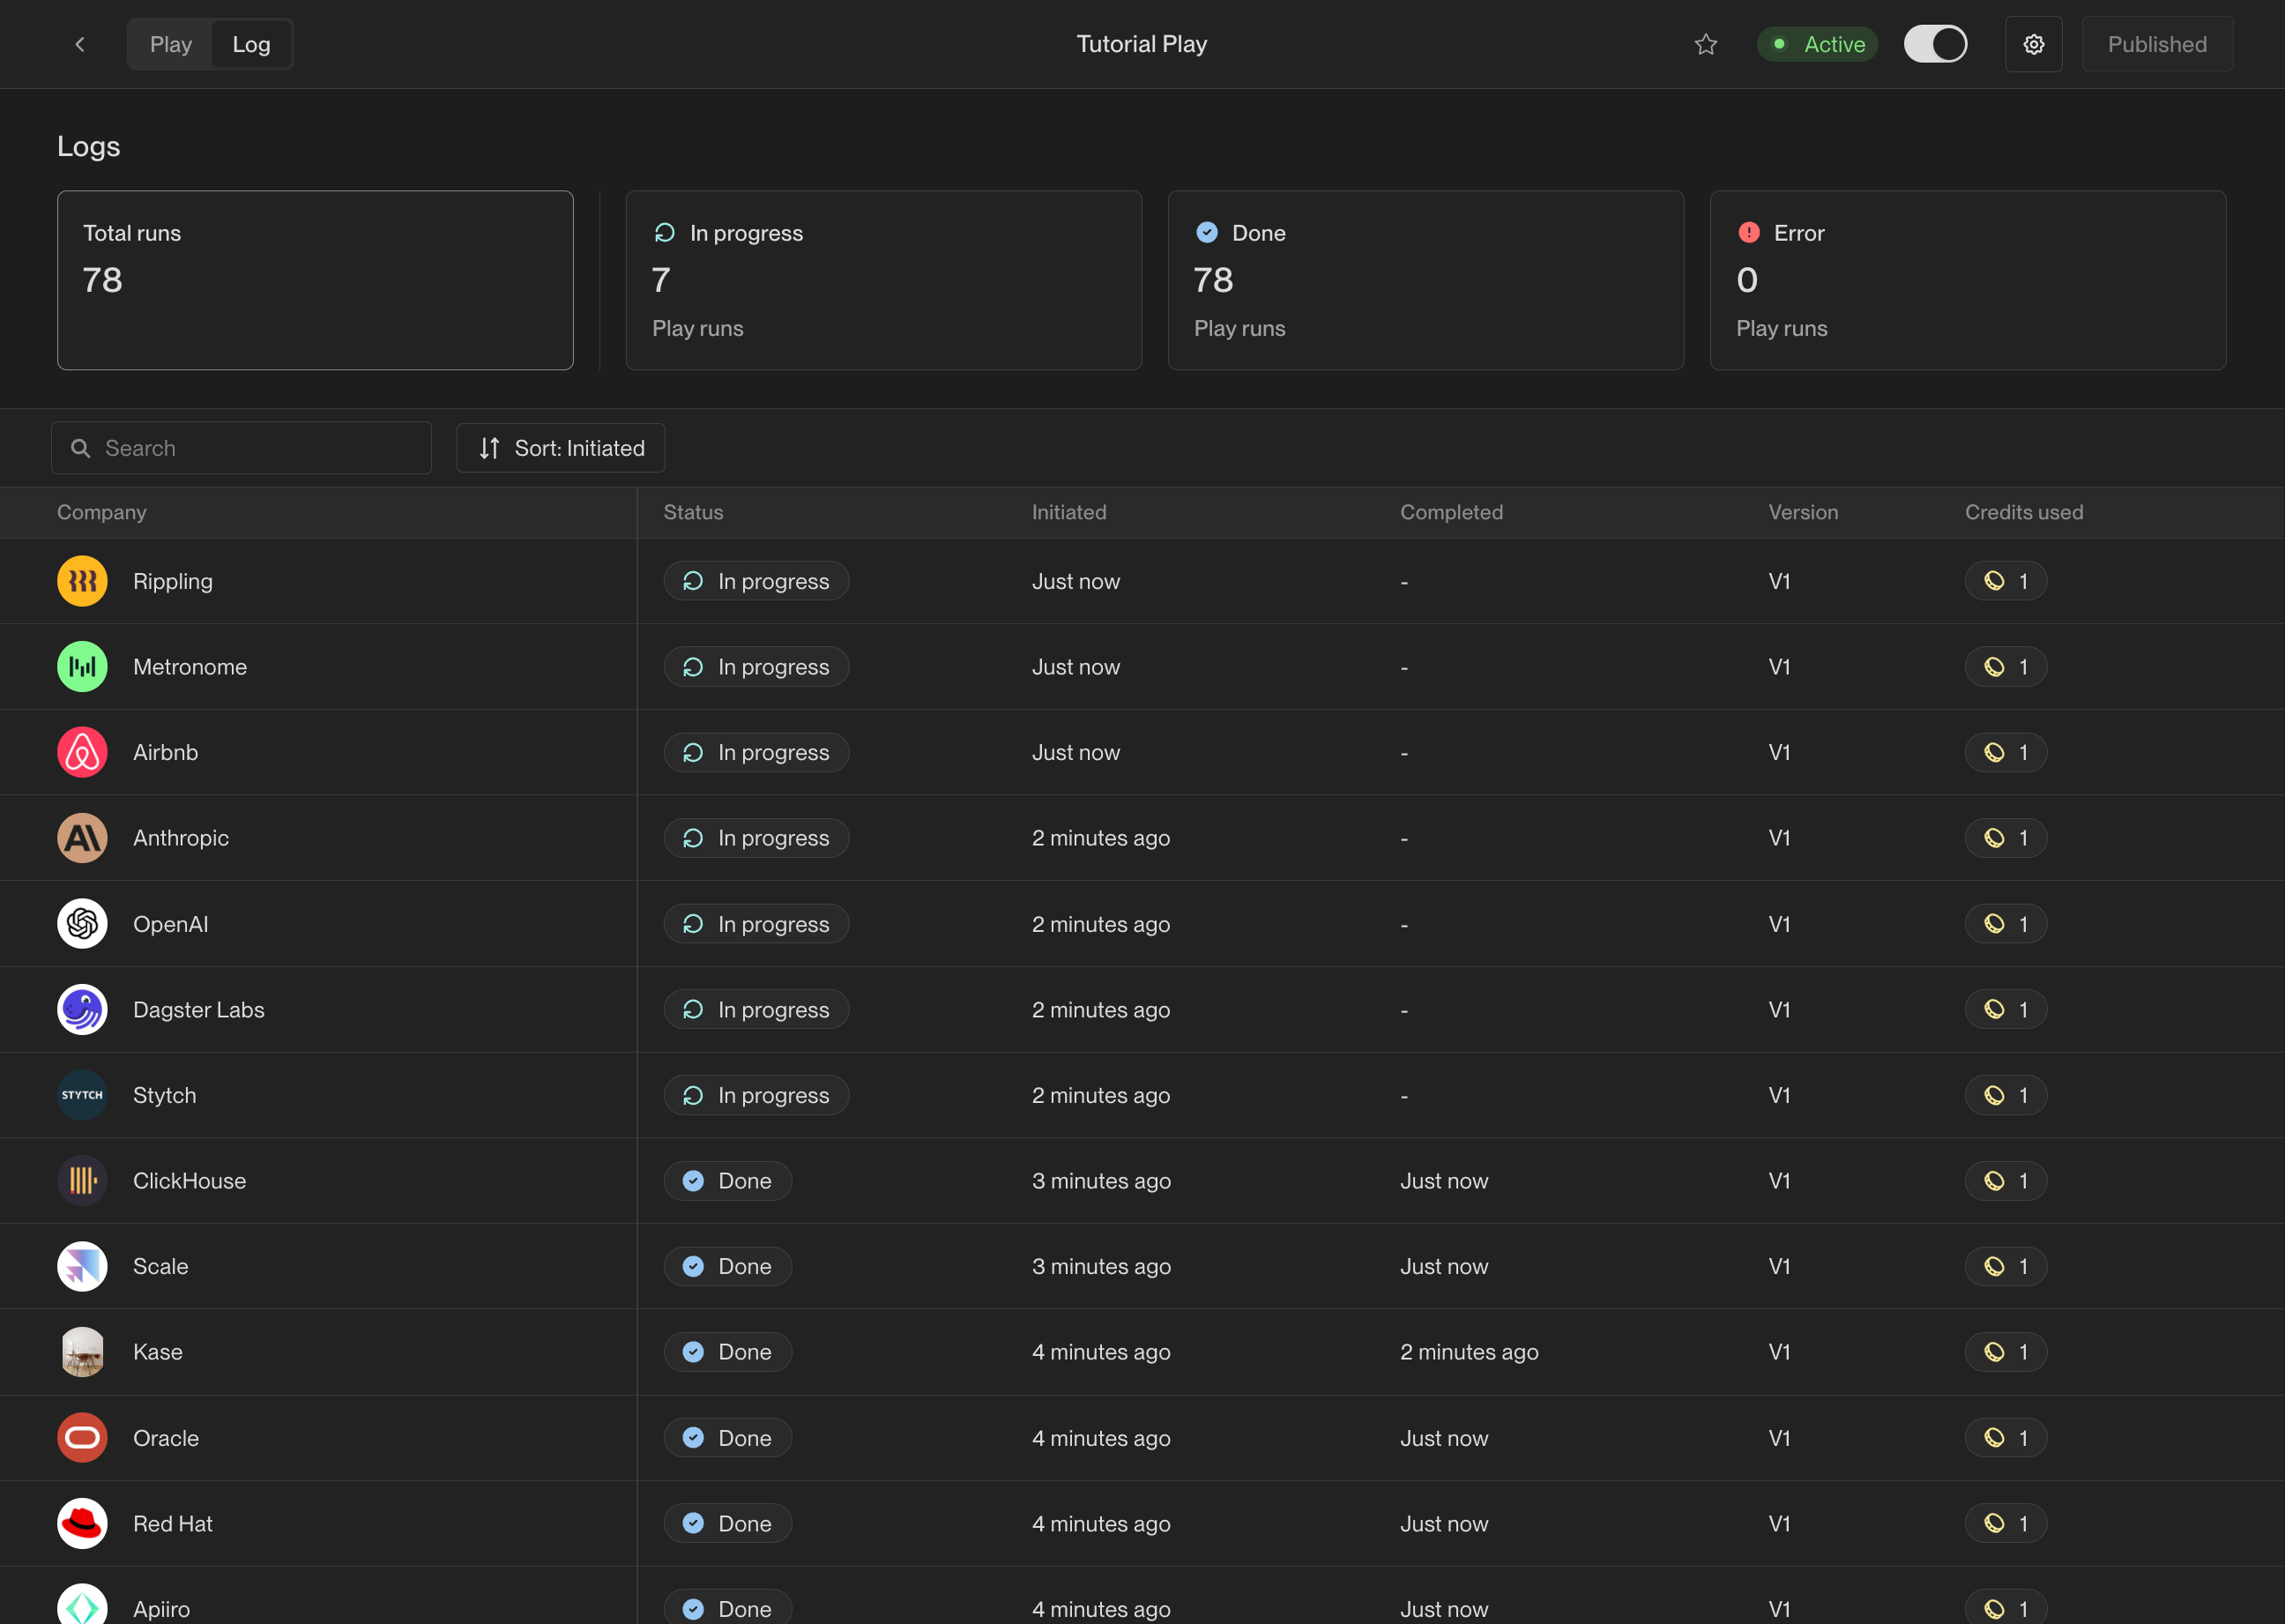
Step 4: Publish and view logs
Once your Play is ready, click the Publish button in the top right corner of the Play Builder. This will activate the Play and start running it on companies that match the trigger criteria you defined earlier.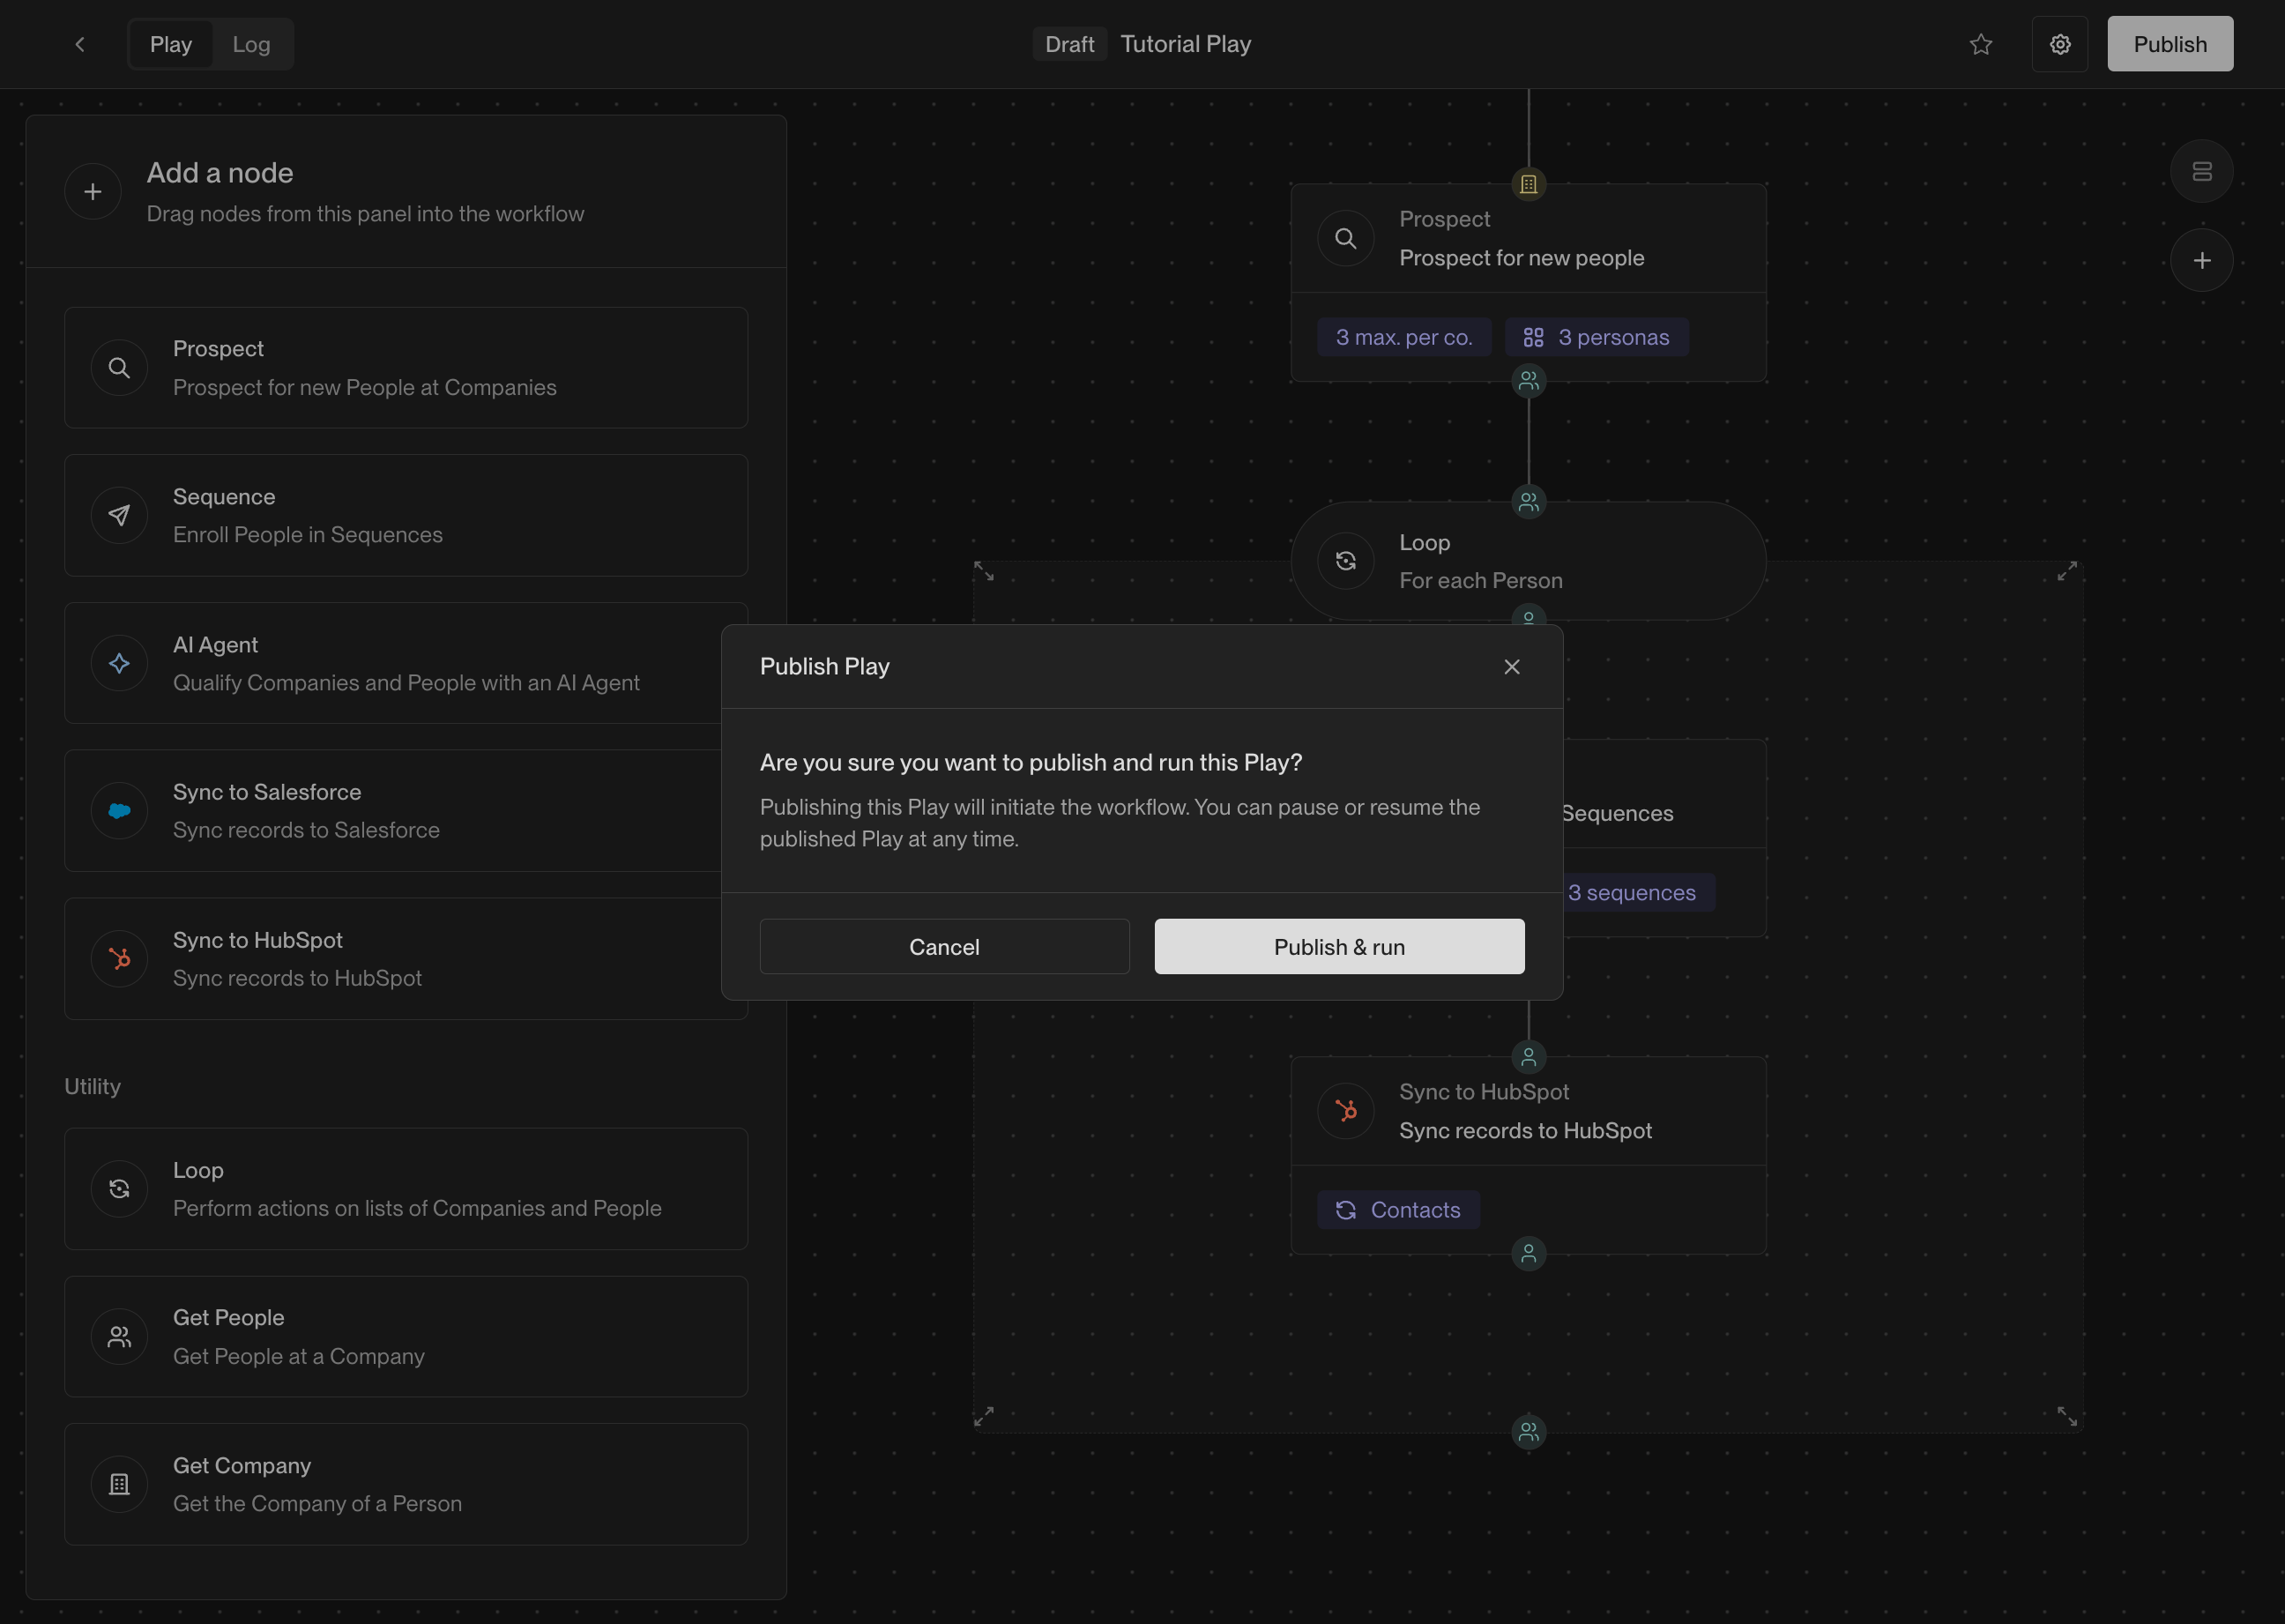
Conclusion
Congratulations on creating a Play! Combining website intent, prospecting, and sequences into a single automated flow is a popular Play and an excellent starting point. For a comprehensive overview of Unify Plays, check out the reference guide:Plays Reference
Detailed reference guide that covers the fundamentals of plays, the actions
and triggers available to use, and more.