Installation
You can automatically load and install the client by placing a<script> tag in the <head>
or <body> of your website’s HTML. The minified script can be found here
in Unify.
index.html
Content Security Policy
If your site has a content security policy defined, you will need to modify two of the policy’s directives to permit the Unify client to load and function:- Add
https://tag.unifyintent.comto thescript-srcdirective- This allows your site to load and execute the script which installs the Unify client
- Add
https://api.unifyintent.comto theconnect-srcdirective- This allows the Unify client to make requests to the Unify API
Additional instructions
If you’re using one of the tools below, you can follow the provider-specific instructions for that tool to install the website tag.Google Tag Manager
Google Tag Manager
Follow these steps to install the website tag using Google Tag Manager: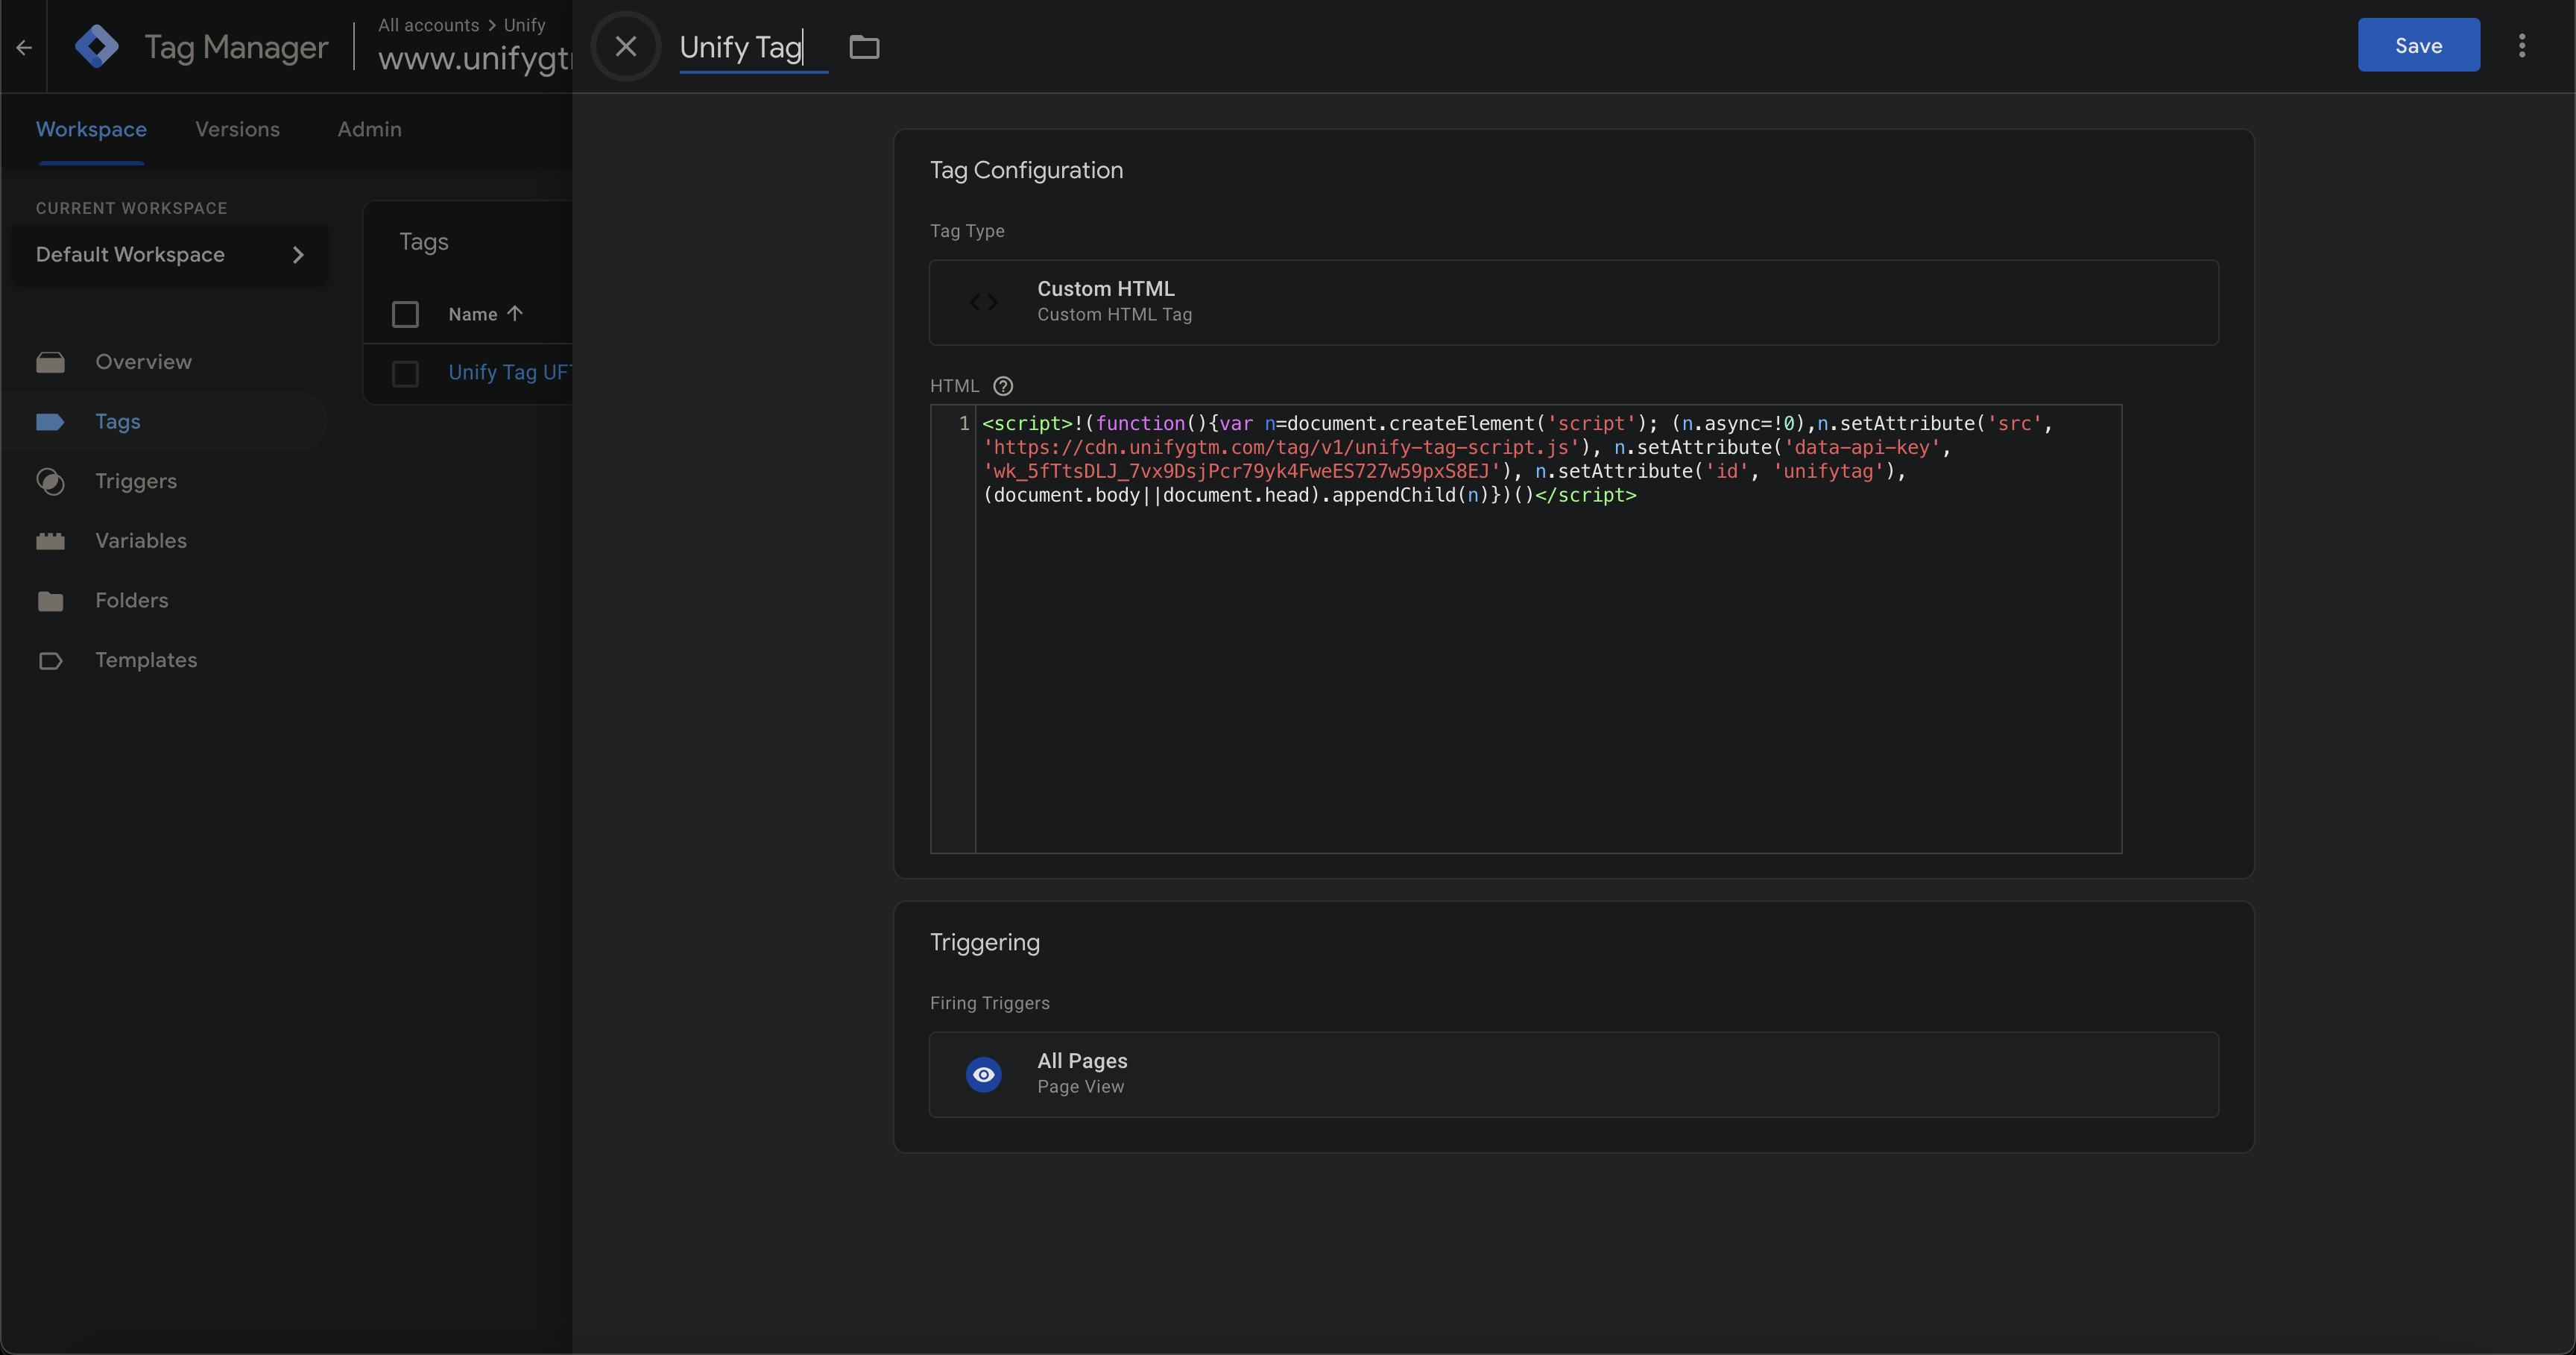
- Log in to your Google Tag Manager account.
- Select the container associated with your website.
- Click Tags in the left sidebar, then click New.
- Click Tag Configuration and select Custom HTML.
- Copy the website tag script from the Unify settings page and paste the website tag snippet into the HTML field.
- Under Triggering, select All Pages.
- Save the tag.
- Click Submit to publish the container.
- Visit your website and confirm the tag is firing correctly.
document.write in the tag settings.
This is required for the website tag to work correctly.For more information, see the official Google Tag Manager support docs
here.HubSpot CMS
HubSpot CMS
Follow these steps to install the website tag on a site hosted with HubSpot CMS:
- Log in to your HubSpot account.
- Navigate to Settings → Website → Pages.
- Open the Templates or Pages tab (depending on your setup).
-
Choose one of the following approaches:
-
Global install (recommended):
- Open Website → Pages → Templates.
- Edit your main site template.
- Paste the website tag snippet inside the
<head>section.
-
Per-page install:
- Open a specific page.
- Go to Advanced Settings.
- Paste the snippet into the HTML Head field.
-
Global install (recommended):
- Save and publish your changes.
- Visit your site and confirm the tag is running.
A global template install is recommended to ensure full site coverage.
Shopify
Shopify
Follow these steps to install the website tag on a Shopify store:
- Log in to your Shopify admin.
- In the left sidebar, go to Online Store → Themes.
- Find your active theme and click ⋯ → Edit code.
- Under the Layout section, open
theme.liquid. - Locate the closing
</head>tag. - Paste the website tag snippet immediately before the closing
</head>tag. - Click Save.
- Visit your storefront and confirm the tag loads correctly.
Installing the tag in
theme.liquid ensures it runs on all pages of your site.Squarespace
Squarespace
Follow these steps to install the website tag on a Squarespace site:
- Log in to your Squarespace account.
- Open the site you want to install the tag on.
- Go to Settings → Advanced → Code Injection.
- In the Header field, paste the website tag snippet.
- Click Save.
- Publish your site if it is not already live.
- Visit your site and verify that the tag is loading.
Adding the script to the Header ensures it loads on every page.
Static hosts (e.g., Netlify, Vercel, Cloudflare Pages)
Static hosts (e.g., Netlify, Vercel, Cloudflare Pages)
Use these steps if your site is deployed as a static site or via a modern framework:
- Open your project’s source code locally.
-
Identify the file that controls your global HTML layout, such as:
index.html_document.tsx(Next.js)app.html(SvelteKit)- A shared layout or template file
-
Paste the website tag snippet inside the
<head>section of that file. - Save your changes.
- Commit and push the changes to your Git repository.
- Deploy the site using your hosting provider (Netlify, Vercel, Cloudflare Pages, etc.)
- Once the deployment completes, visit the live site and verify the tag loads correctly.
Ensure the script runs on all pages and is not conditionally excluded during build or runtime.
Webflow
Webflow
Follow these steps to install the website tag on a Webflow site: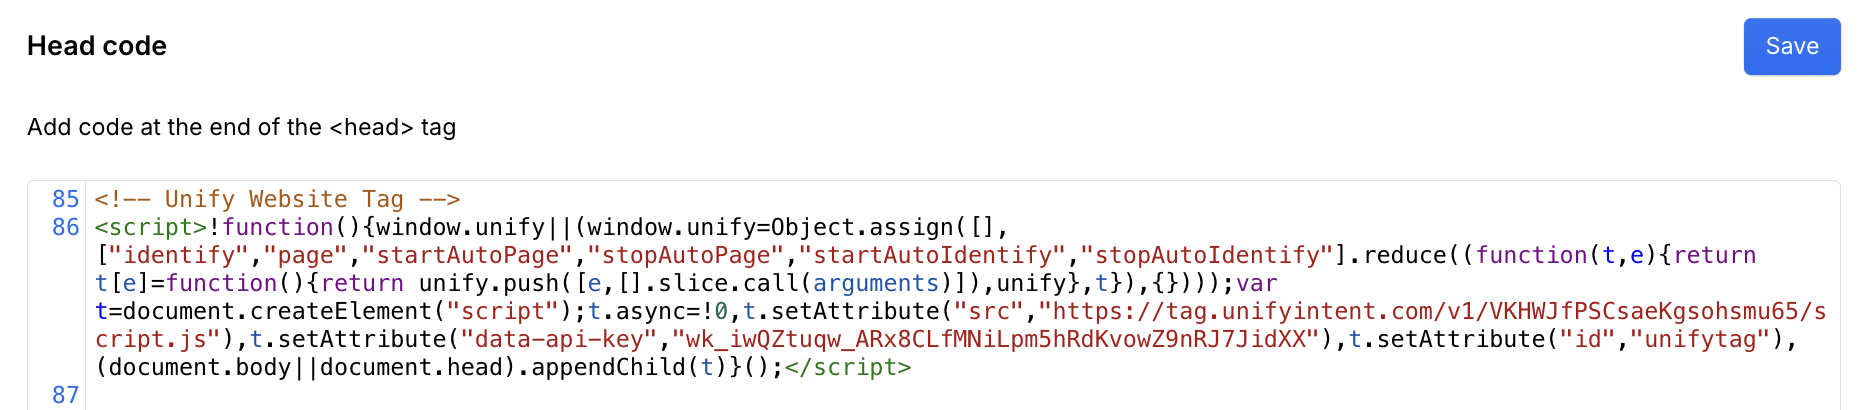
- Log in to your Webflow account.
- Open the project you want to install the tag on.
- Go to Project Settings.
- Select the Custom Code tab.
- Paste the website tag snippet into the Head code field.
- Click Save Changes.
- Publish the site to apply the changes.
- Visit your site and verify the tag is loading.
The tag will run on all published pages of the site.
Usage
Once the website tag is installed, the Unify Intent client will automatically start collecting events on your website. Often, there is nothing else you need to do. If you’d like to manually trigger events in specific places on your website, you can do so by calling the client directly. When you include the tag in your HTML, you will immediately be able to access the client atwindow.unify (or simply
unify since window is global).
Console