> ## Documentation Index
> Fetch the complete documentation index at: https://docs.unifygtm.com/llms.txt
> Use this file to discover all available pages before exploring further.
# Sync data from Hightouch
> Learn how to connect upstream data sources to Unify via Hightouch.
## Overview
This guide assumes that you already have a Hightouch account. If you don't,
you can sign up for a demo [here](https://hightouch.com/demo).
Hightouch provides a destination which allows you to sync data from any
Hightouch-supported data source into Unify objects. Hightouch supports a range
of data sources, including data warehouses, databases, and more.
## Connect Hightouch to Unify
Within Hightouch, navigate to **Destinations** and select **Add destination**.
Look for the **Unify** destination type and select it.
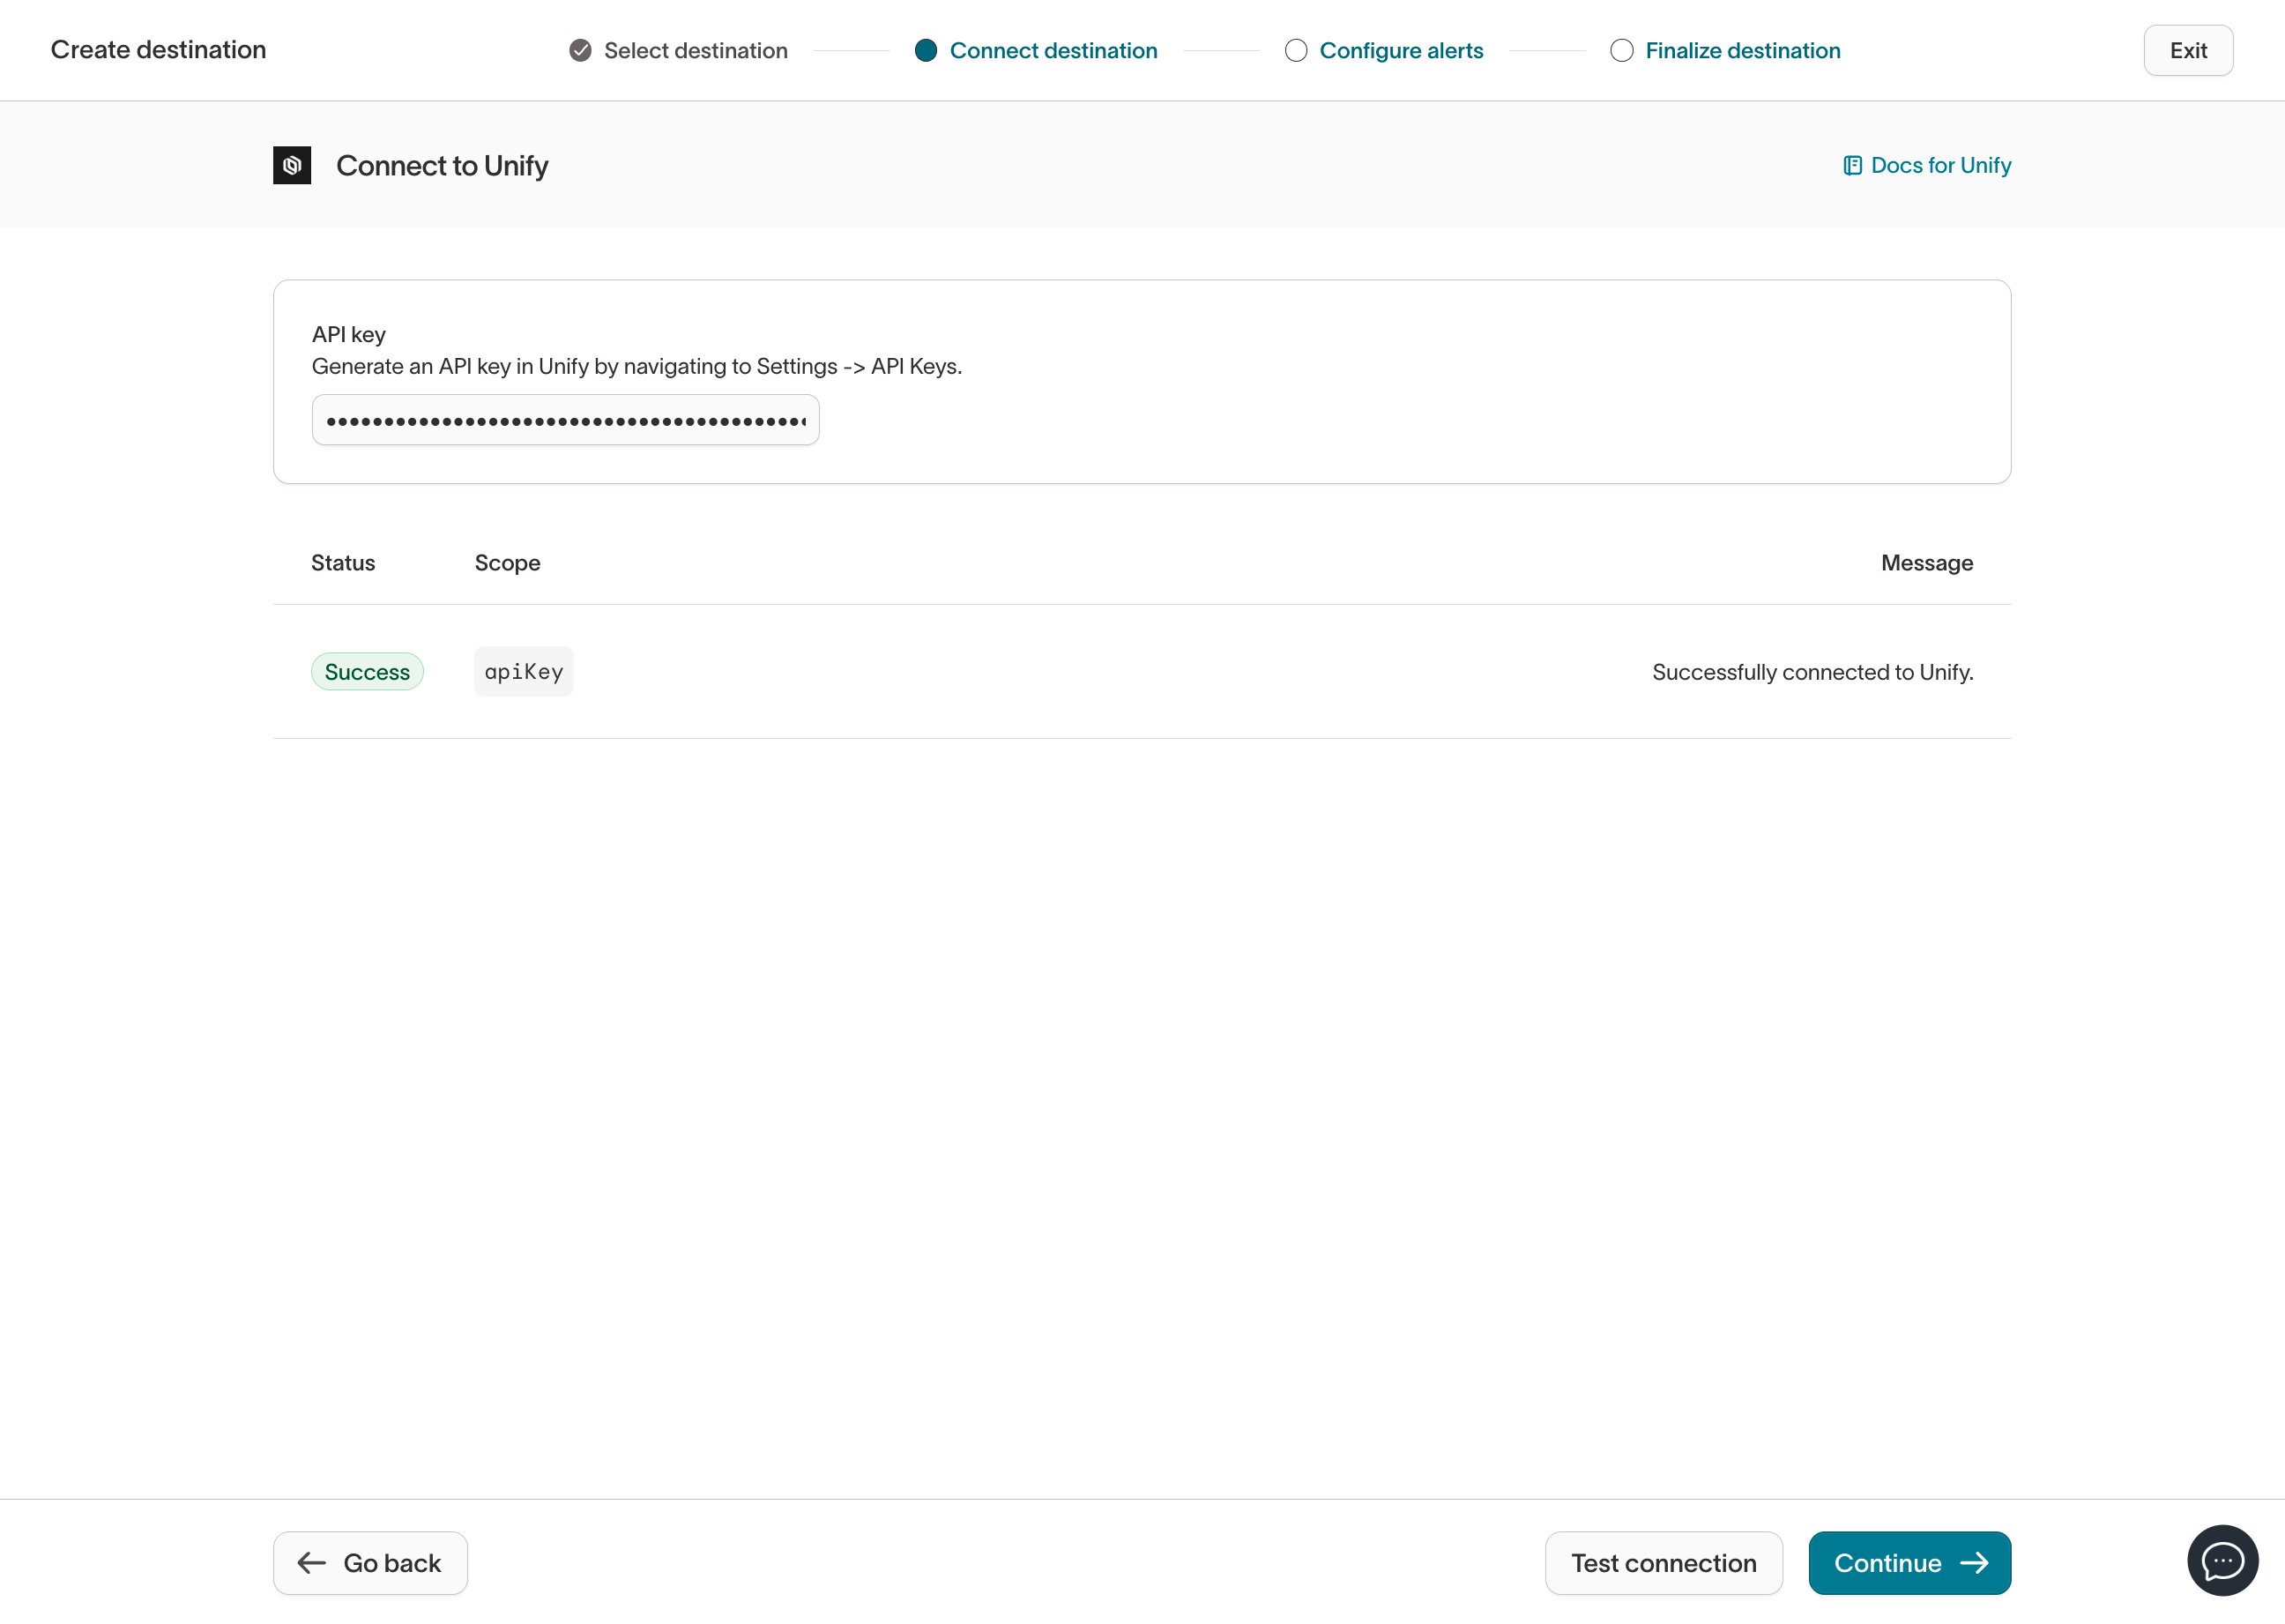
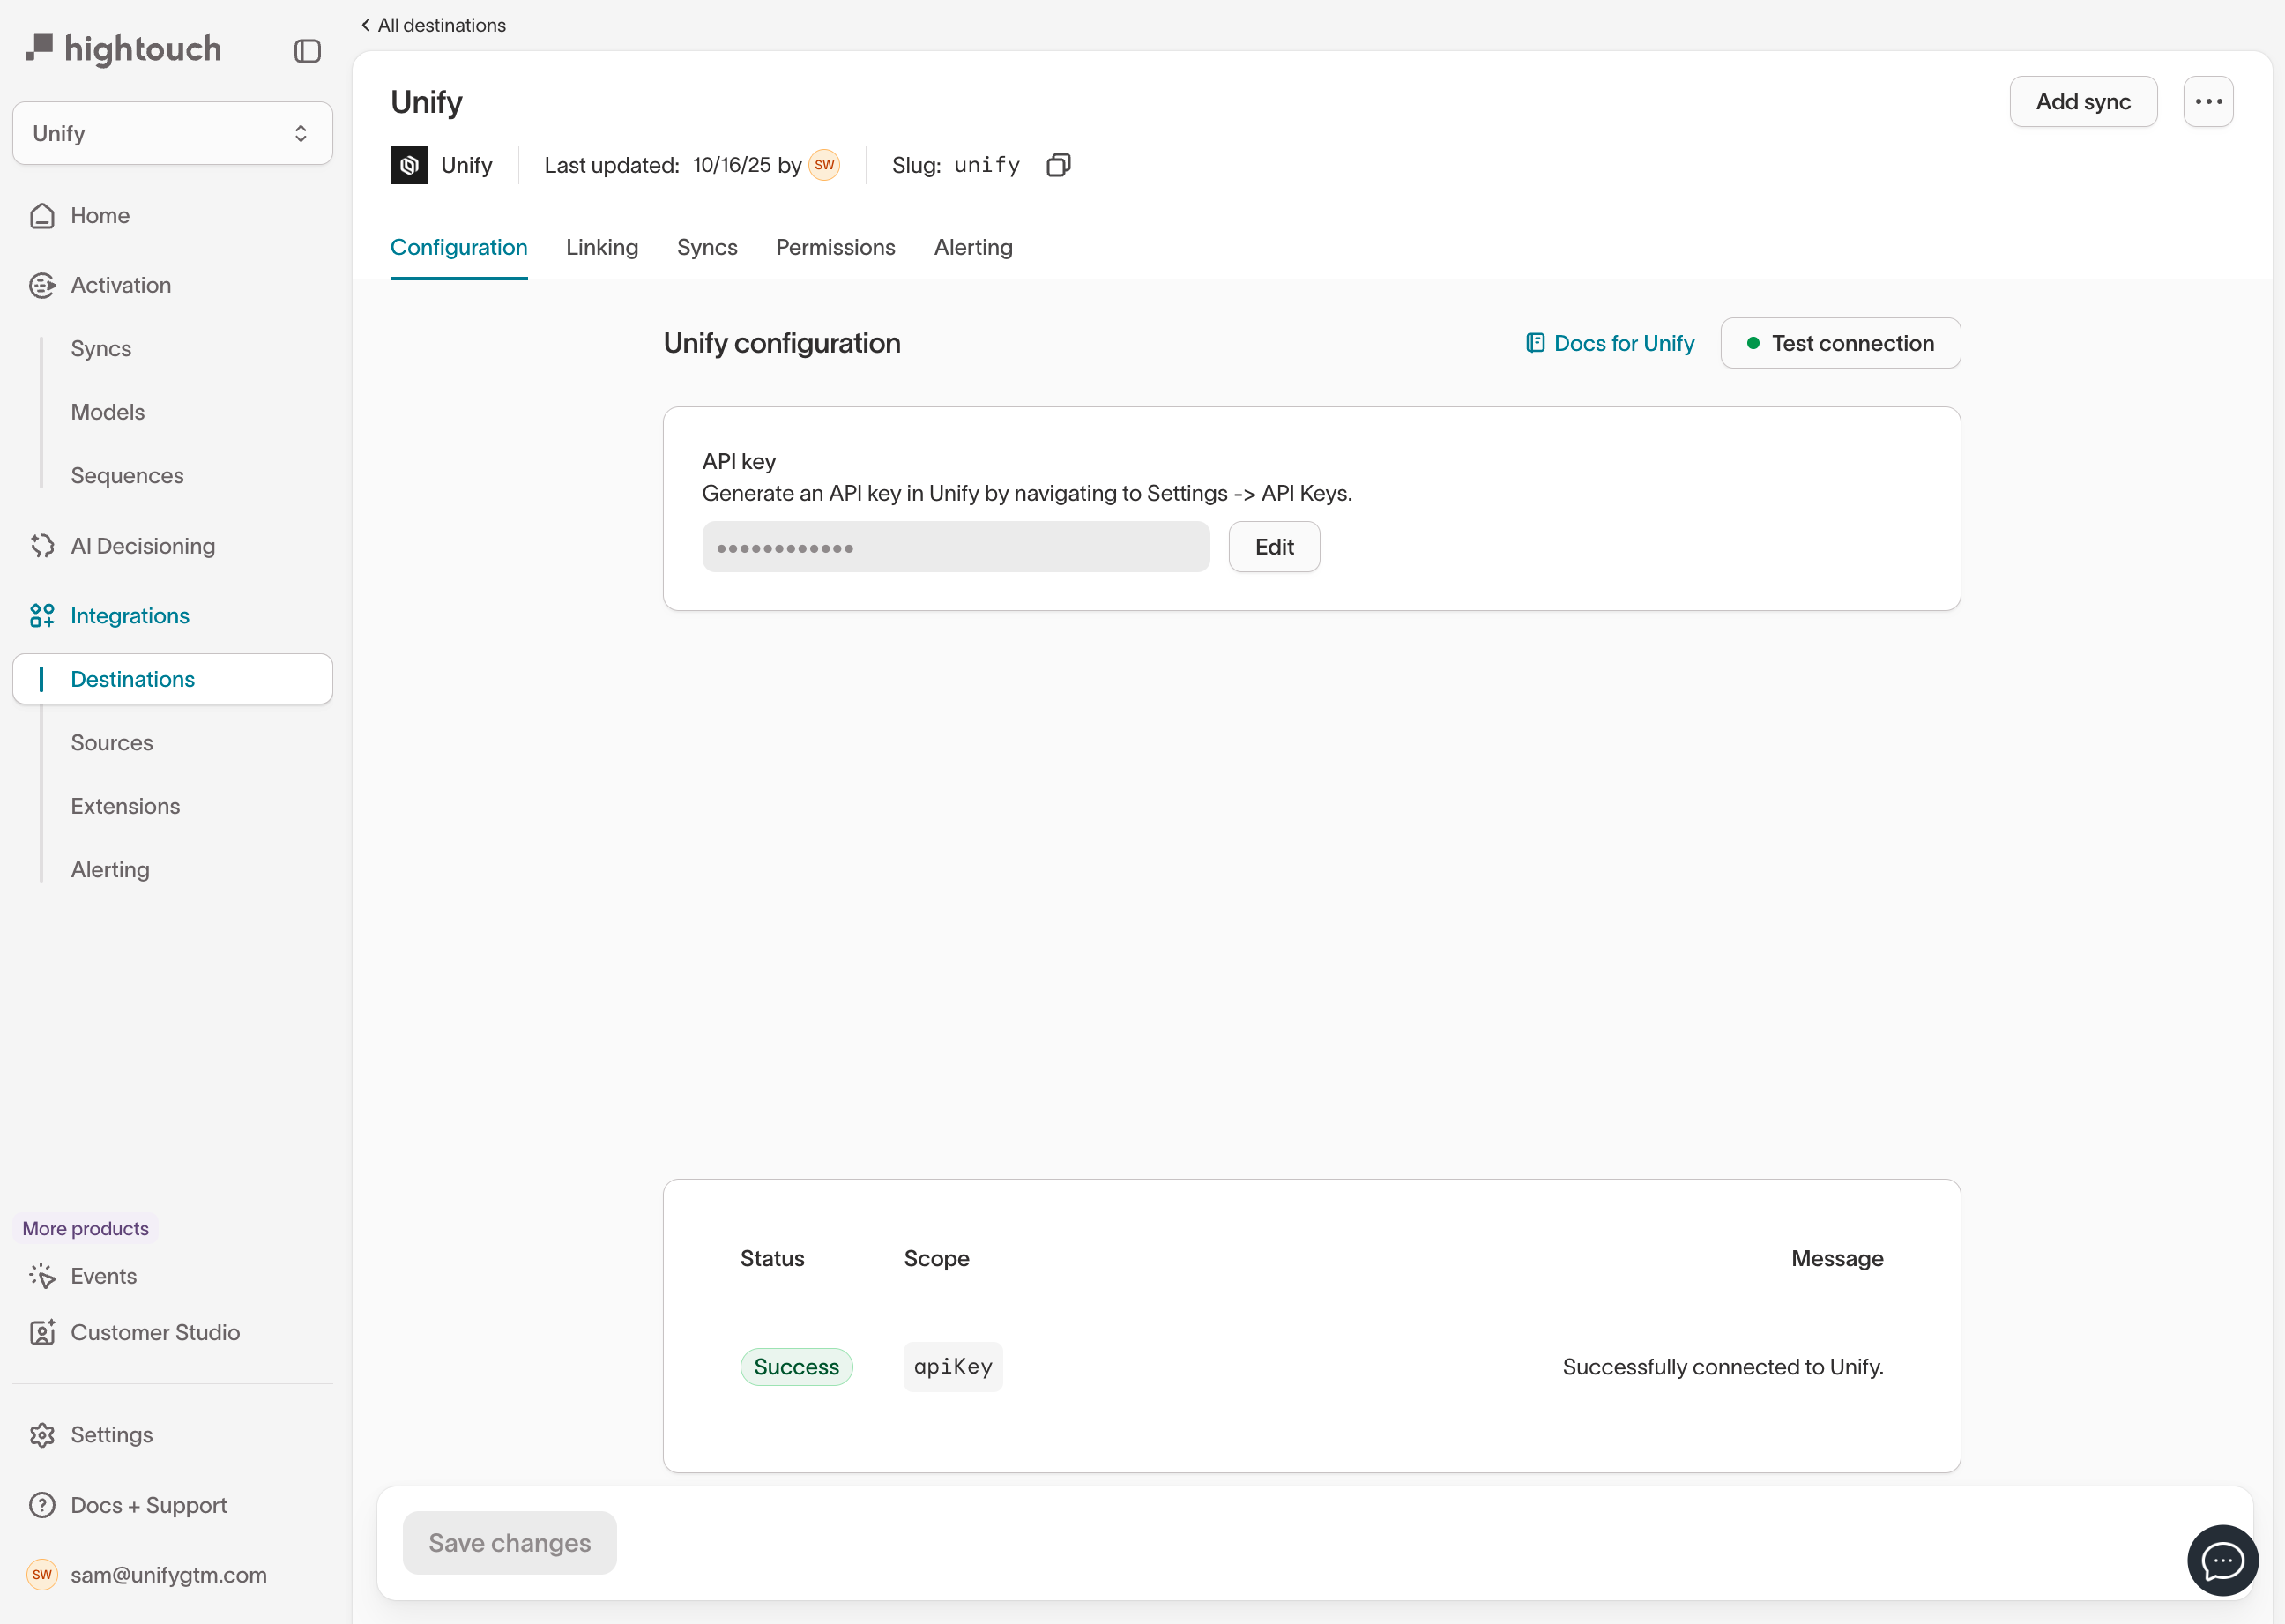
 Provide an API key for your destination. You can generate an API key within
Unify by navigating to [Settings → Developers](https://app.unifygtm.com/dashboard/settings/integrations/api-keys).
You can verify that the API key is valid and working by selecting **Test connection**.
You should see a message that says "Successfully connected to Unify".
Provide an API key for your destination. You can generate an API key within
Unify by navigating to [Settings → Developers](https://app.unifygtm.com/dashboard/settings/integrations/api-keys).
You can verify that the API key is valid and working by selecting **Test connection**.
You should see a message that says "Successfully connected to Unify".
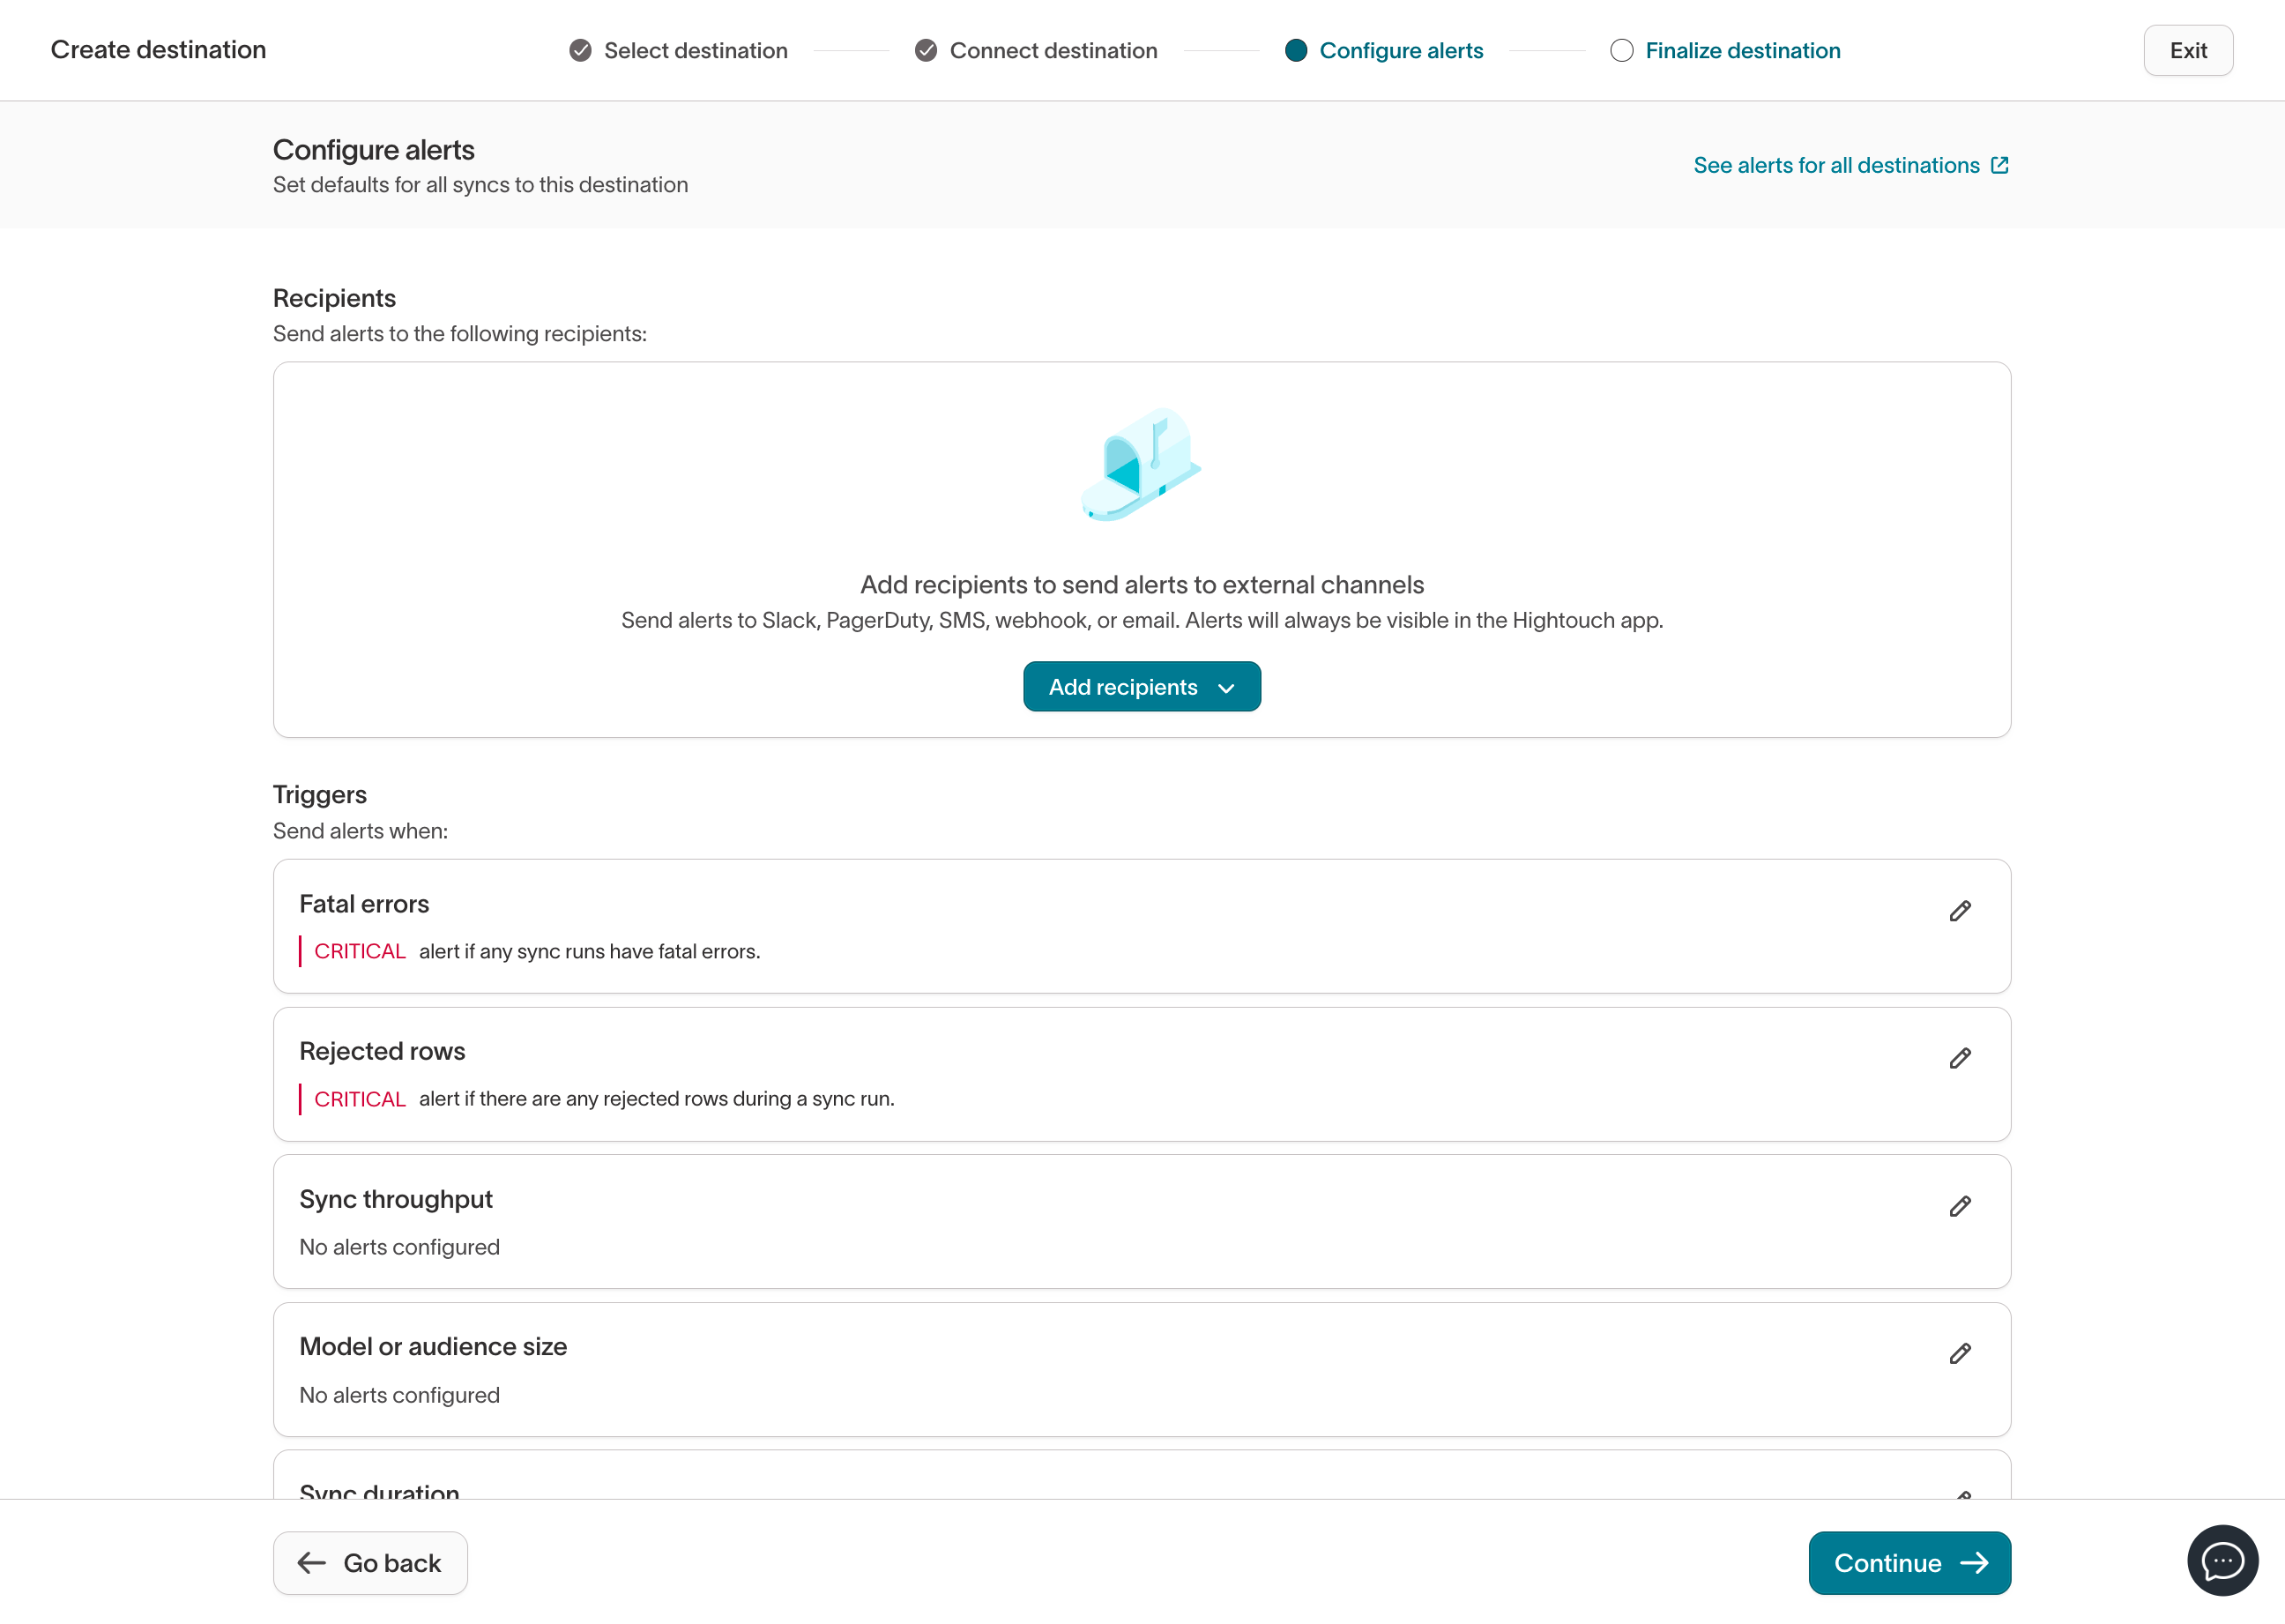
 Next, configure any alerts you want to receive for this destination.
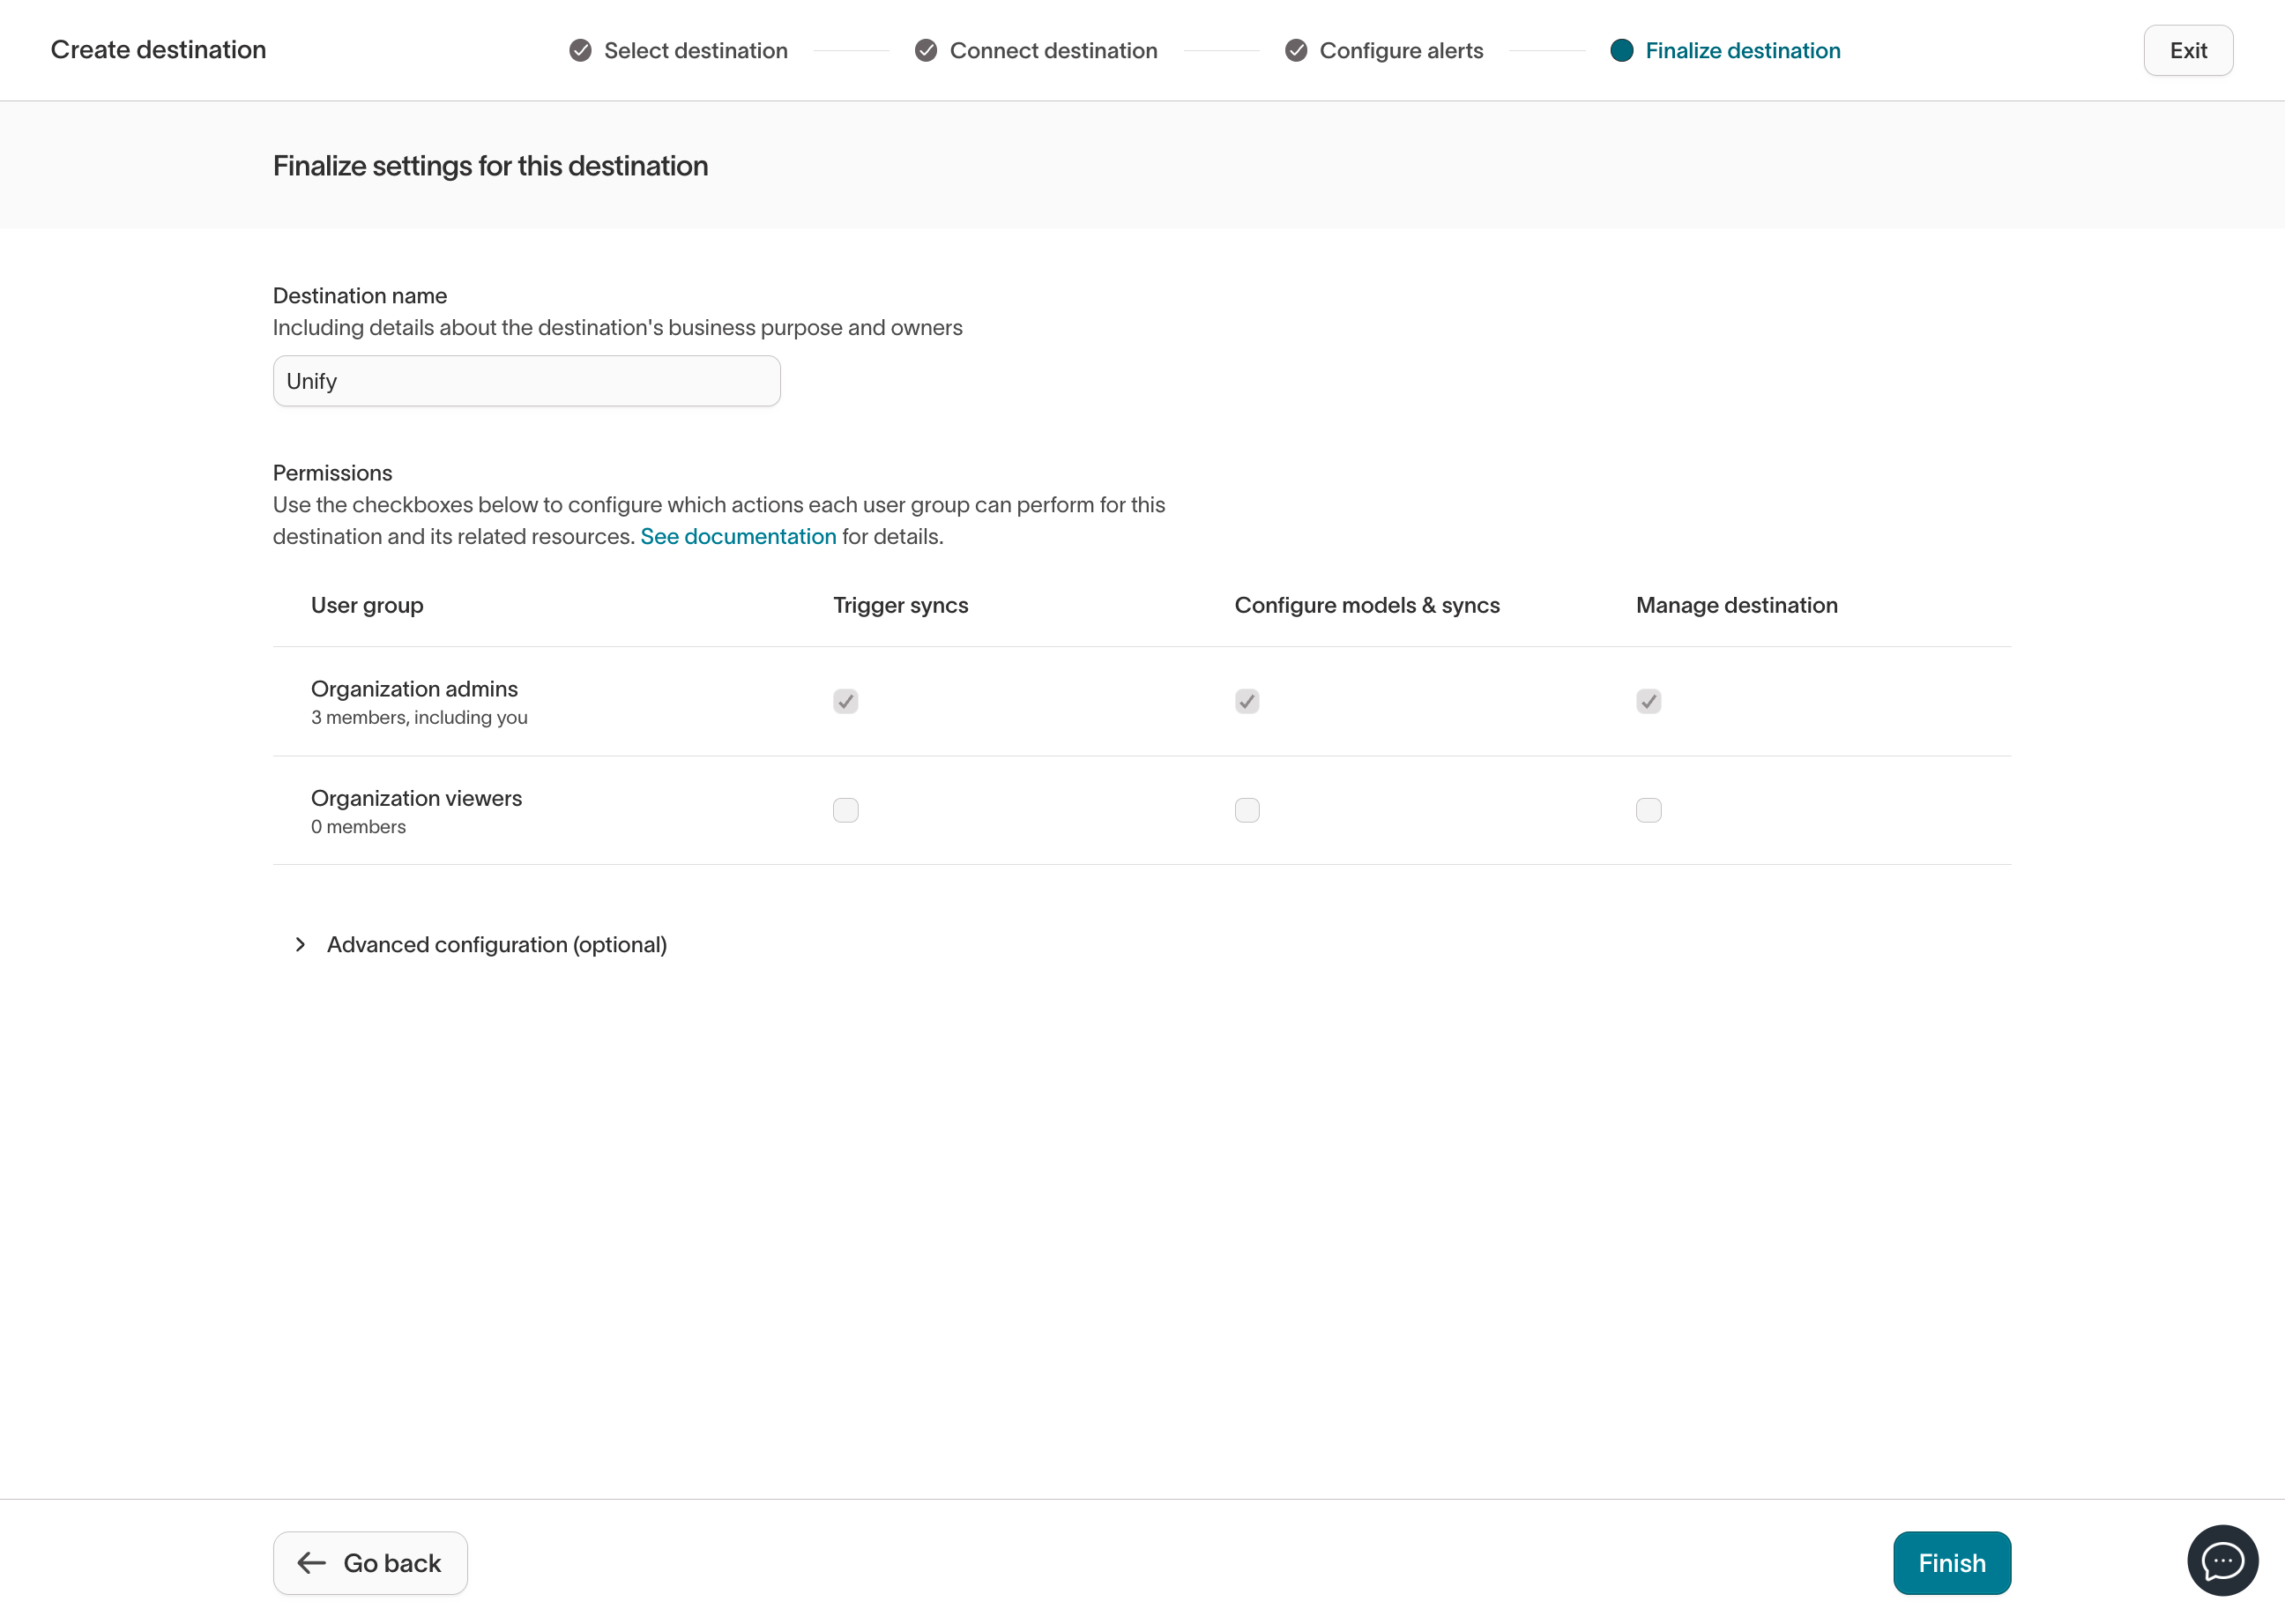
 Lastly, choose a name for your destination, set the desired permissions,
and select **Finish** to save the destination.
Lastly, choose a name for your destination, set the desired permissions,
and select **Finish** to save the destination.
 Once saved, you will see this destination listed in the **Destinations** tab.
 You can modify the destination settings and test the connection again from
here.
## Sync to an object
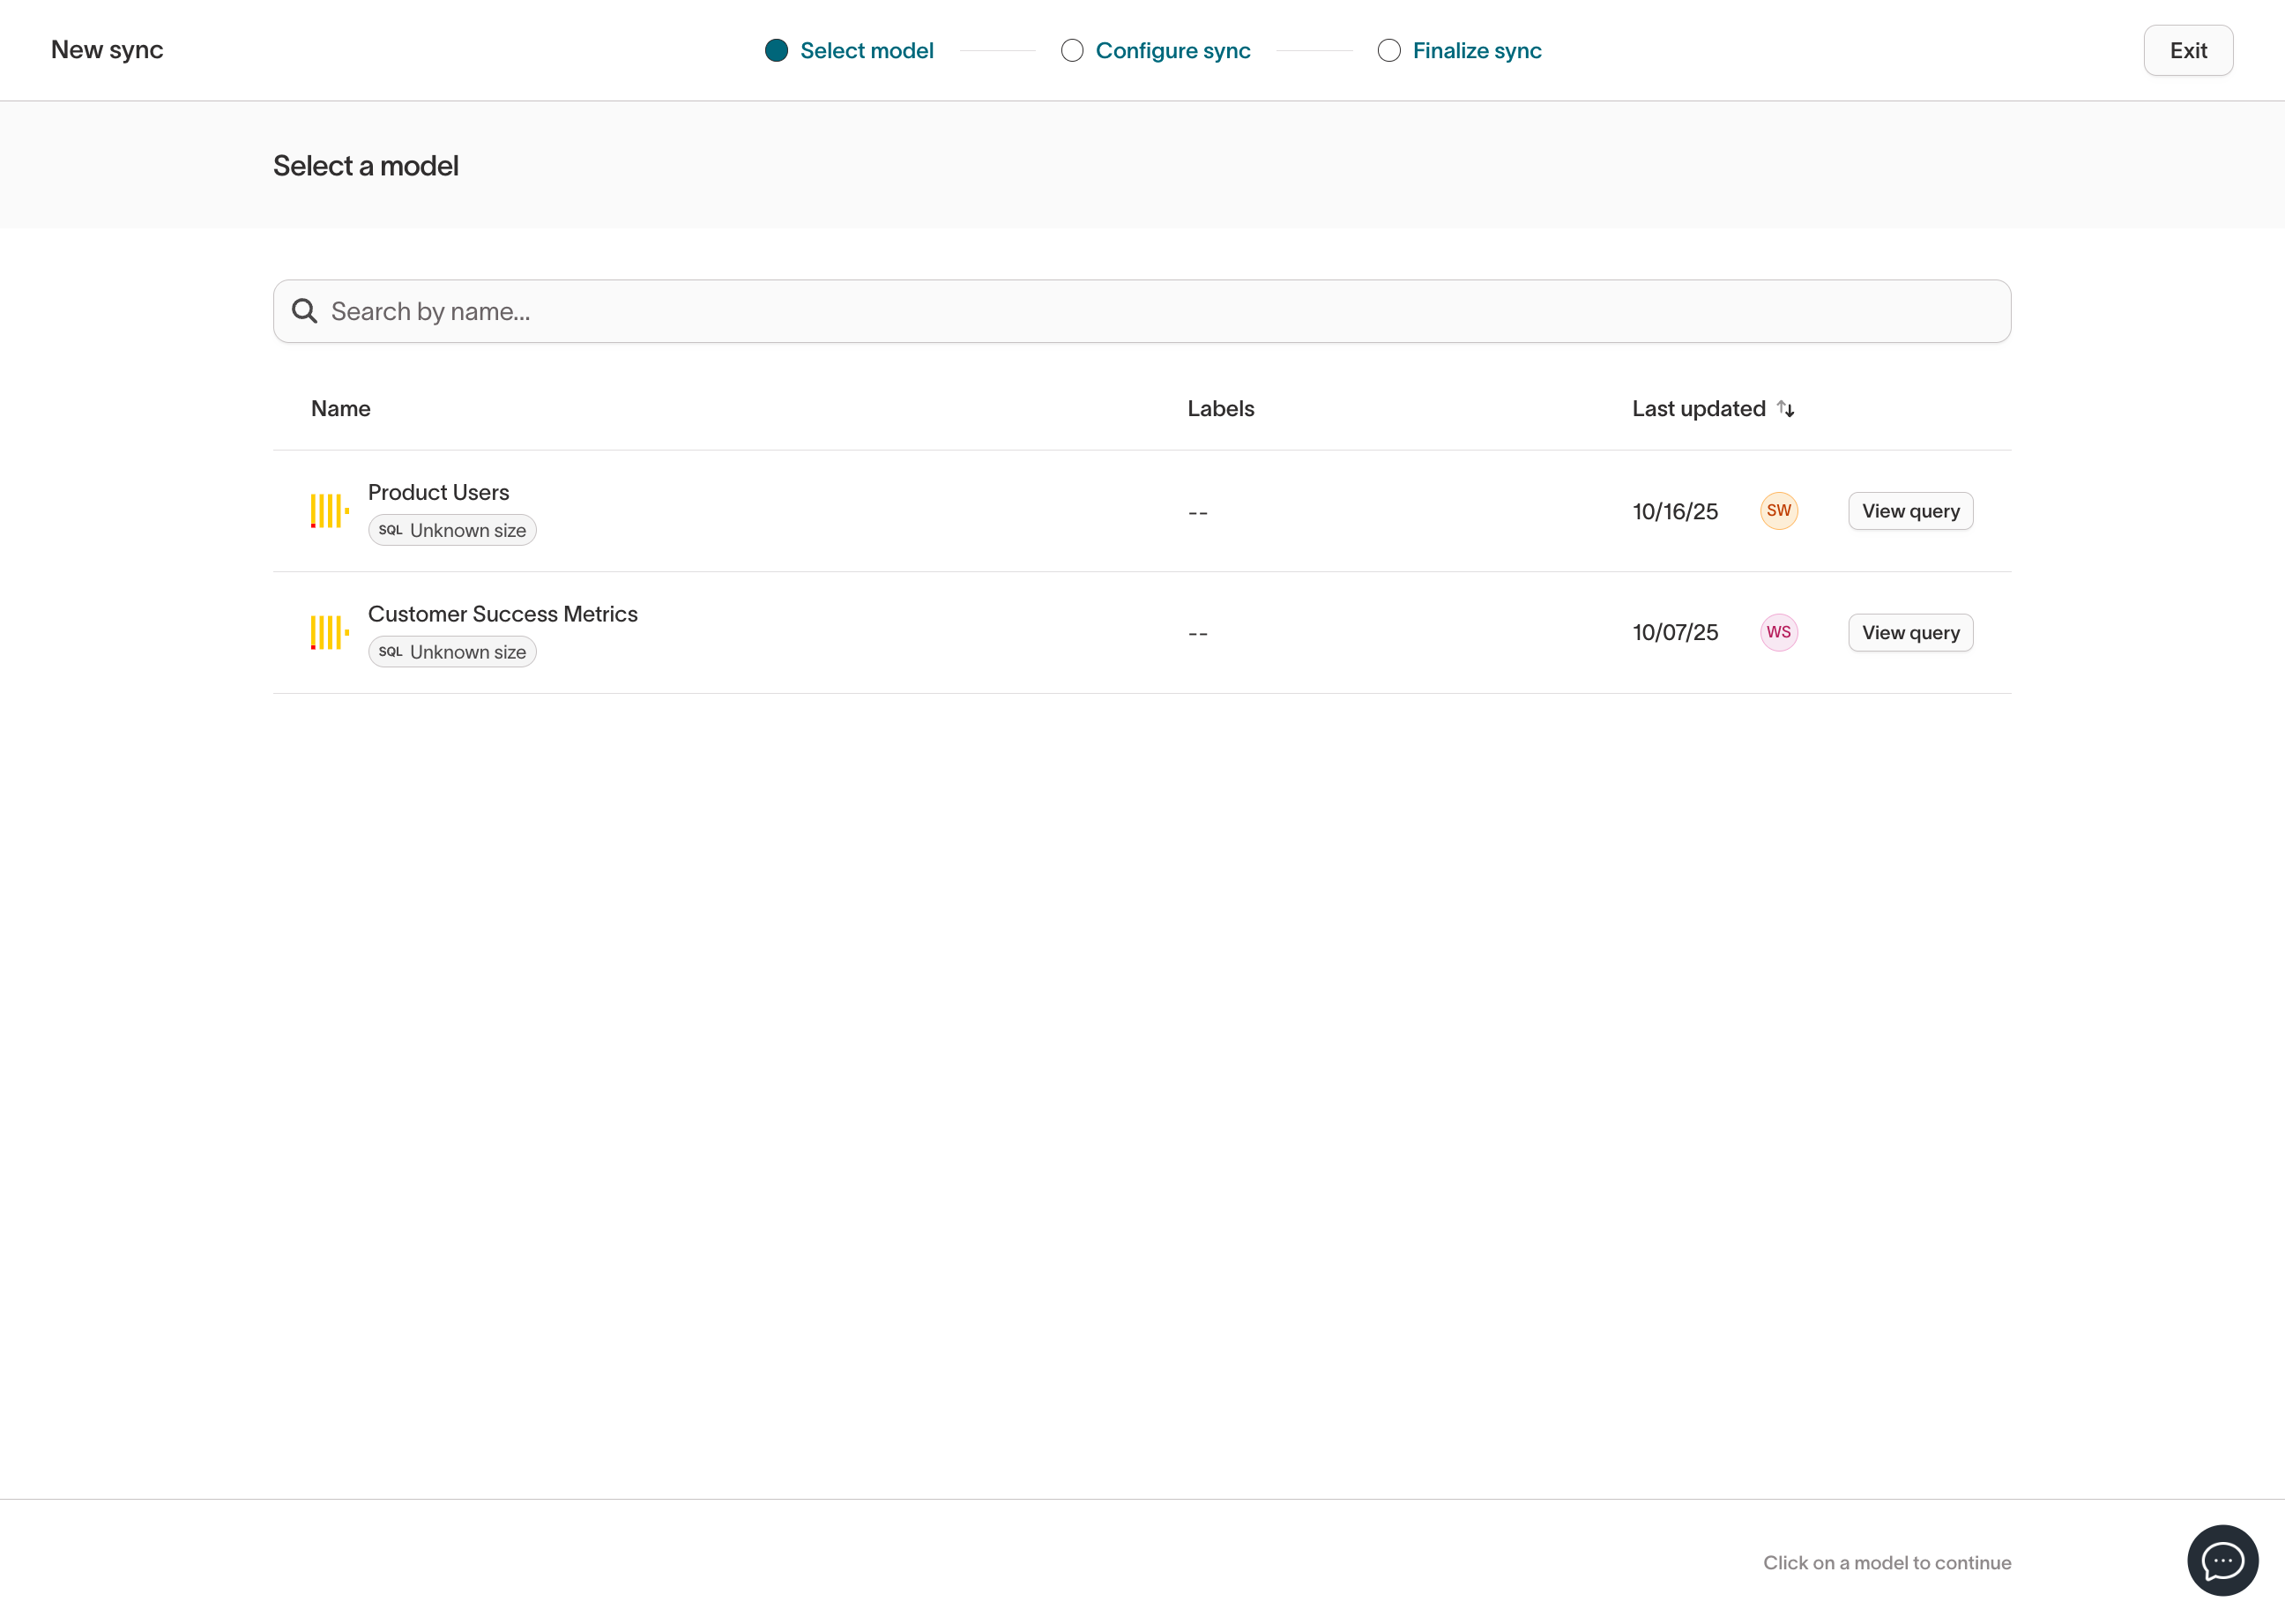
From the destination or syncs page, select **Add sync**. The first step is
to select a *model* which represents the data source you want to send into
Unify. If you haven't configured one yet, head over to **Models** and
create one.
You can modify the destination settings and test the connection again from
here.
## Sync to an object
From the destination or syncs page, select **Add sync**. The first step is
to select a *model* which represents the data source you want to send into
Unify. If you haven't configured one yet, head over to **Models** and
create one.
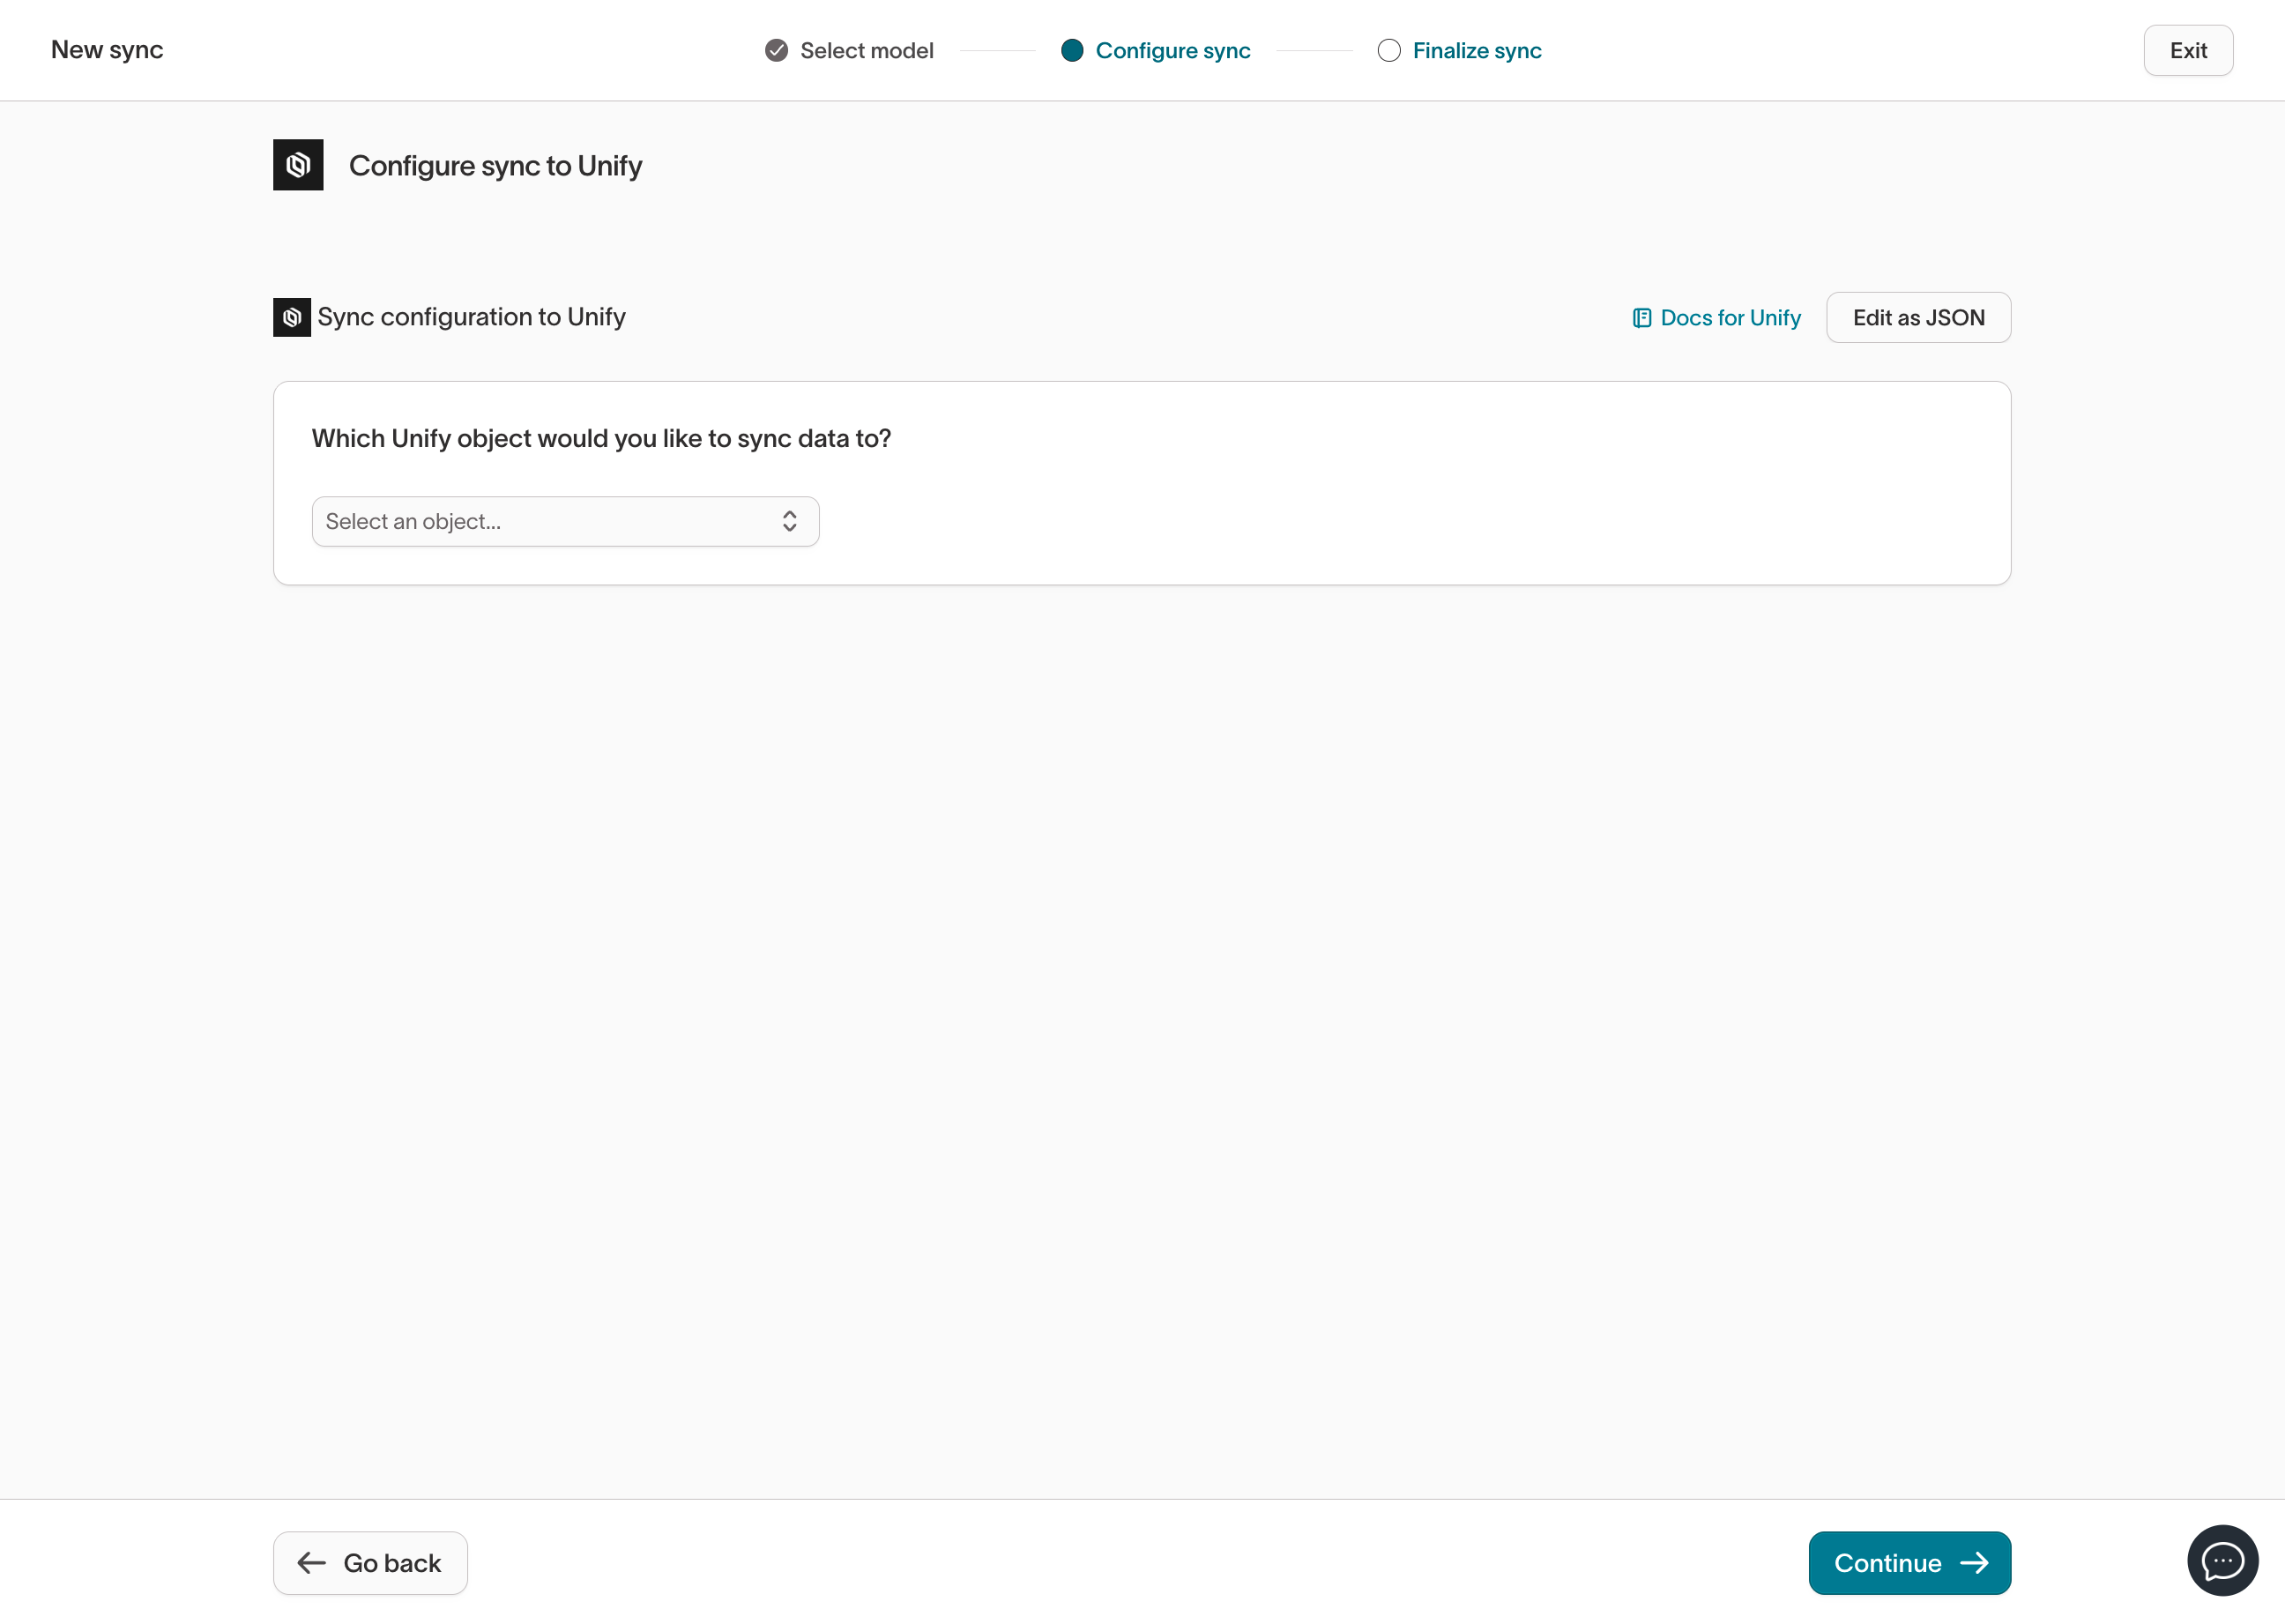
 Select the Unify destination you created previously. Choose "Records" for
the first option and then select the Unify object you want to sync records
to. You can select a "standard" object (e.g., Companies or People) or a
custom object.
Select the Unify destination you created previously. Choose "Records" for
the first option and then select the Unify object you want to sync records
to. You can select a "standard" object (e.g., Companies or People) or a
custom object.
 Once the object is selected, choose whether you want to "upsert" records
(create and update) or "insert" records (create only).
Once the object is selected, choose whether you want to "upsert" records
(create and update) or "insert" records (create only).
 Choose which unique key to use for the sync. This is the key that will be
used to identify records in Unify to avoid creating duplicates and to update
existing records (if applicable).
Choose which unique key to use for the sync. This is the key that will be
used to identify records in Unify to avoid creating duplicates and to update
existing records (if applicable).
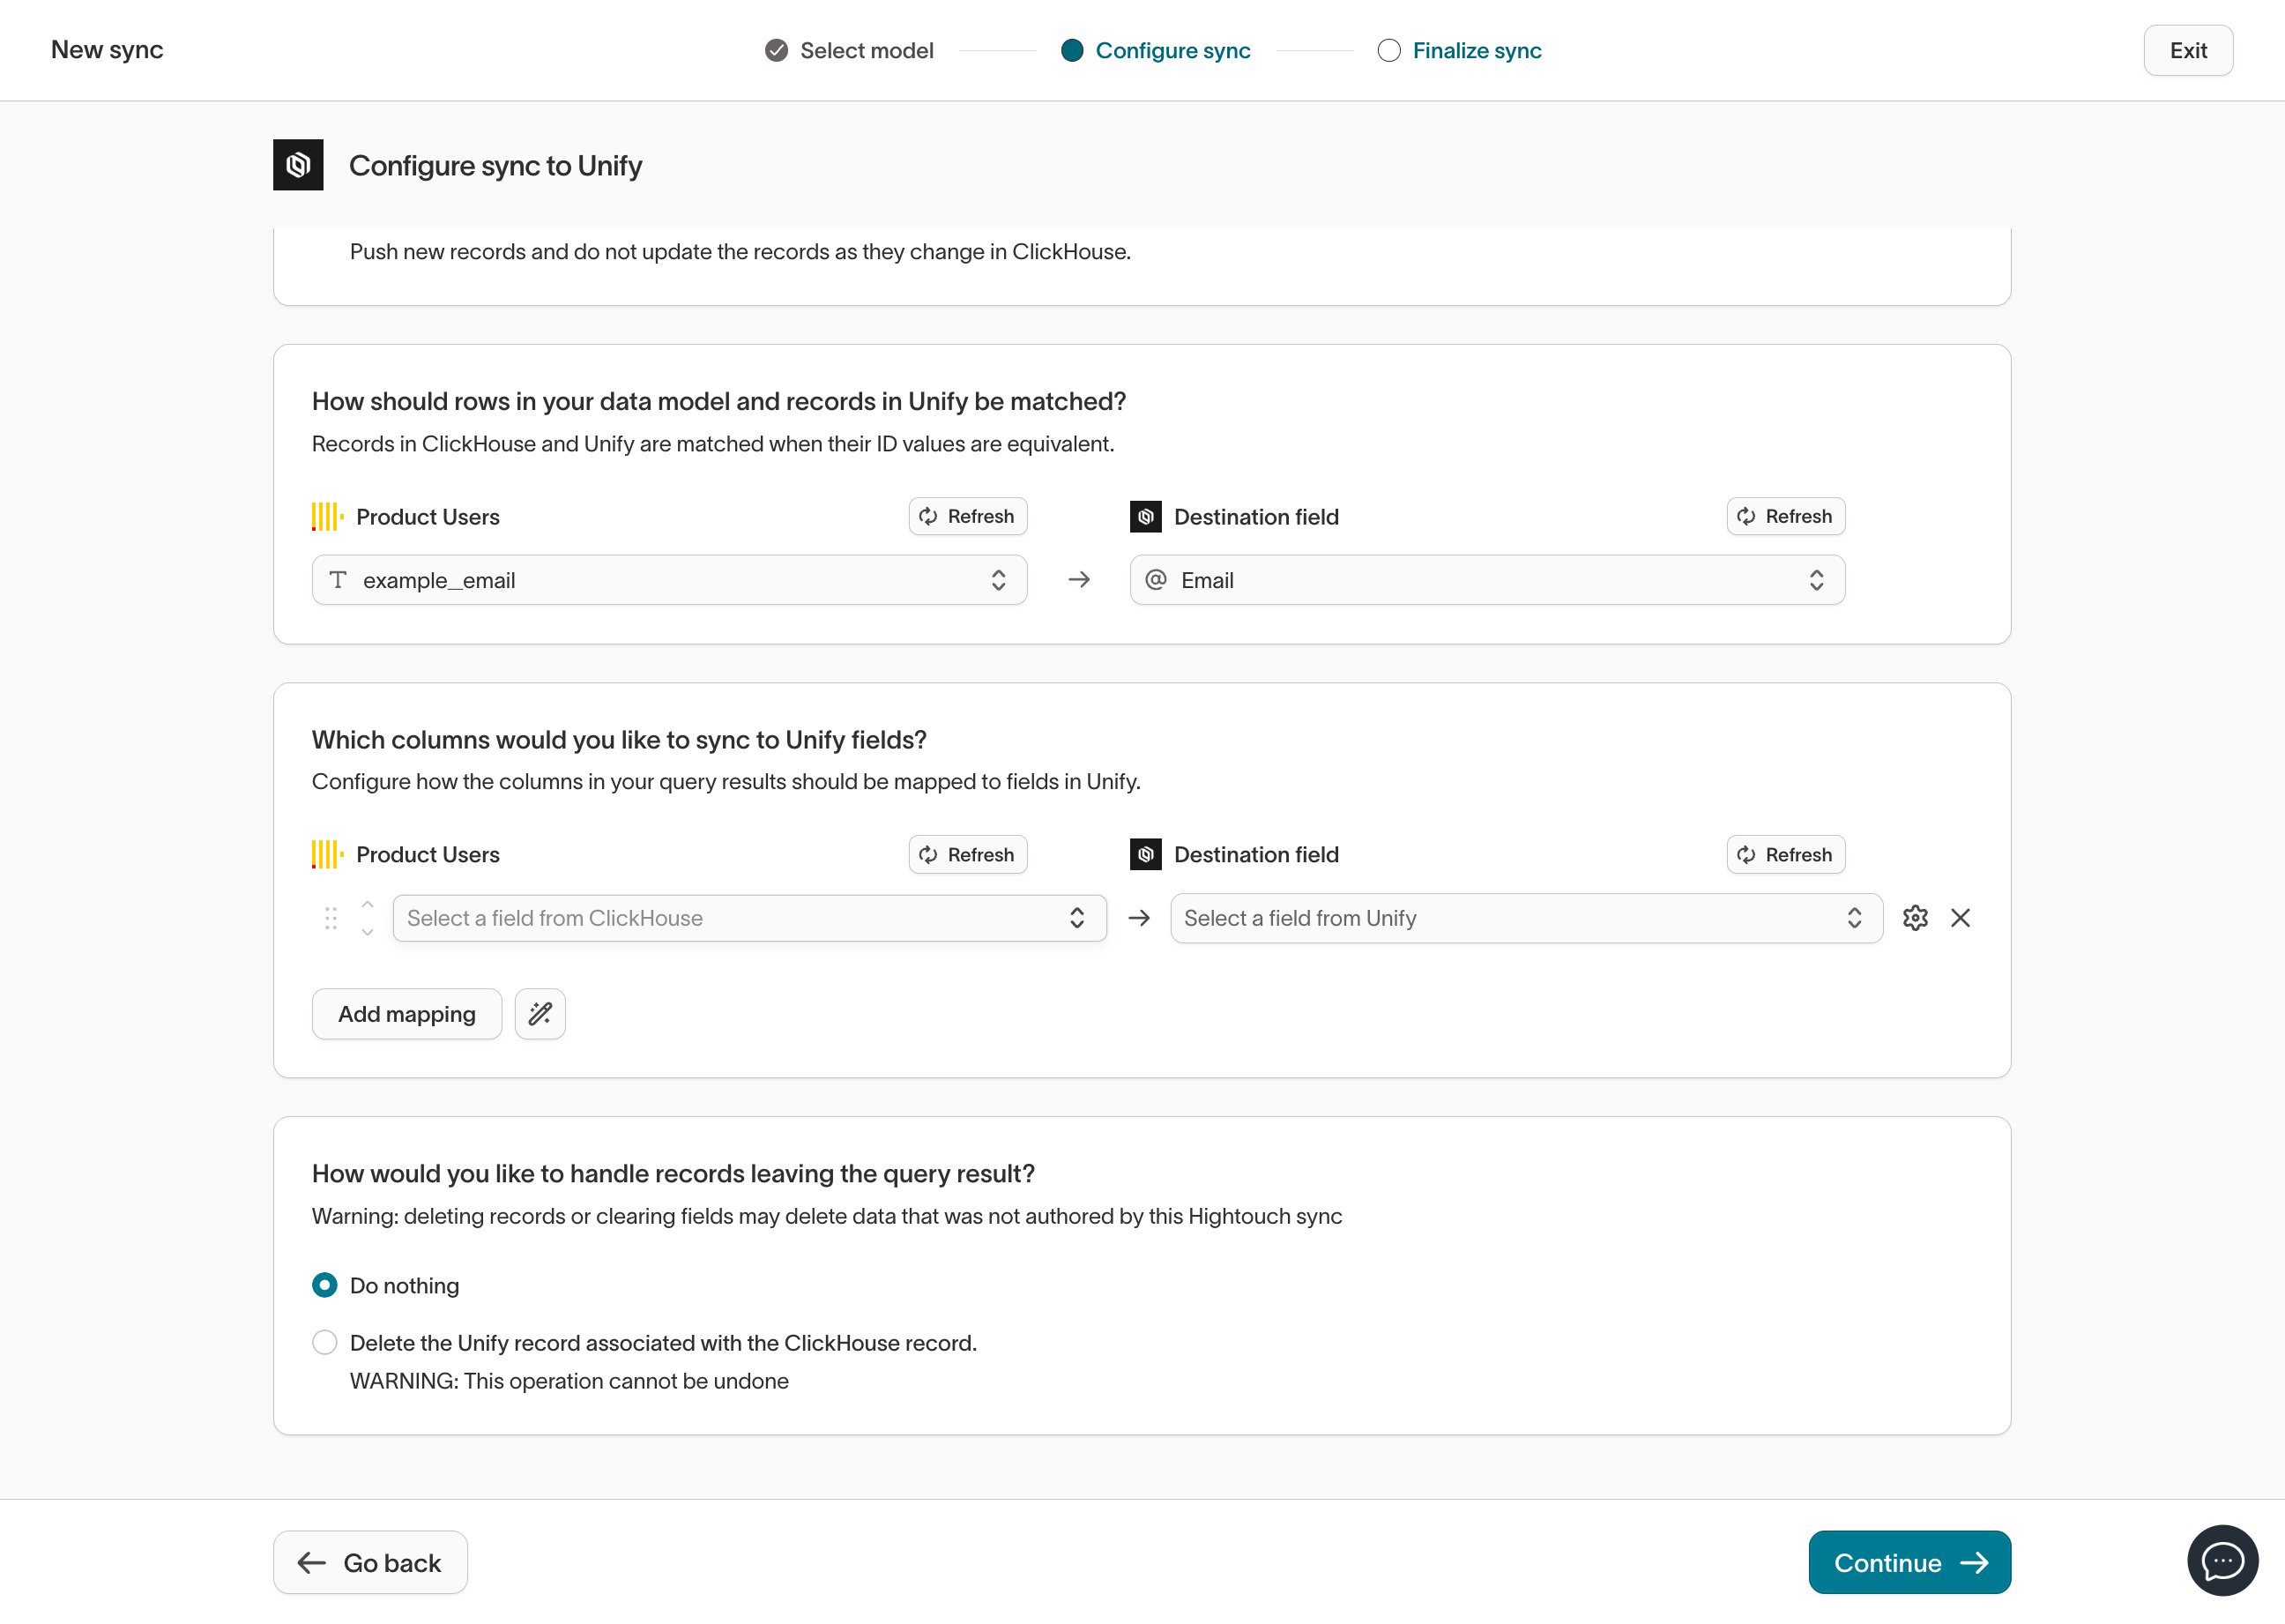 This must be a unique attribute on the Unify object and in the data source.
For example, the unique attribute on Companies is `domain`, and the unique
attribute on People is `email`. On custom objects, you can define your own
unique attributes.
The next step is to map fields in your data source to Unify object
attributes. This defines how record values will be copied over to Unify.
This must be a unique attribute on the Unify object and in the data source.
For example, the unique attribute on Companies is `domain`, and the unique
attribute on People is `email`. On custom objects, you can define your own
unique attributes.
The next step is to map fields in your data source to Unify object
attributes. This defines how record values will be copied over to Unify.
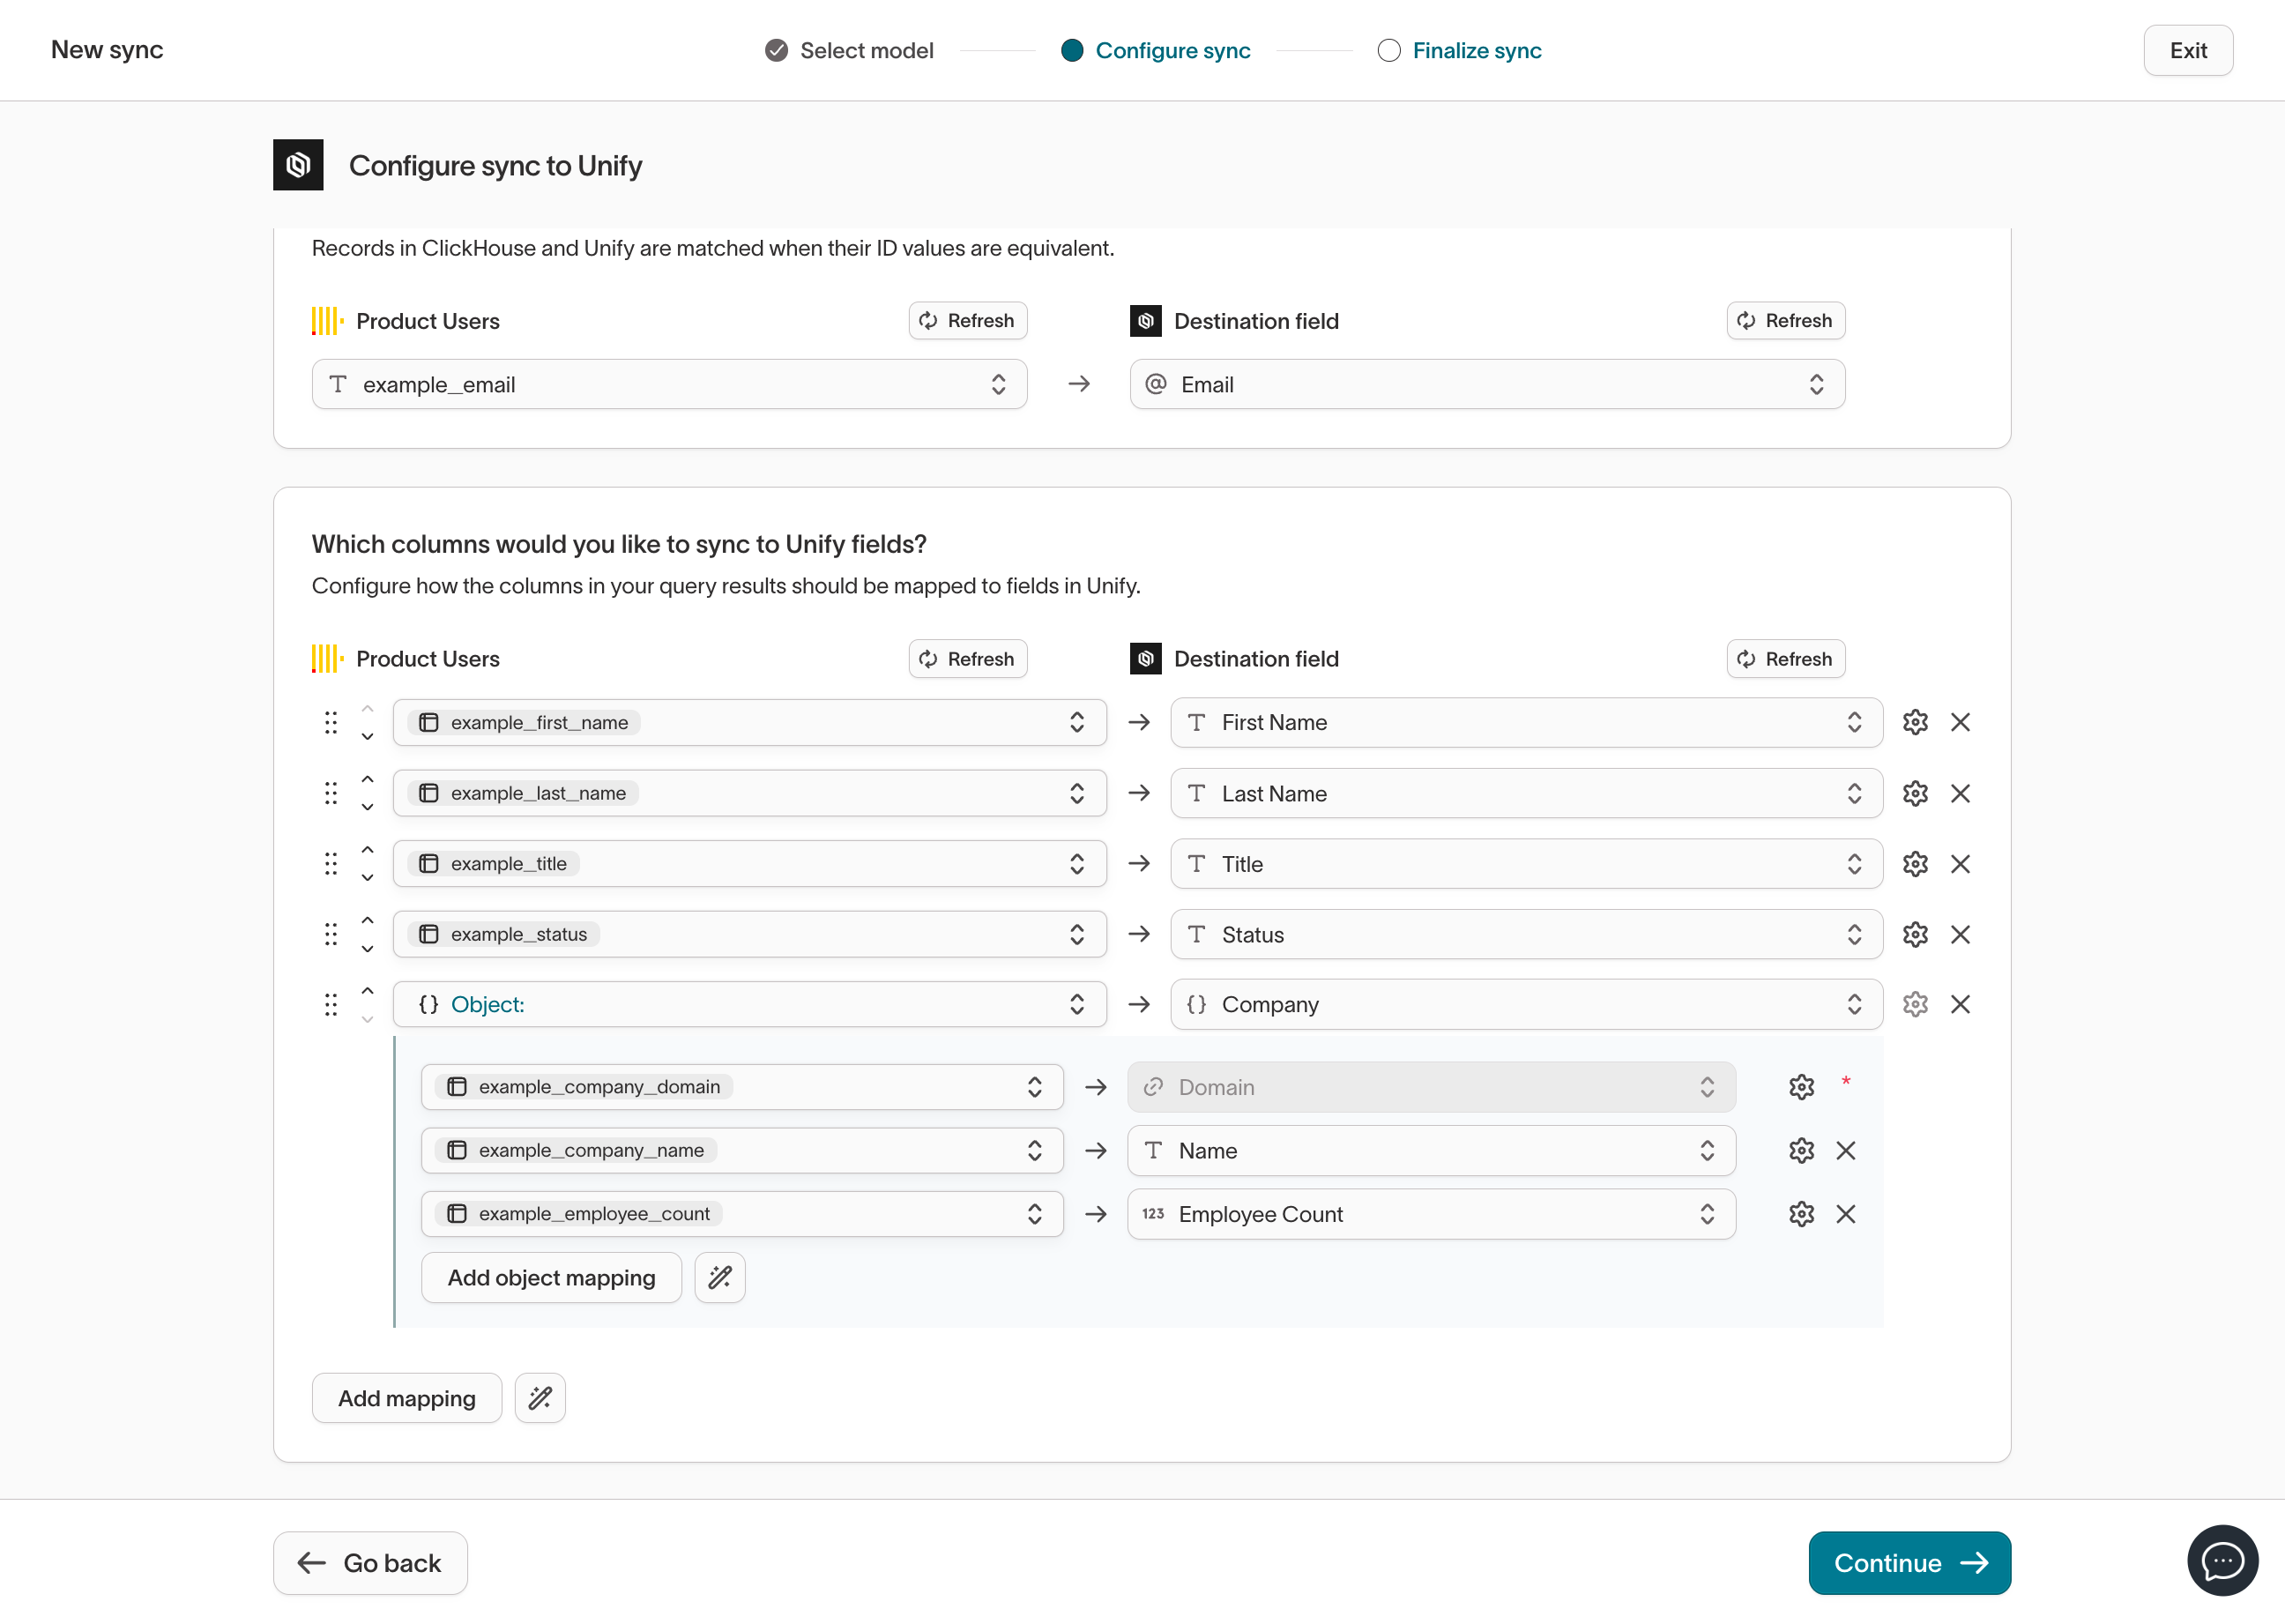 Unify objects support *reference* attributes which represent relationships
between objects. For example, the Person object has a reference attribute
for the Company that the person works at.
In the above example, we are mapping our data source to the Person object,
and we are also linking each person to a Company by mapping Company fields.
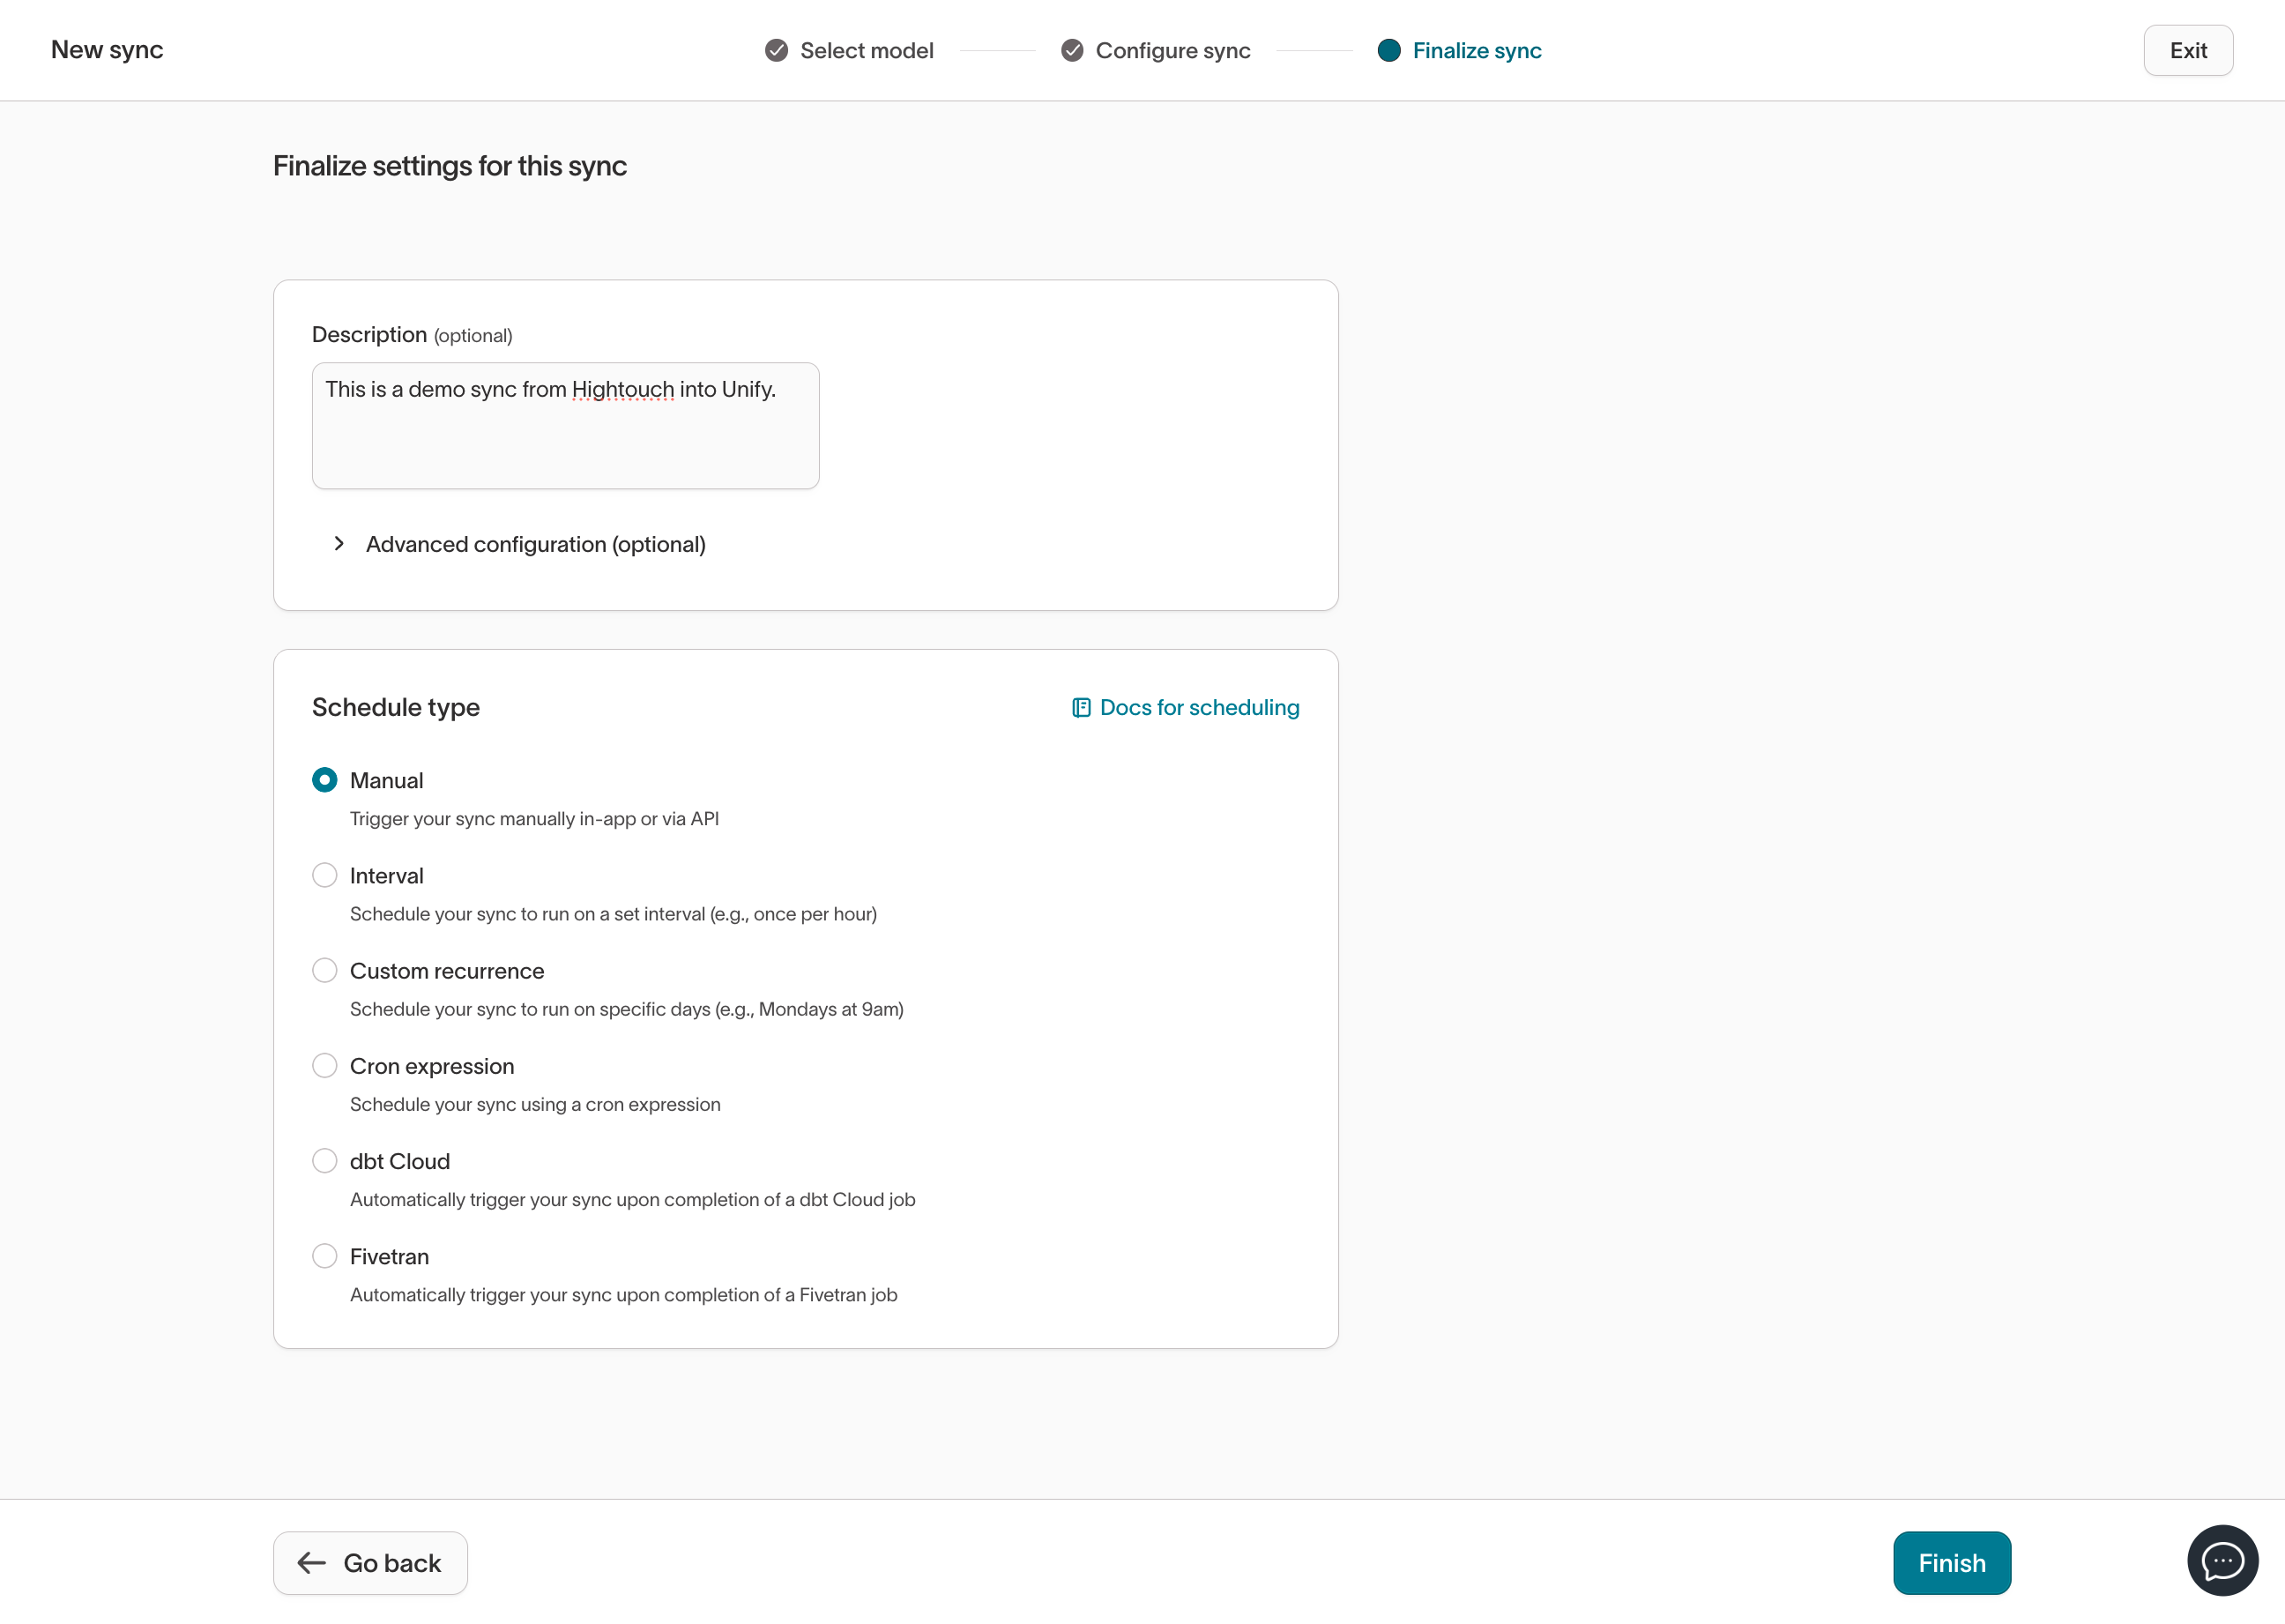
Finally, choose how you want to run the sync and then select **Finish**.
Unify objects support *reference* attributes which represent relationships
between objects. For example, the Person object has a reference attribute
for the Company that the person works at.
In the above example, we are mapping our data source to the Person object,
and we are also linking each person to a Company by mapping Company fields.
Finally, choose how you want to run the sync and then select **Finish**.
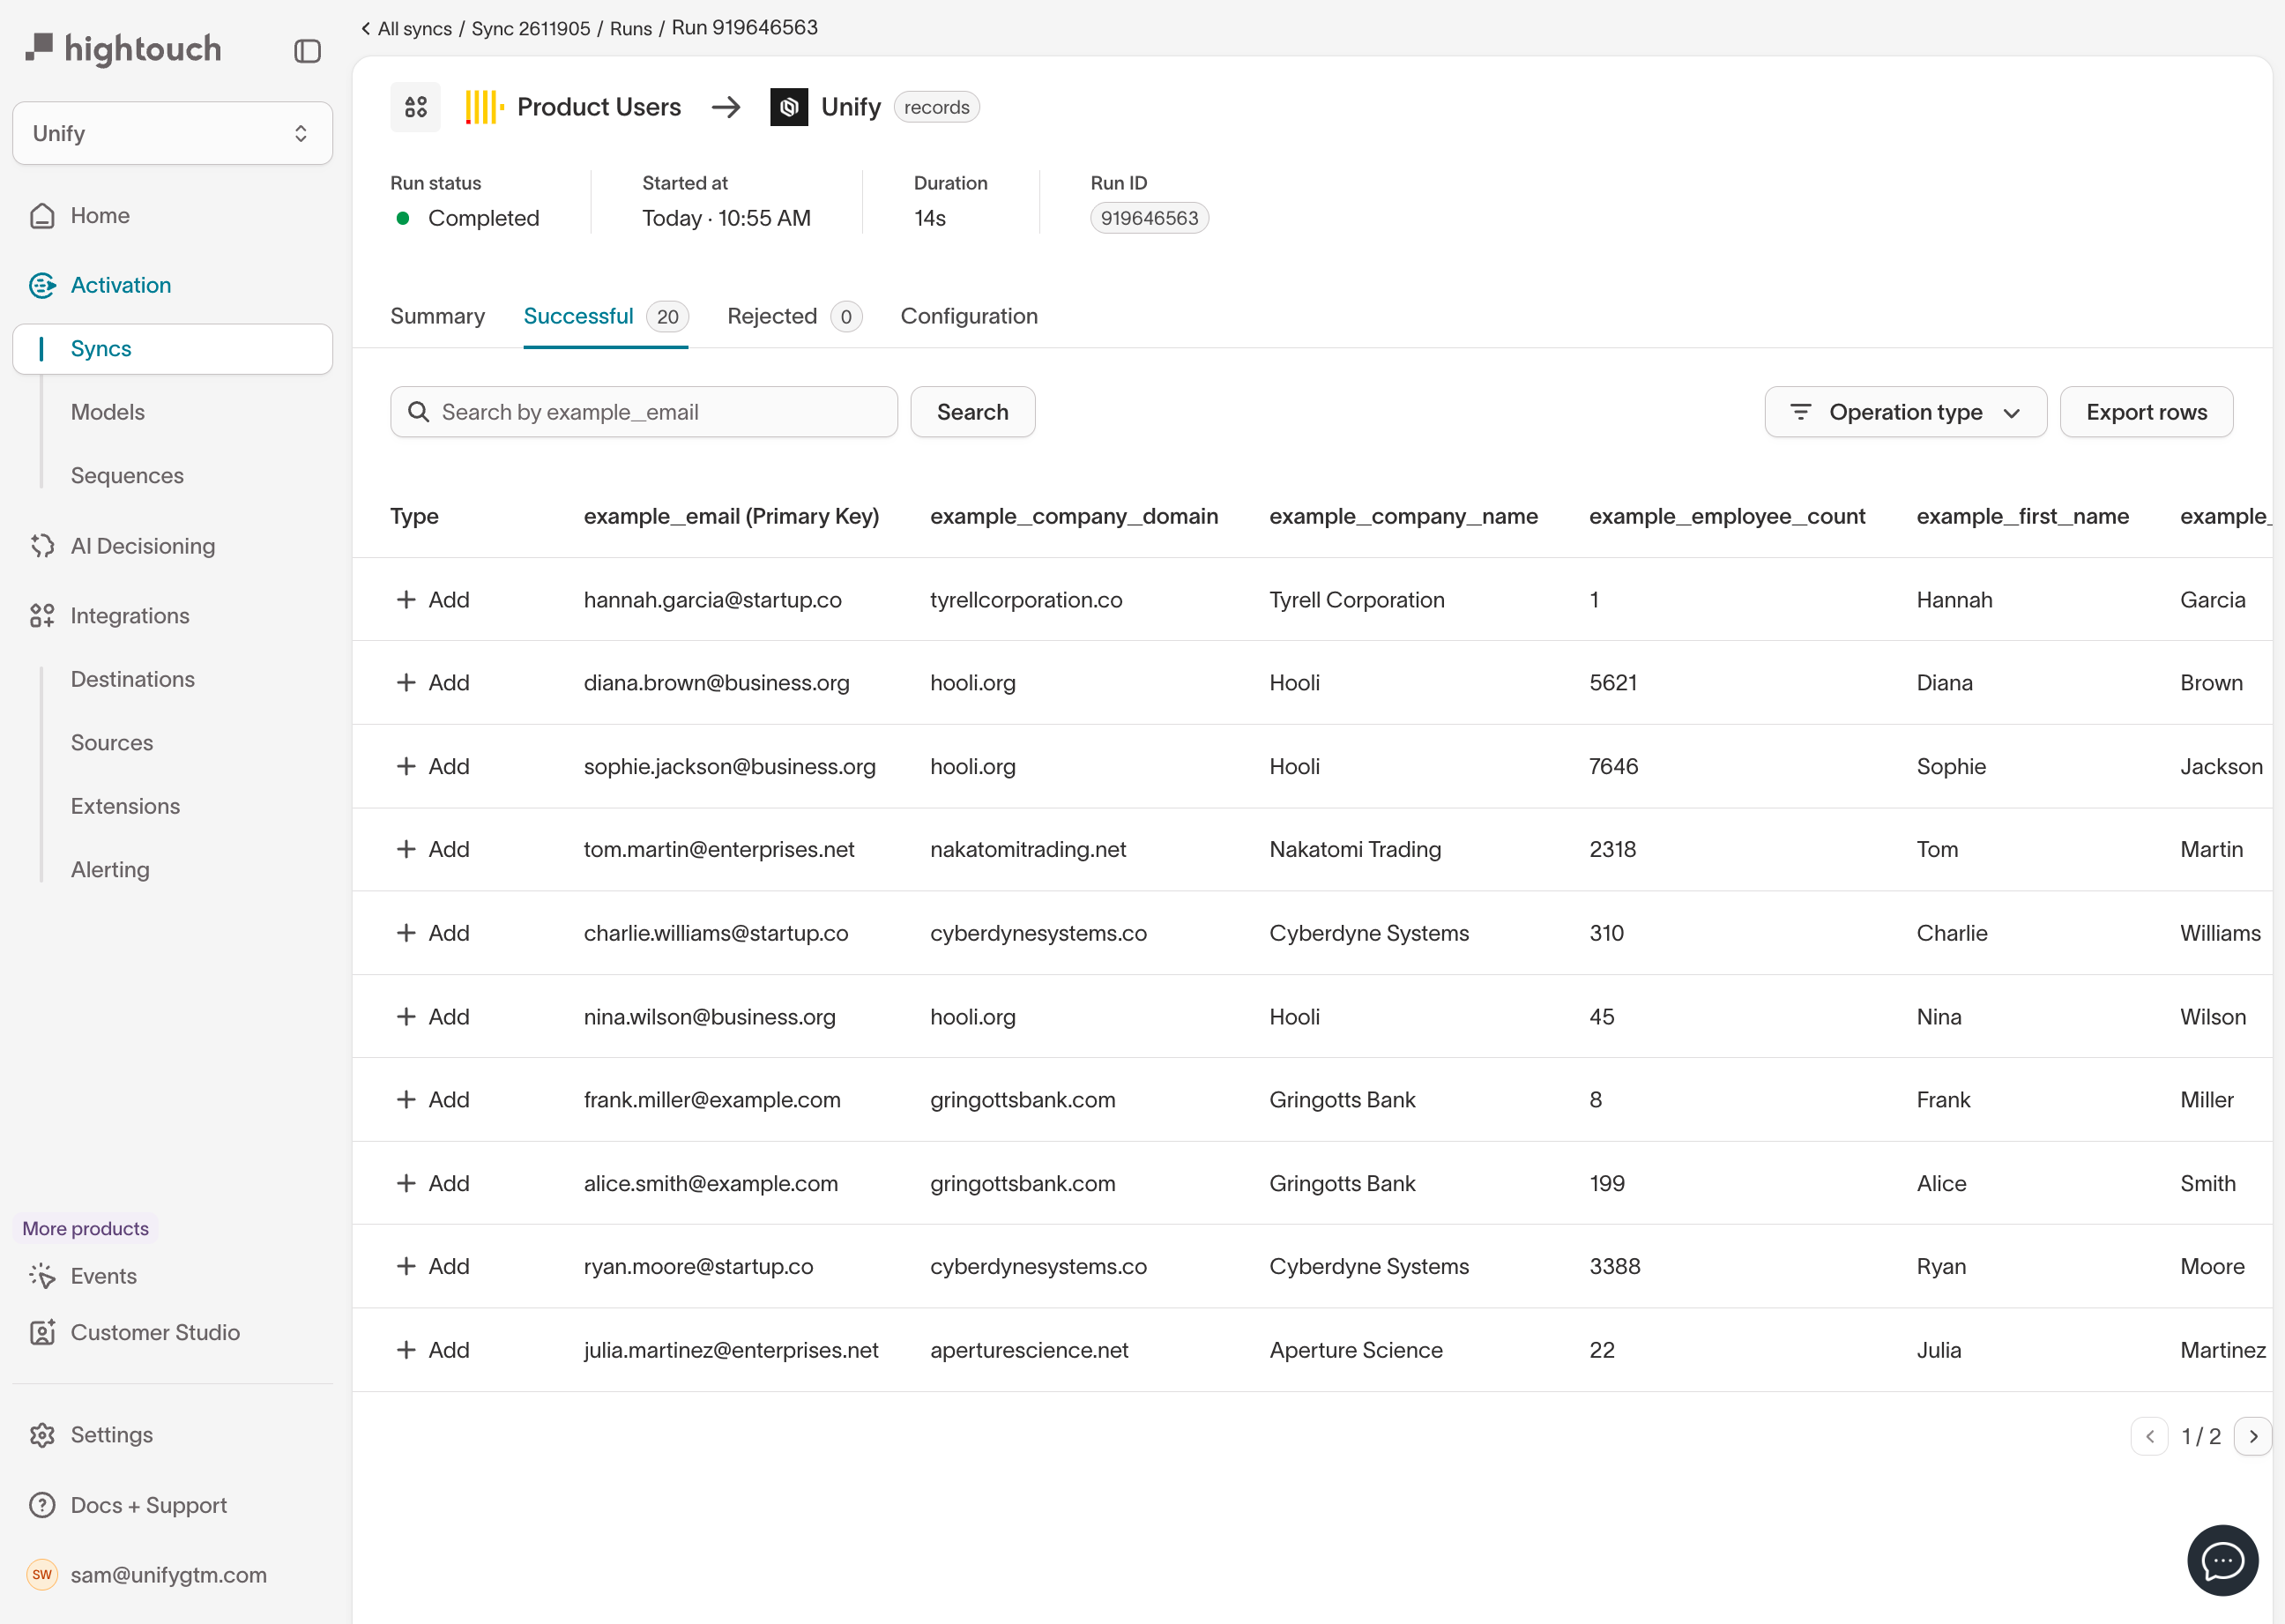
 ## Inspect the sync
On the sync page, you can see the newly created sync, trigger a run, and
inspect results.
## Inspect the sync
On the sync page, you can see the newly created sync, trigger a run, and
inspect results.
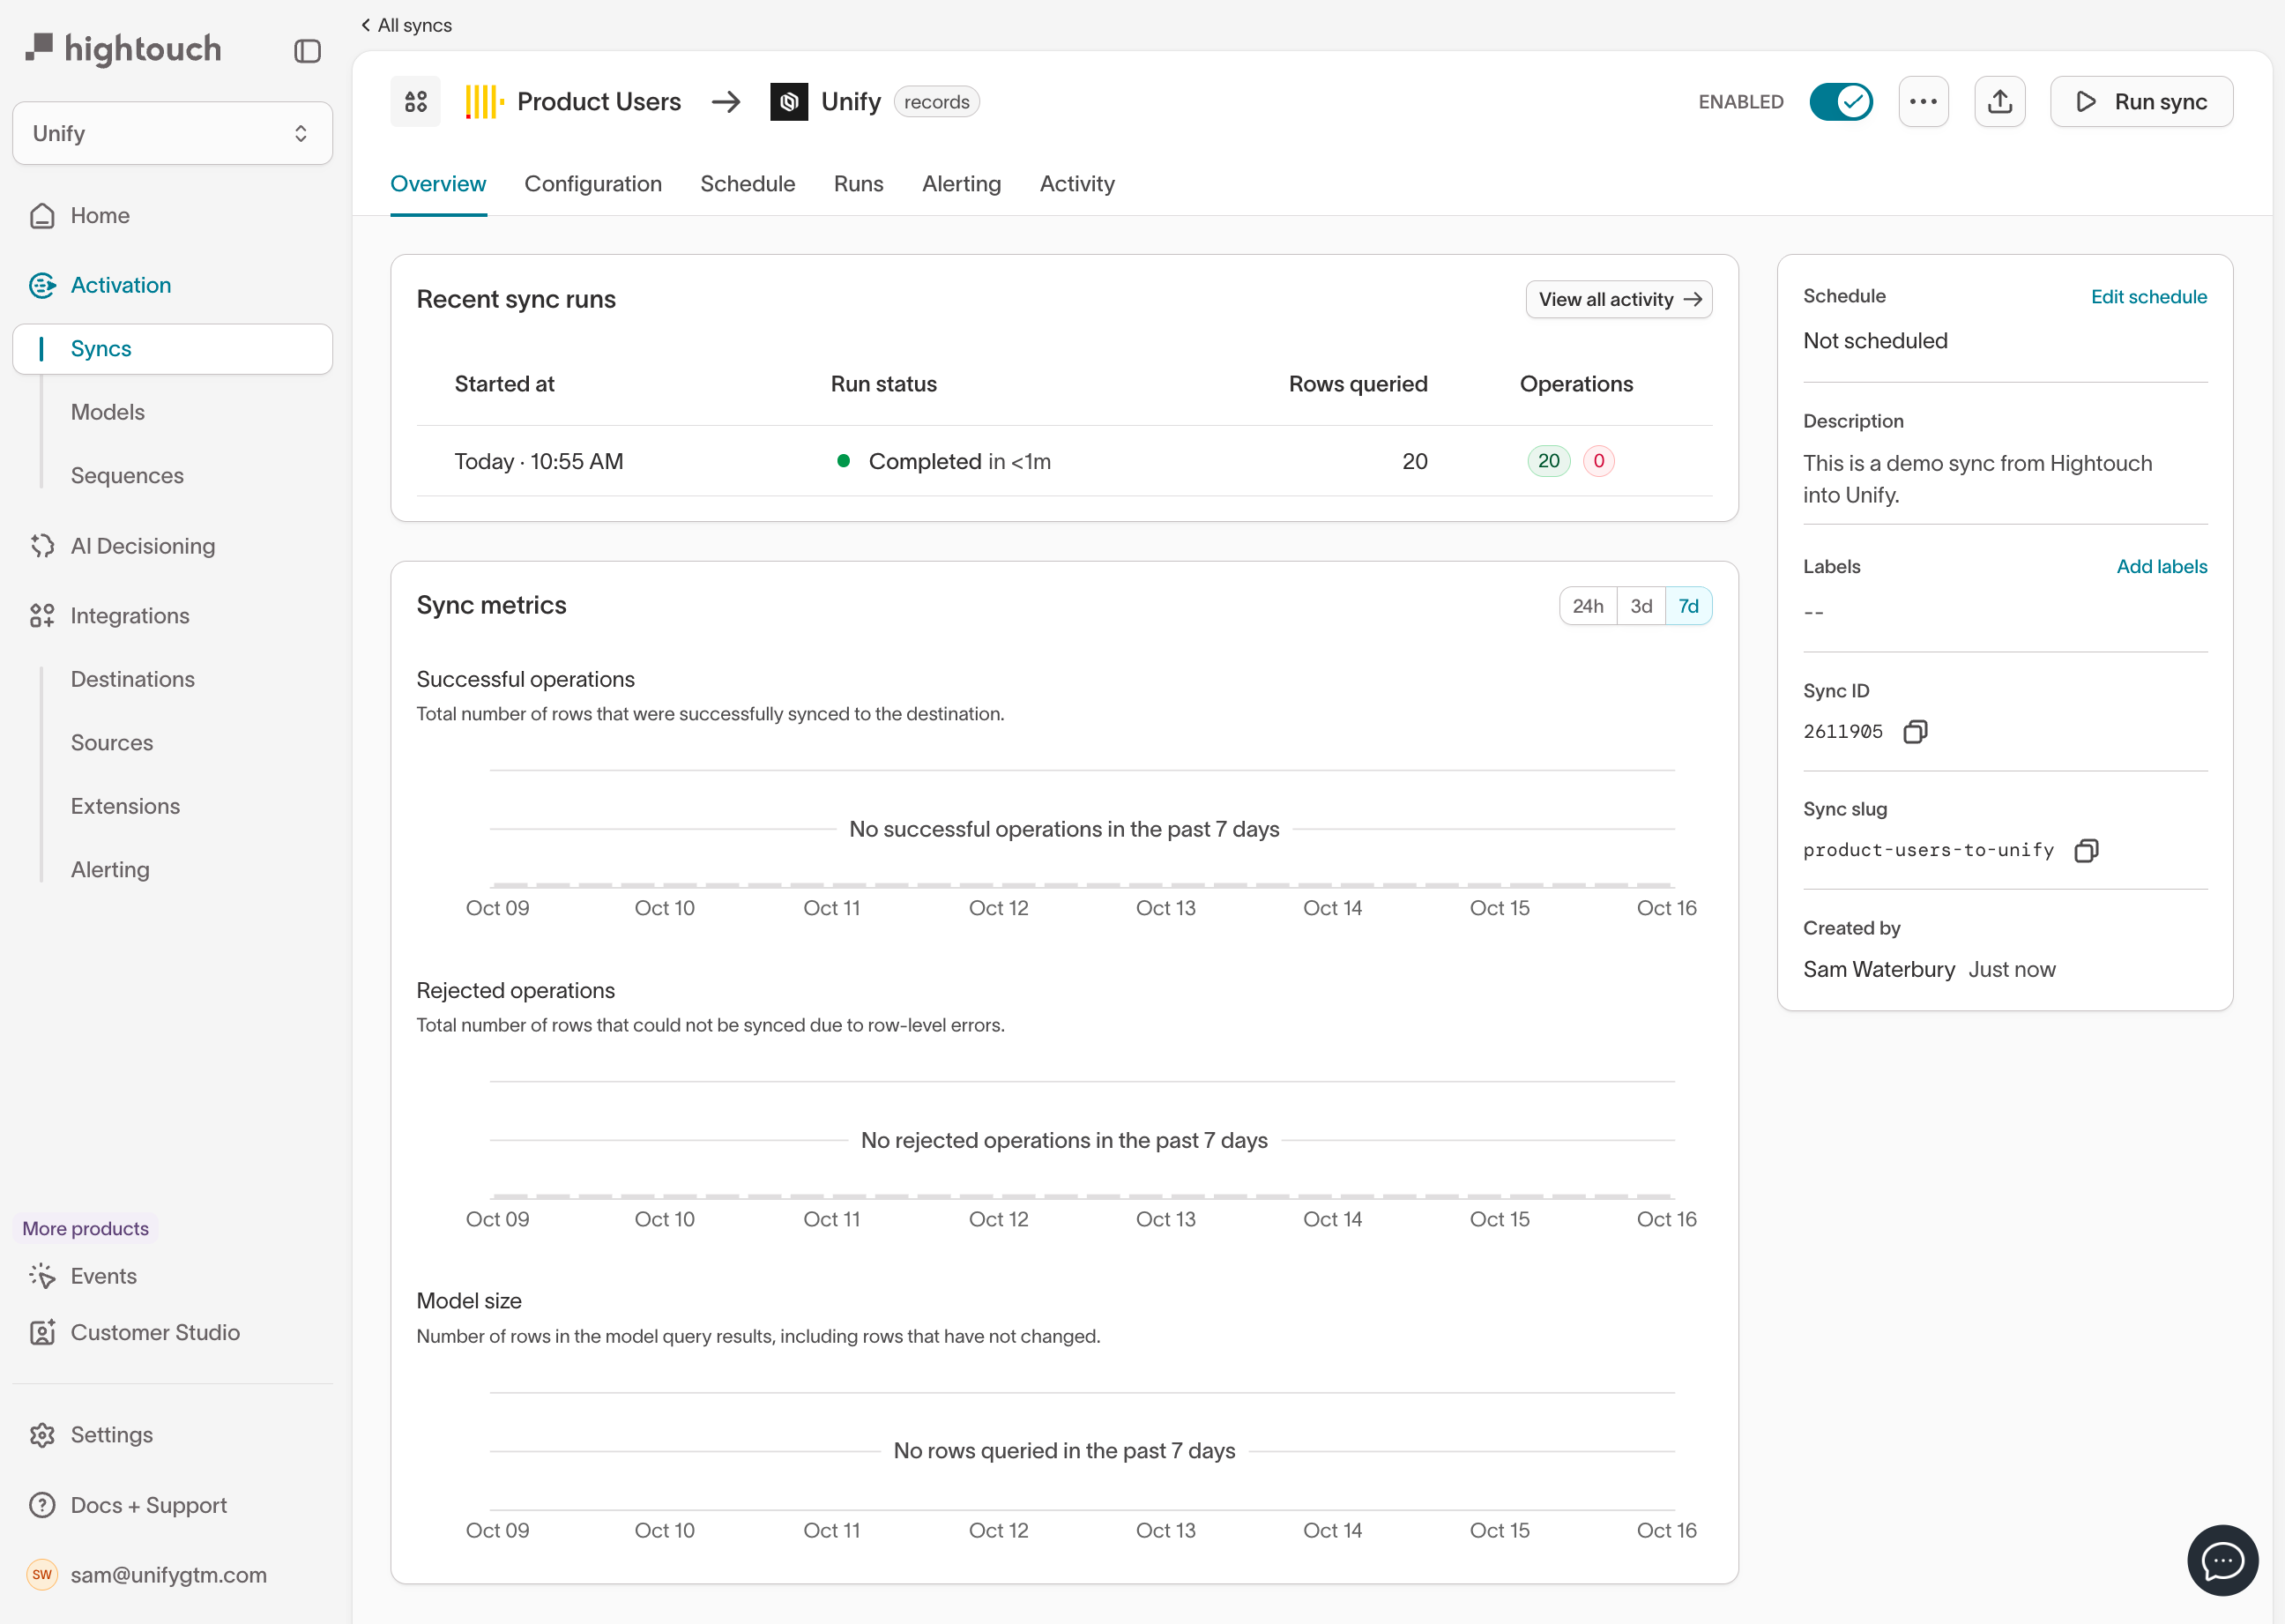 Click on a sync run to view the successfully synced records and any errors
that were encountered.
Click on a sync run to view the successfully synced records and any errors
that were encountered.
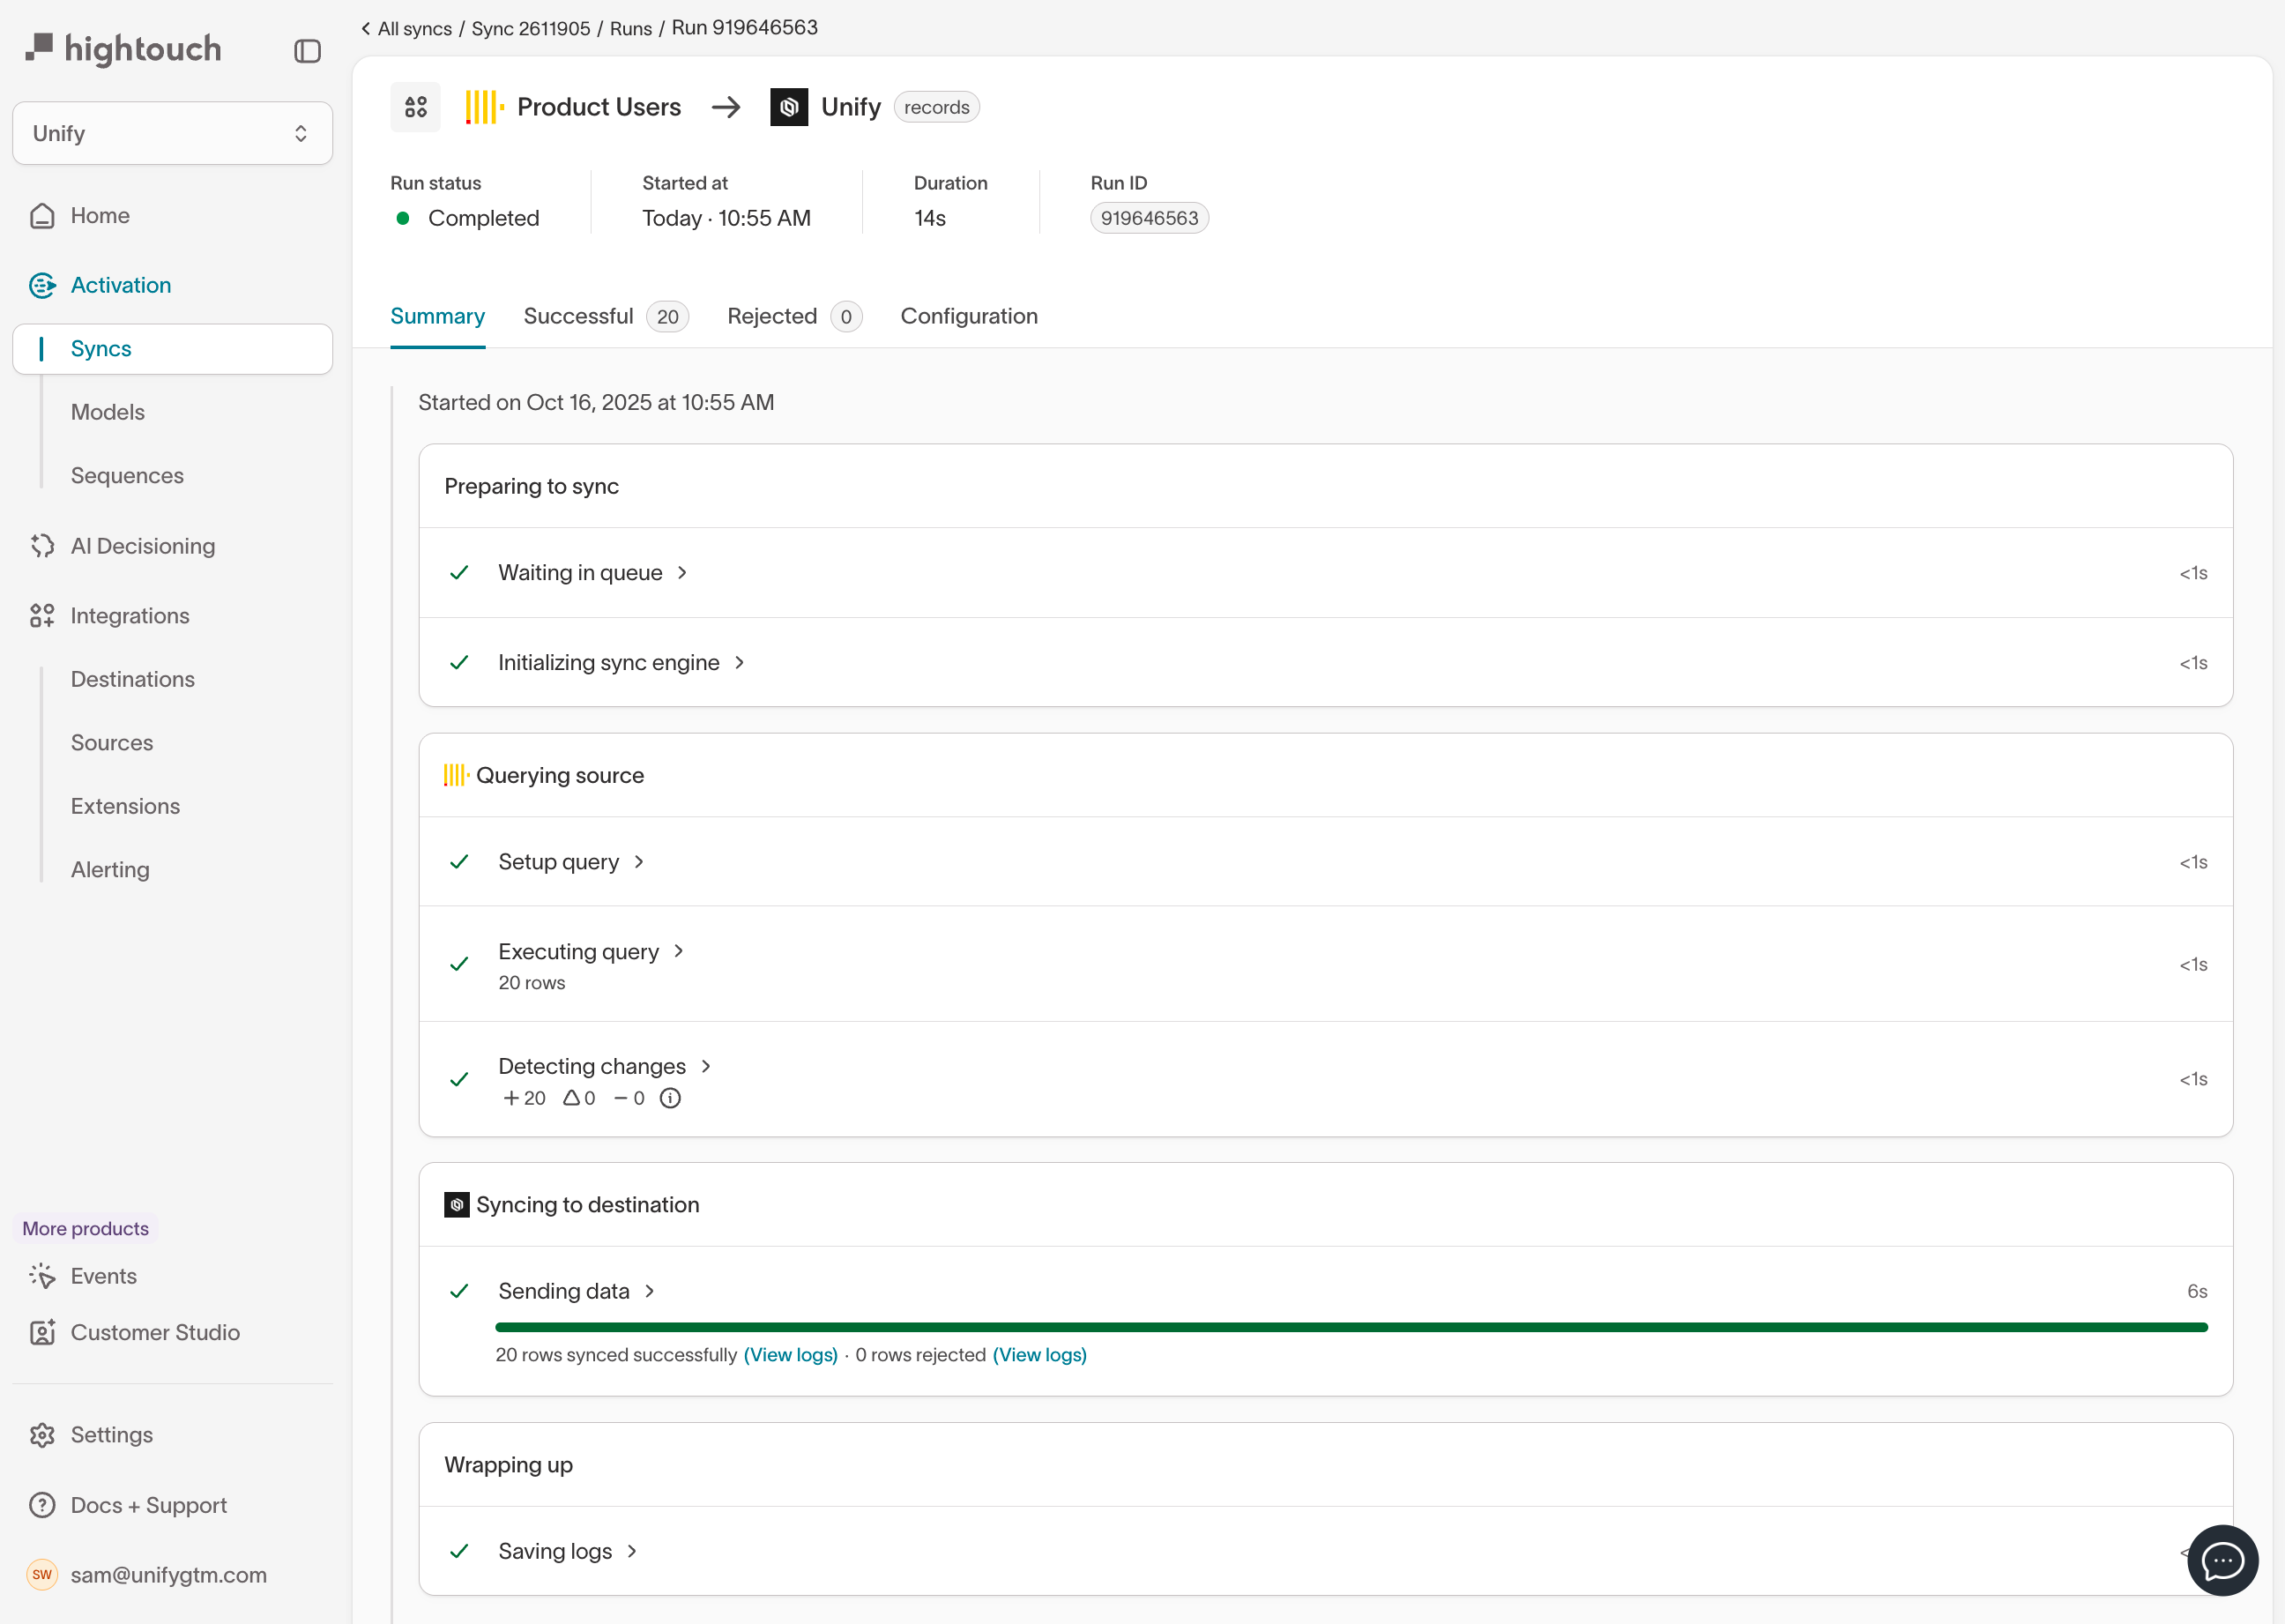 Select the **Successful** tab to view synced records.
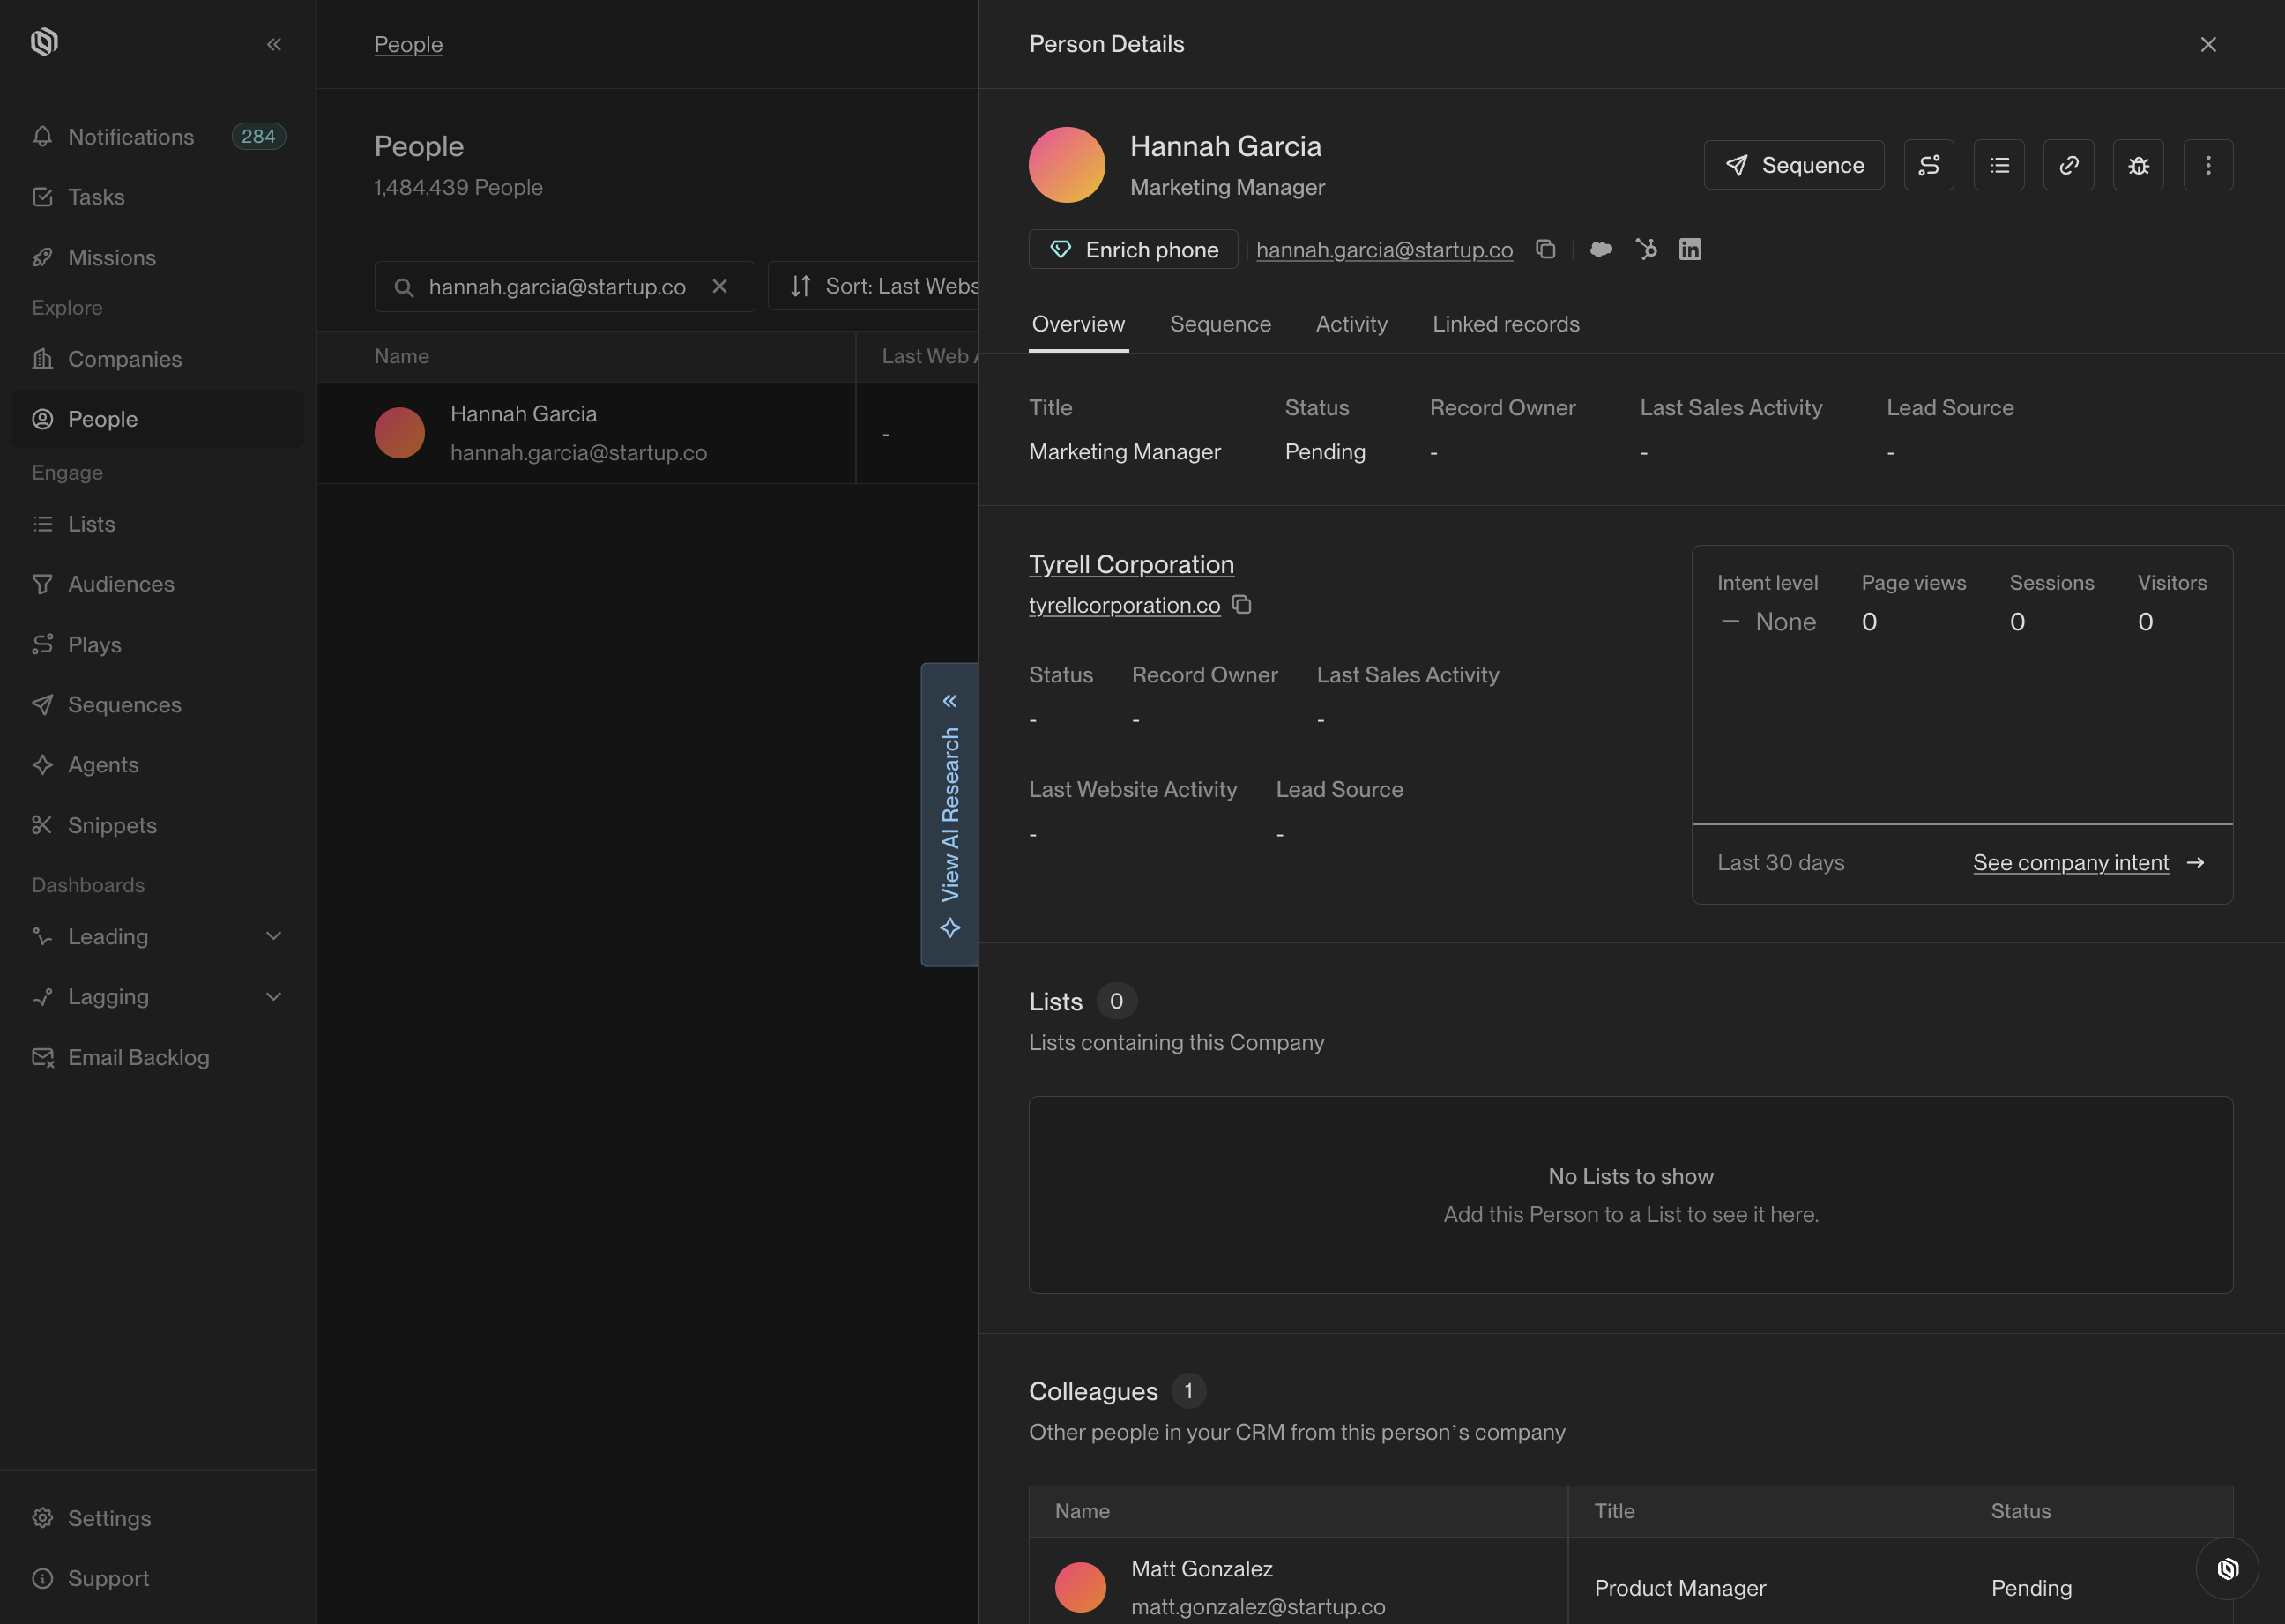
 You should then see the created records in Unify!